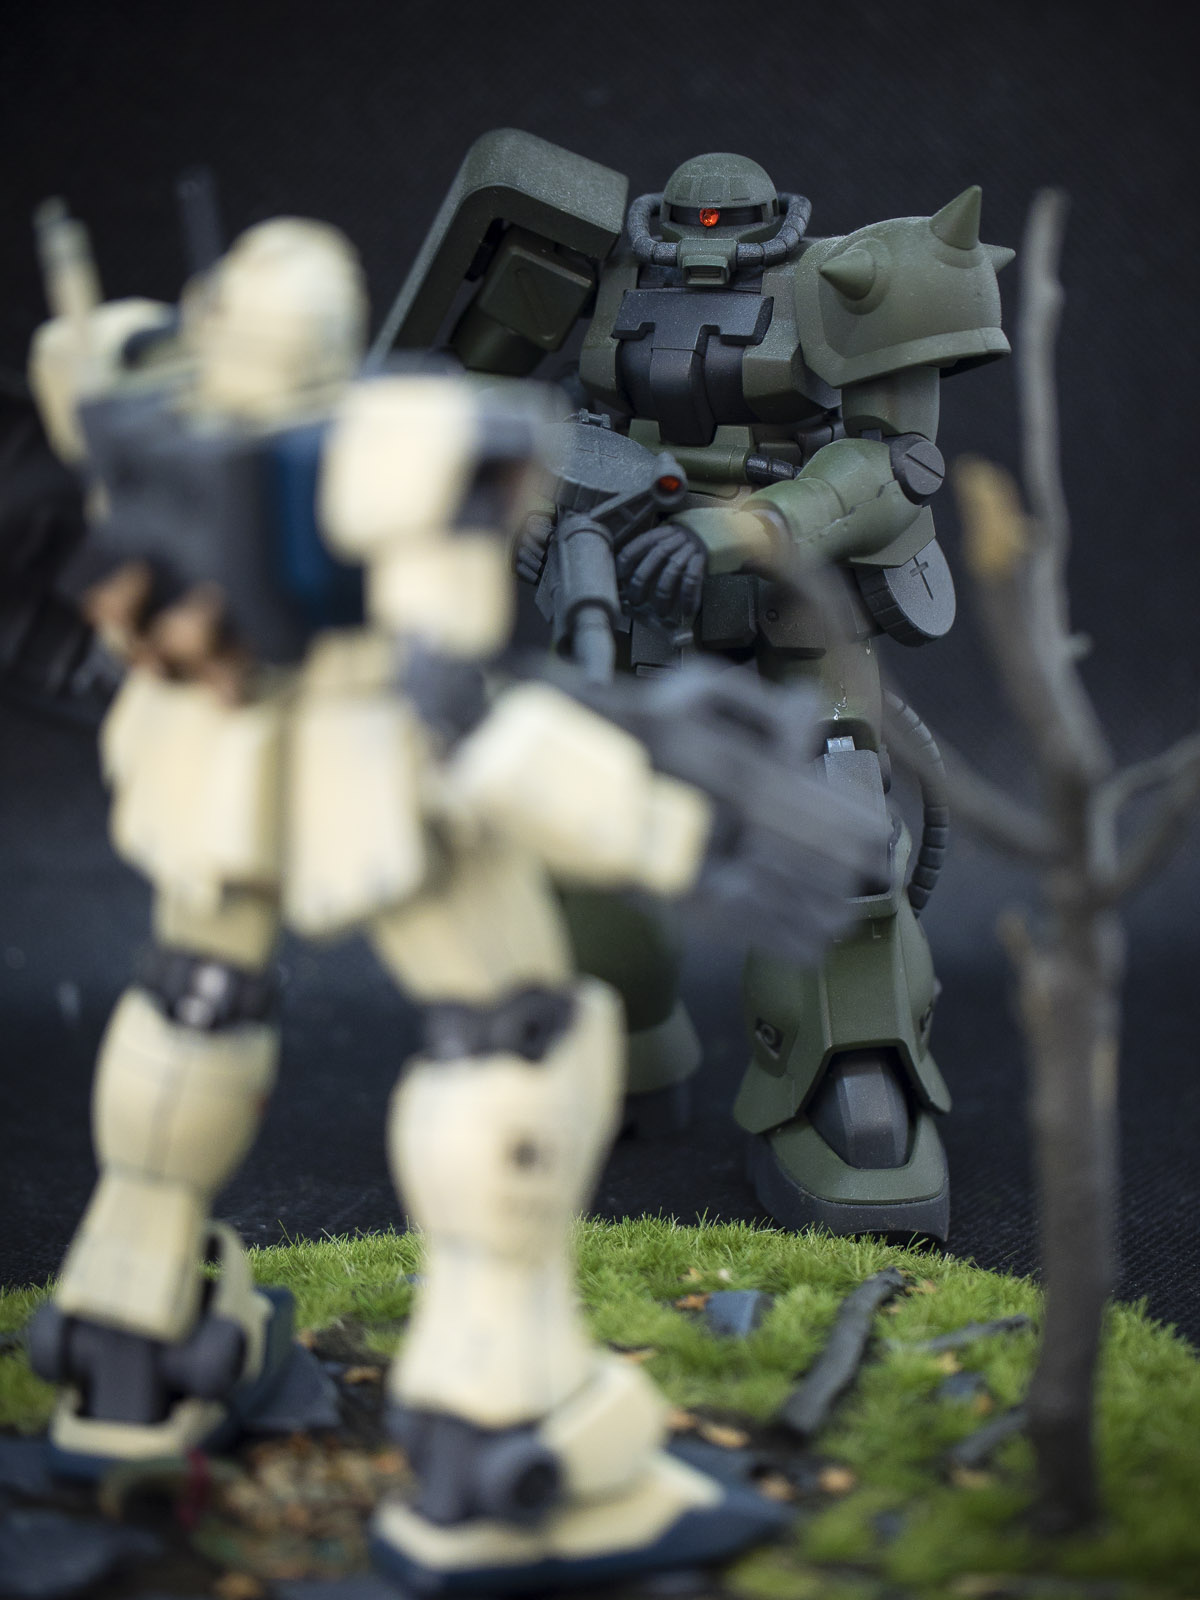
I have submitted my Bandai 1/144 HG MS-04 Bugu [Ramba Ral] into ZakuAurelius Clean vs Weathered Competition 2021. ChrisPabz is one of the judges of the competition and on his youtube channel he gave me some really positive constructive comments and also many things which I can improve on! Check it out on timestamp 16:31.
Take a look at his other videos and if you like send him your WIPs or build for him to review; check out his Instagrambio for the link to send in your photos and follow him!
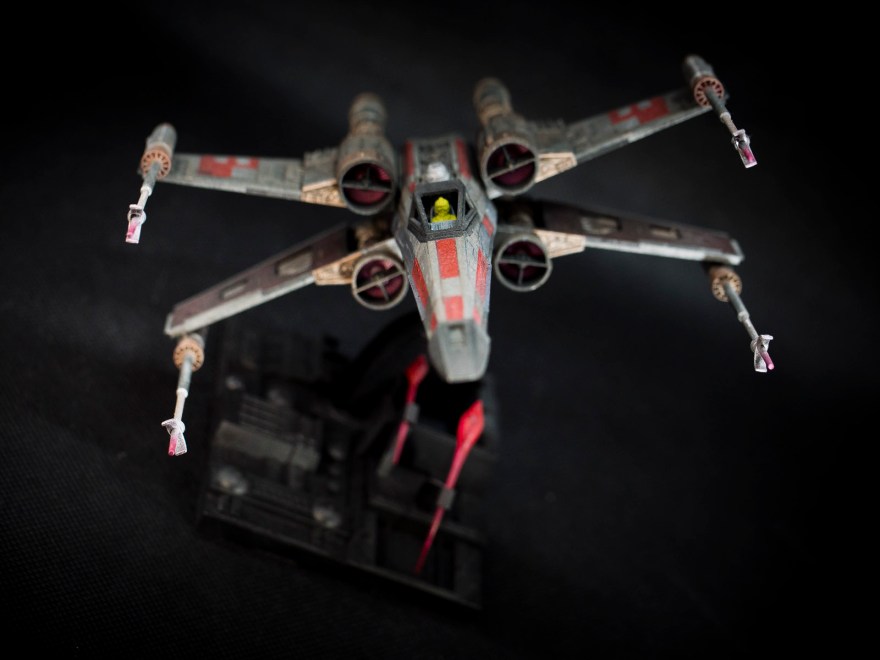
This is my Bandai 1/72 Star Wars X-Wing Starfighter T-65 Space Superiority Fighter. It was built maybe back in 2017. At that time I was still exploring scale models such as Airfix and Revell. Most Japanese brands such as Tamiya, Hasegawa and even Bandai are limited in choices and ranges in most High Street shops in UK.
I only started looking at Gunpla when lockdown started as most hobby shops have went online and then I have access to more overseas brands such as Bandai and I was surprise to find ou that this is still available.I tried to paint the X-Wing in an old metallic finish to present it as an overworked fighter jet and it been repaired using parts from different planes.
I do like how it turns out and really like this design compared to the new X-Wing shown in the new movies.Parts separation is great especially it is a Bandai design. It helps with my colour separation and I really enjoyed the build process. The only thing I dislike about this is that I am not skilled enough to paint the pilot with details hence I just used a lemon yellowy colour base, sigh I still do not know why I used that colour!If you like my work, please feel free to visit the blog at www.itisagunpla.com and have a look at my previous projects. Your continuous support is much appreciated as it helps keep the site going and allow me to do more projects.
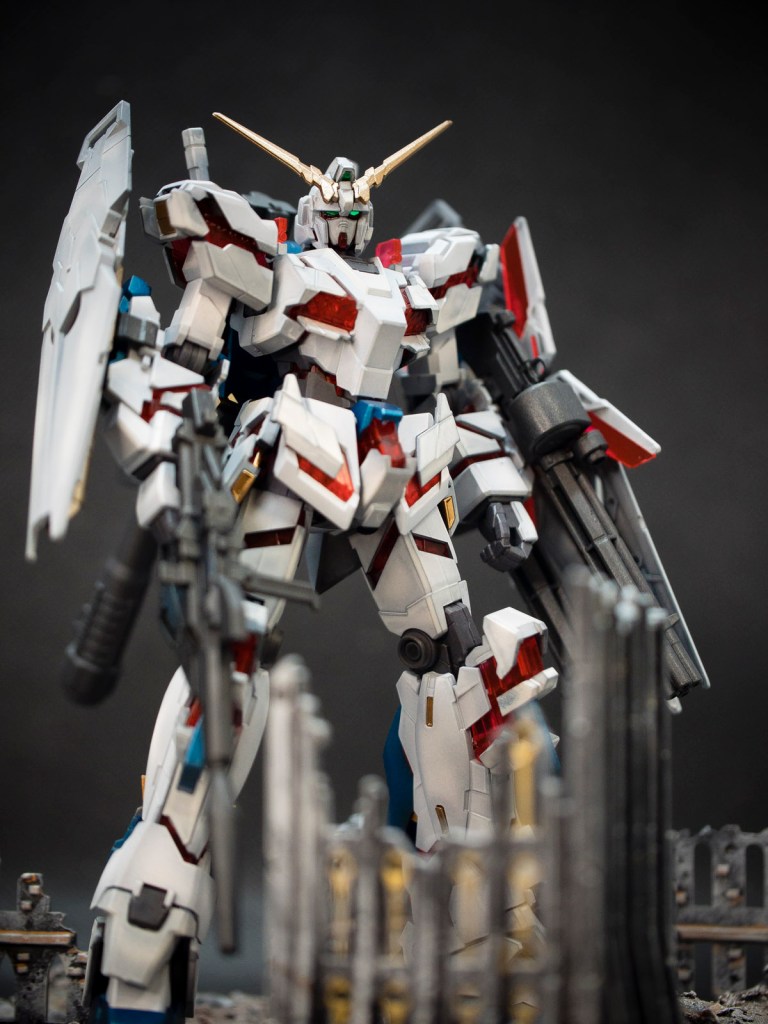
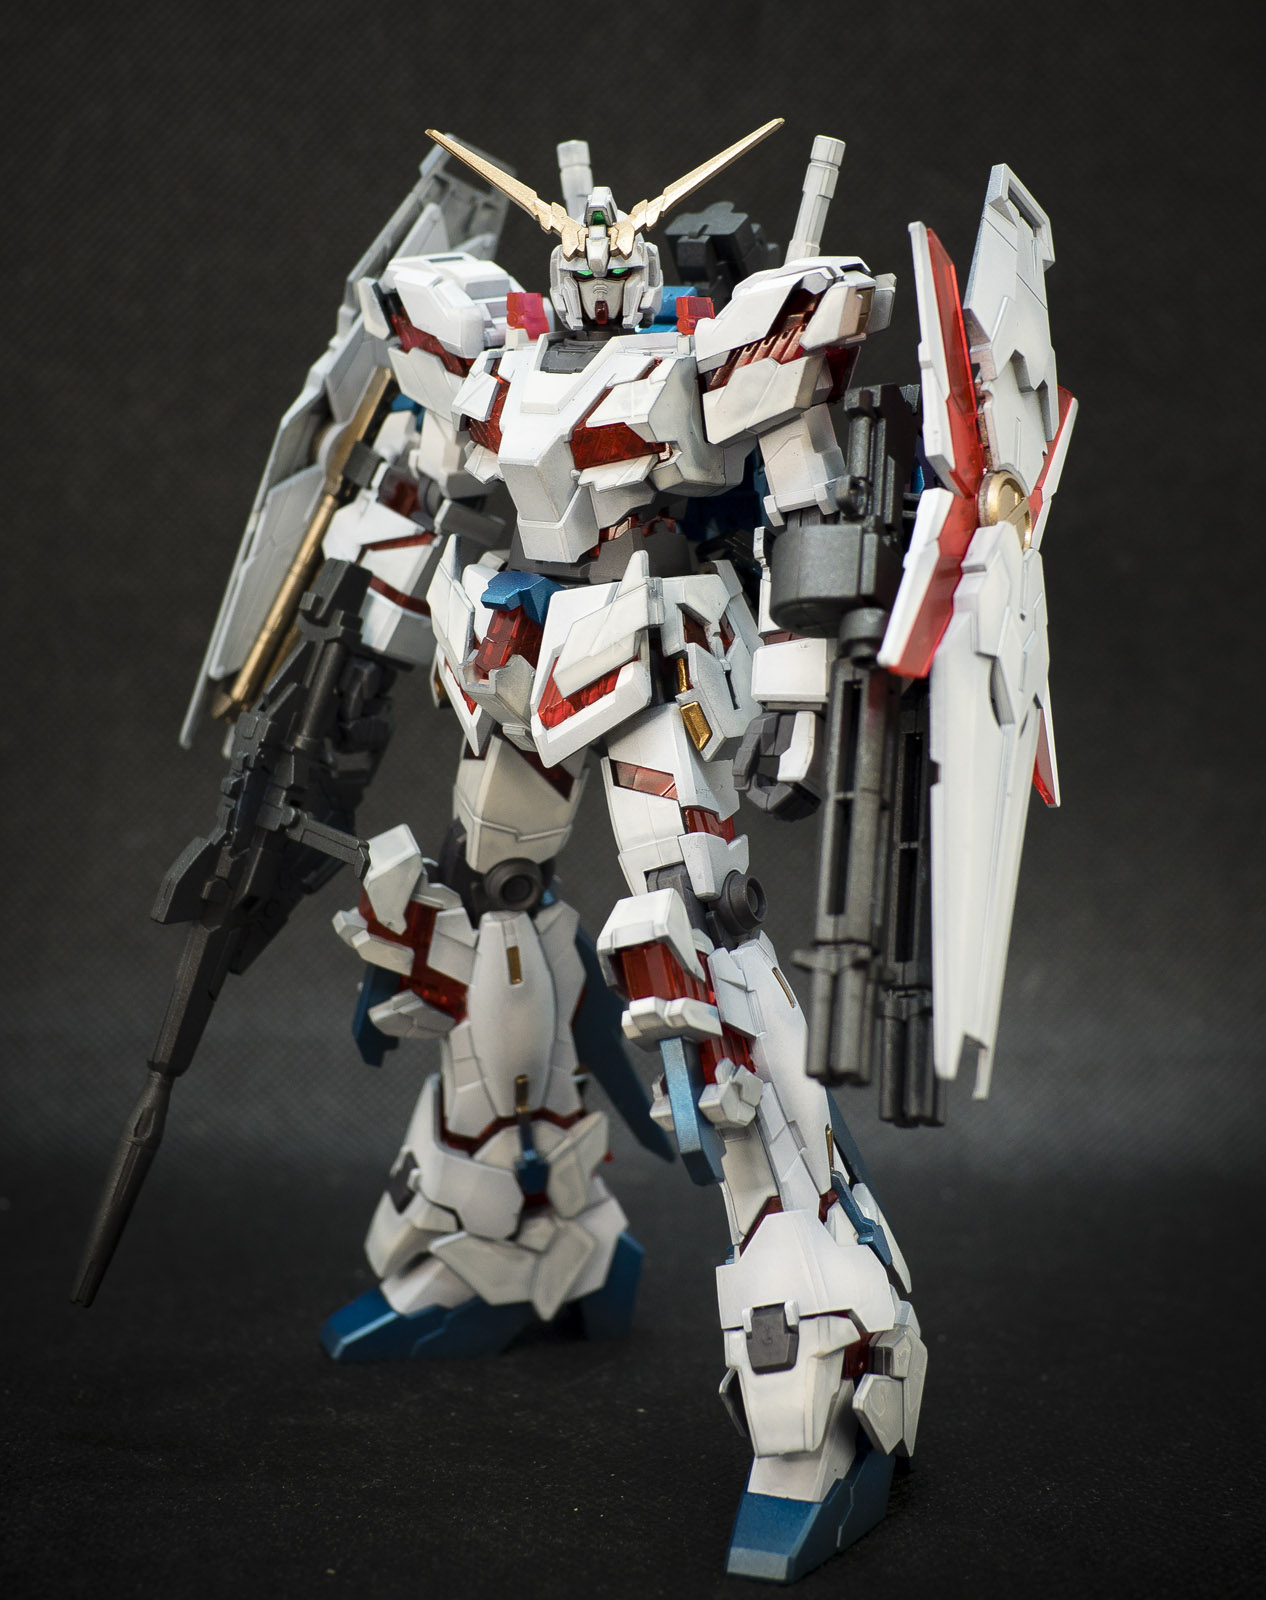
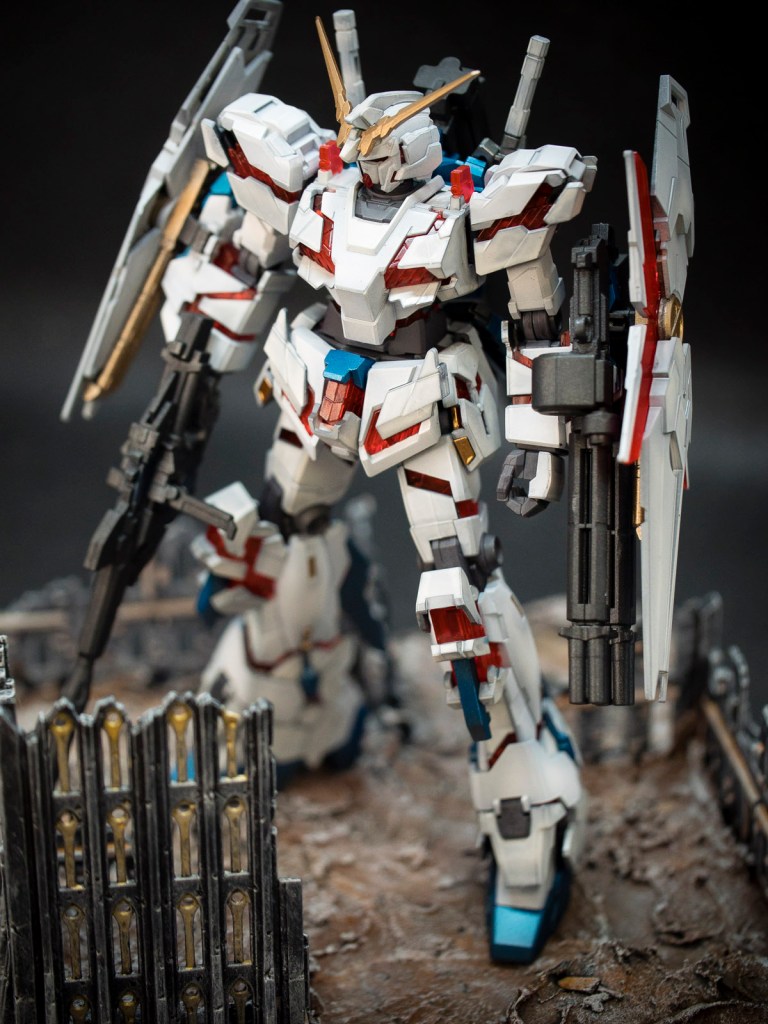
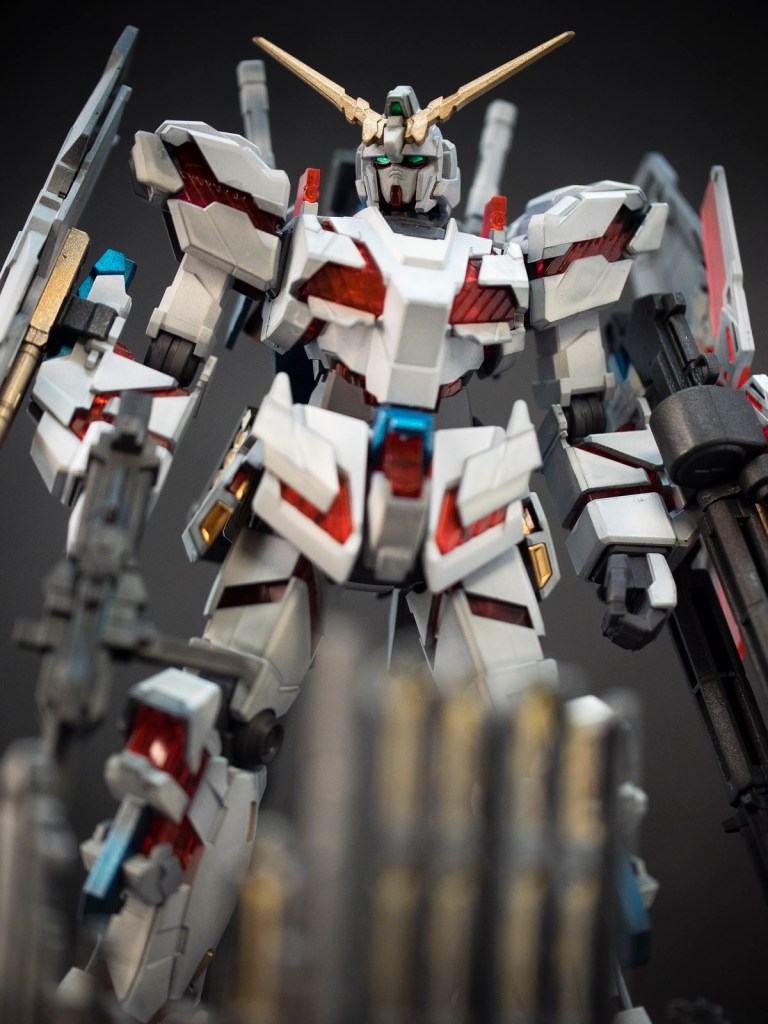
This is my Bandai 1/144 HG RX-0 Unicorn Gundam [Destory Mode]; I have already blogged about this project here. This is now my attempt to update this project with better photos to give it justice as it is one of my favourite build in 2020.
I did not customise this kit much at all because I can’t think of any ideas. There is a saying you can improve on prerfection, and I think this is one of this kit that I just want to build it the way it is. I did give it a slightly more metallic blue accent because I just prefer to give it a bit more contrast over a whole white base.
I also gave it more weapons and shield from my Unicorn [Normal Mode]. This just helps to justify the “Destory Mode” title!
I had not have the chance to get a Full Frontal Sinanju so I have no choice to use a Stein.
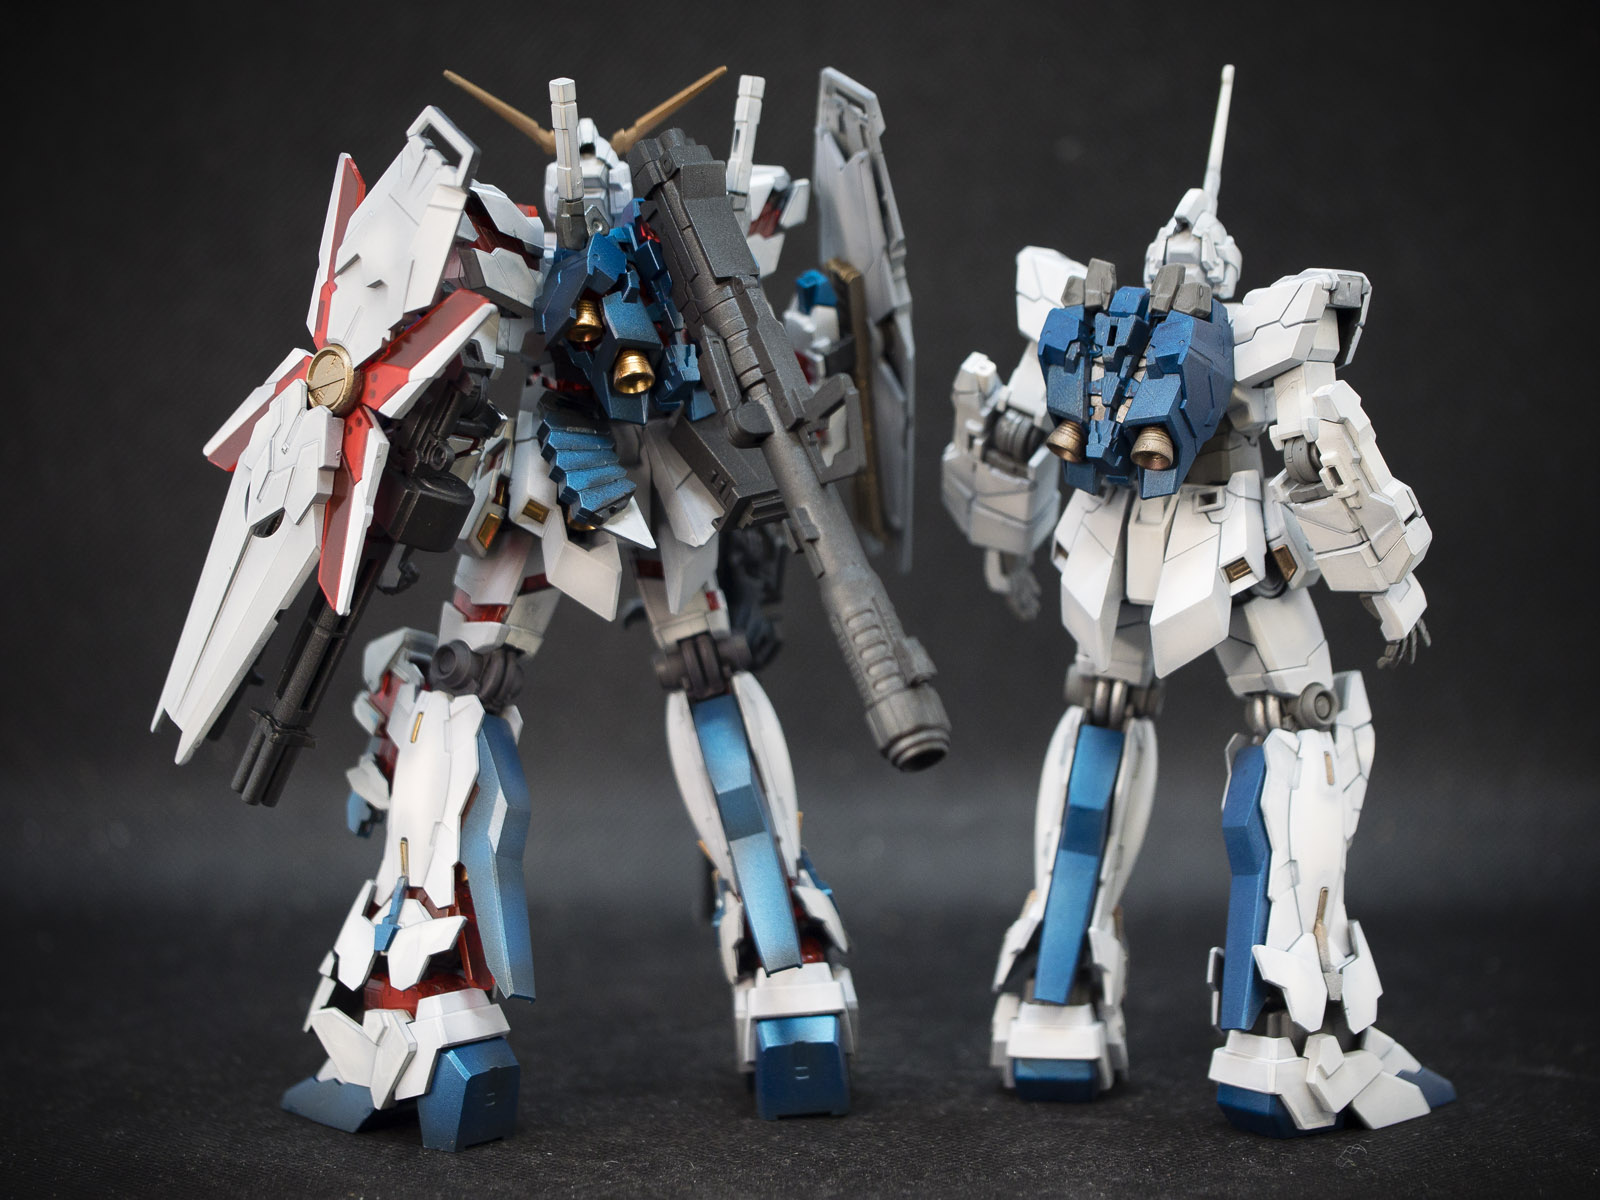
This is just a side-by-side comparison to my EG RX-78 Grand-Daddy. You can see the technology have improved on the Gundam line since RX-78 rolled out.
This is a comparison to some other mobile suits that appeared in the in the Anime. The left is my Delta Plus customised to look like a MSN-00100 Hyaku Shiki, and to the right is my Jesta which was painted in Jegan Green.
The Bandai 1/144 HG RX-79BD-2 Blue Destiny Unit 2 is not my first Blue Destiny kit, I actually already owned 2 but saw this on www.armourofgod.co.uk and decided to purchase it as a custom unit. I knew that Bandai actually updated their mould for the Blue Destiny and my previous 2 models are the improved version; this kit I just bought sadly isn’t.
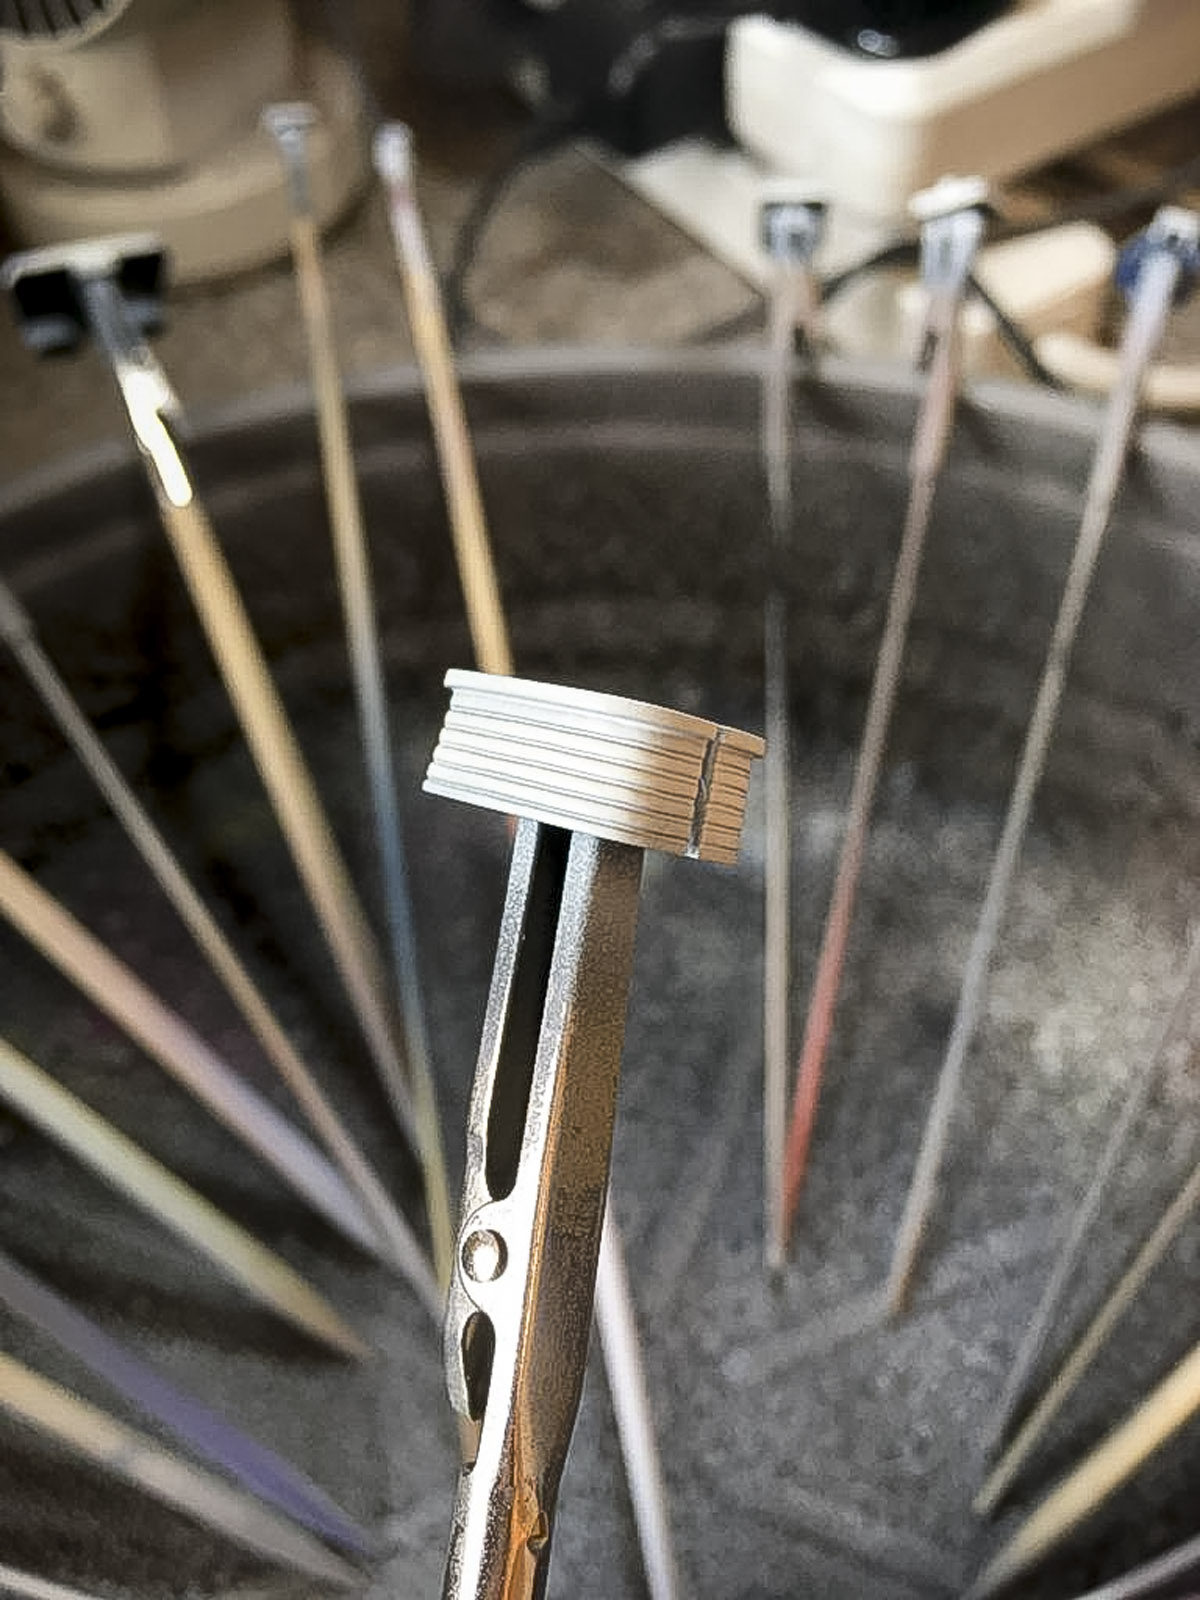
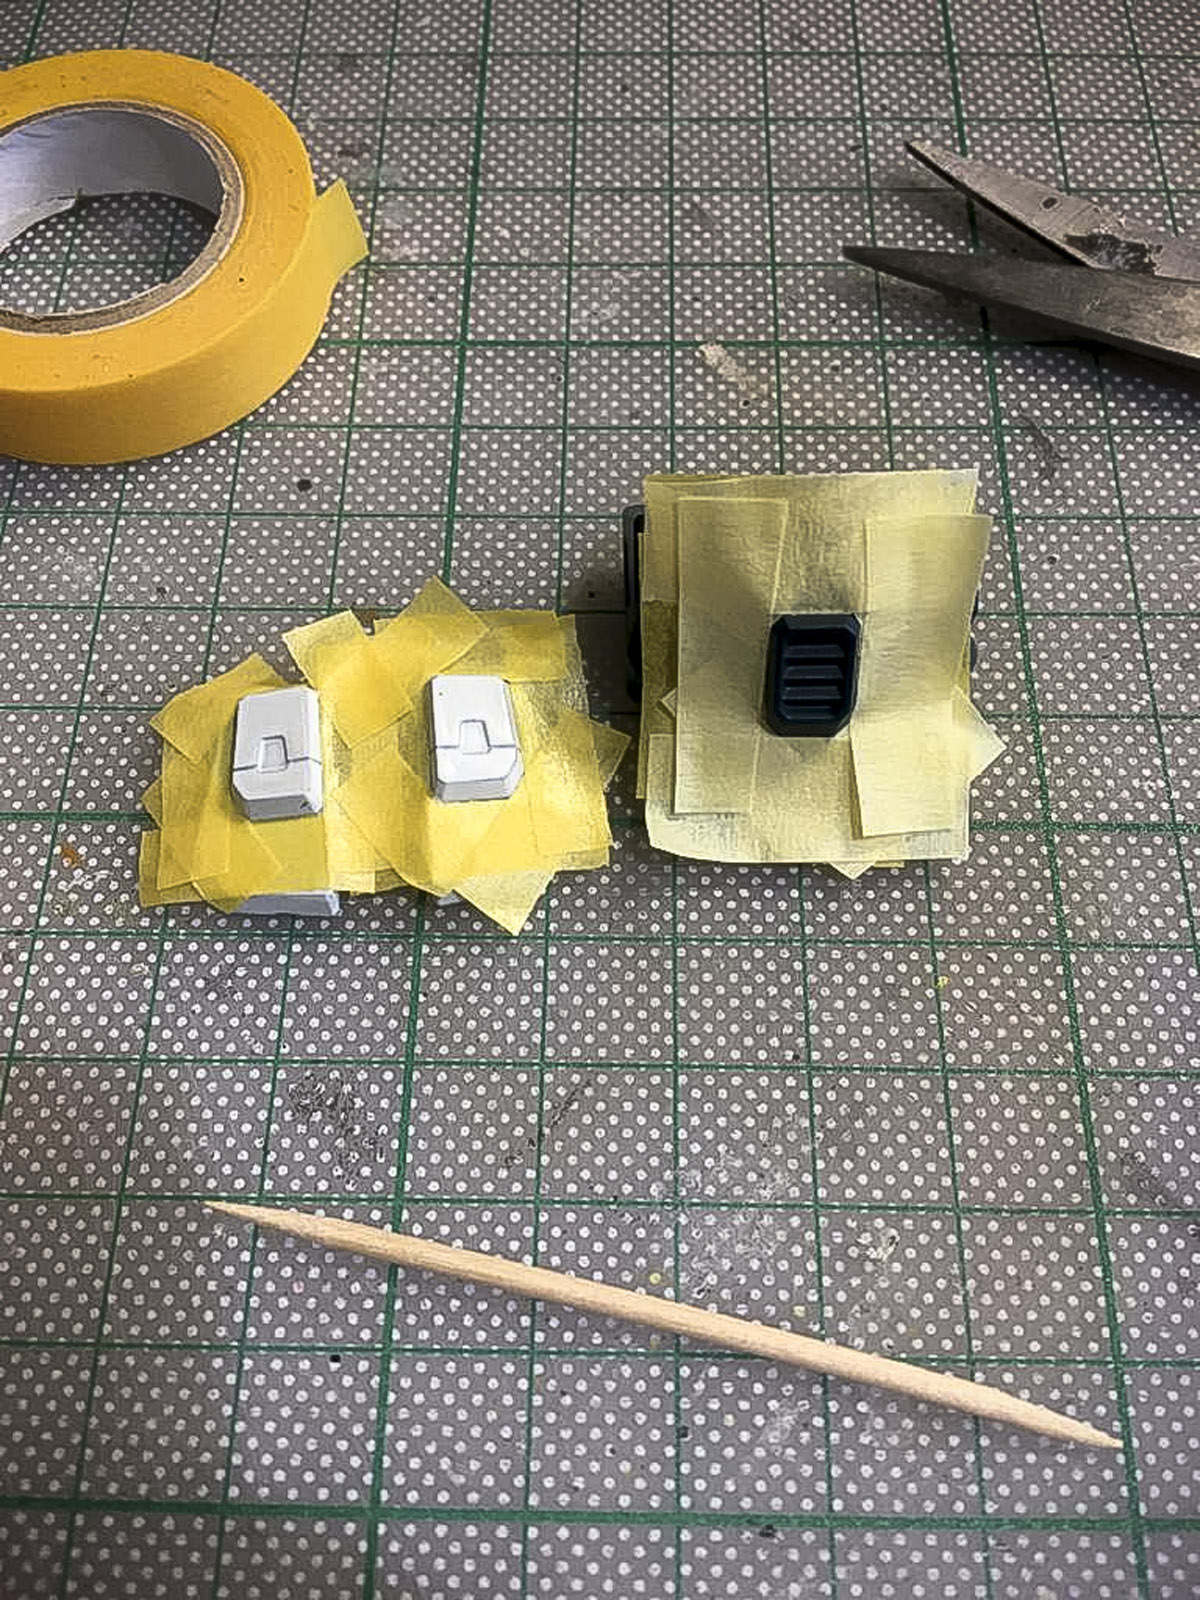
This Bandai 1/144 HG RX-79BD-2 Blue Destiny Unit 2 is released in 2007, although it has some good parts separation mainly around the legs. I am slightly disappointed with the torso. The latest version has the vents and waist cannons moulded in separated pieces for easy painting but this is moulded with the intention of using stickers and masking. The skirt armour is also mould as a single piece which I have to mask to get the colour separation I am aiming for. In the end, I drilled out that waist cannons and repurpose the beam sabres to provide the part separation.
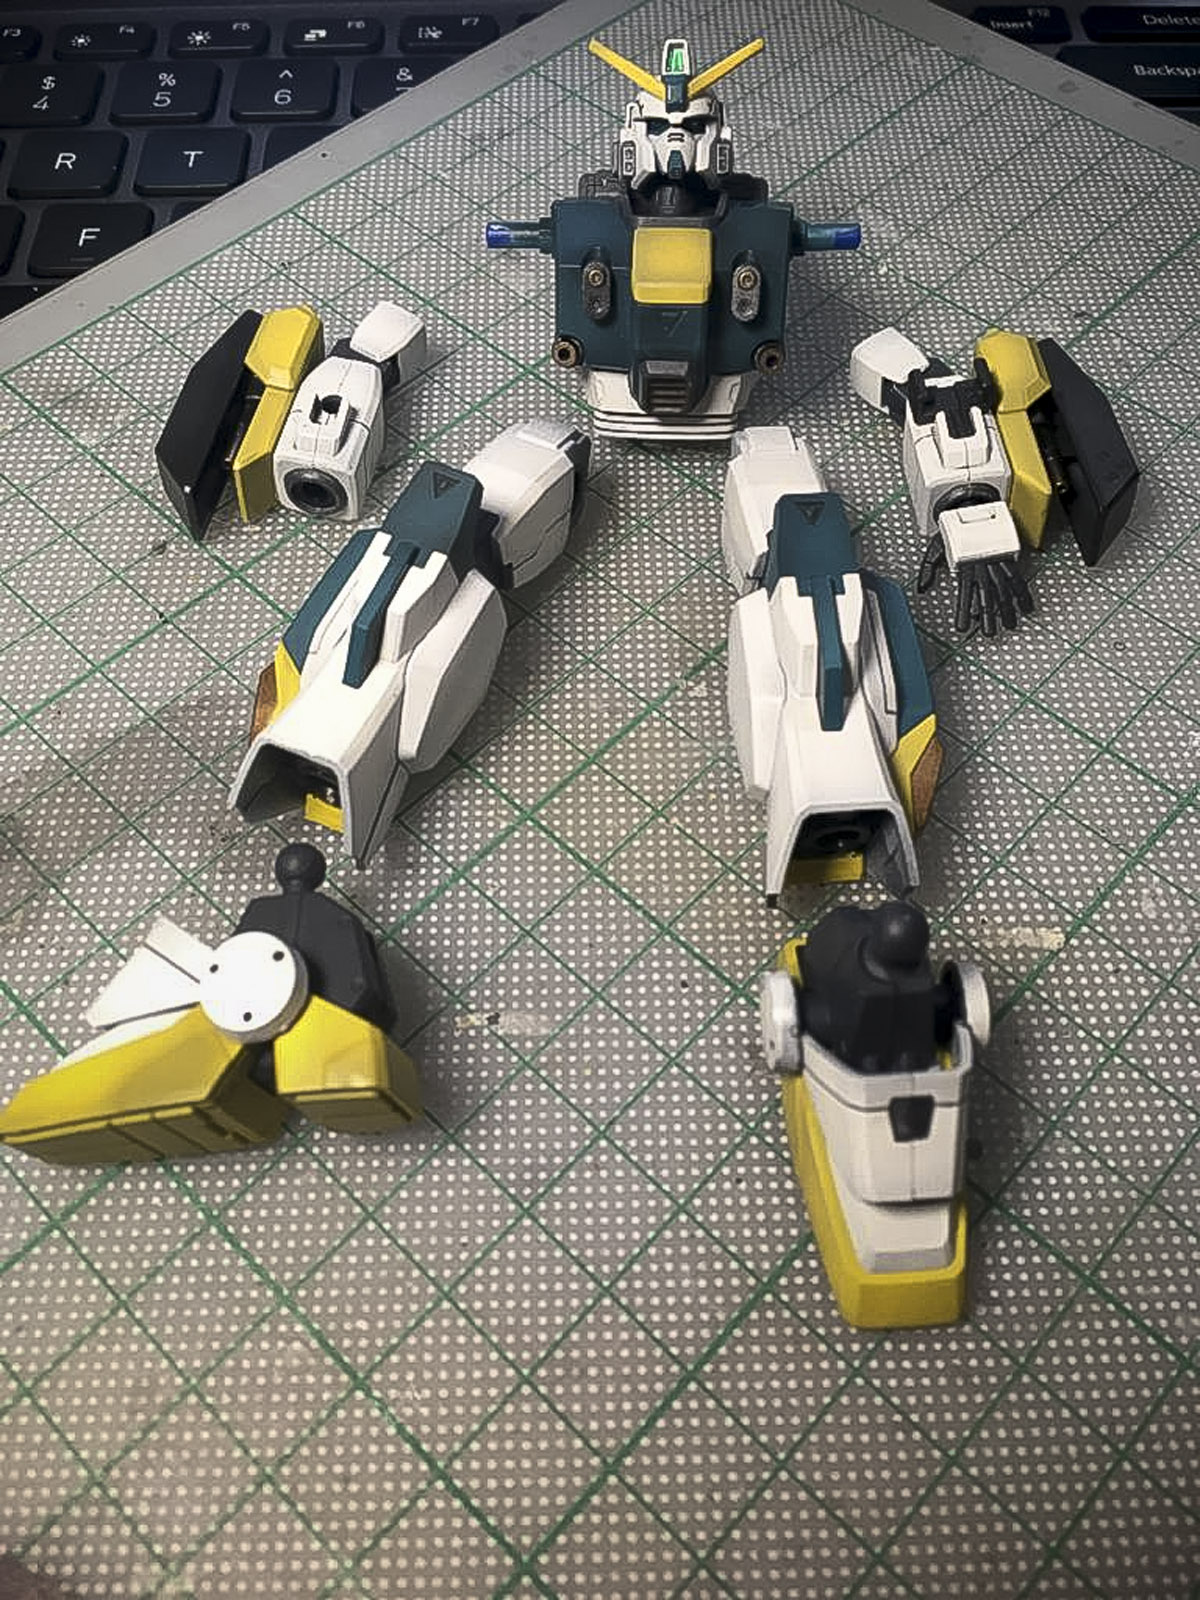
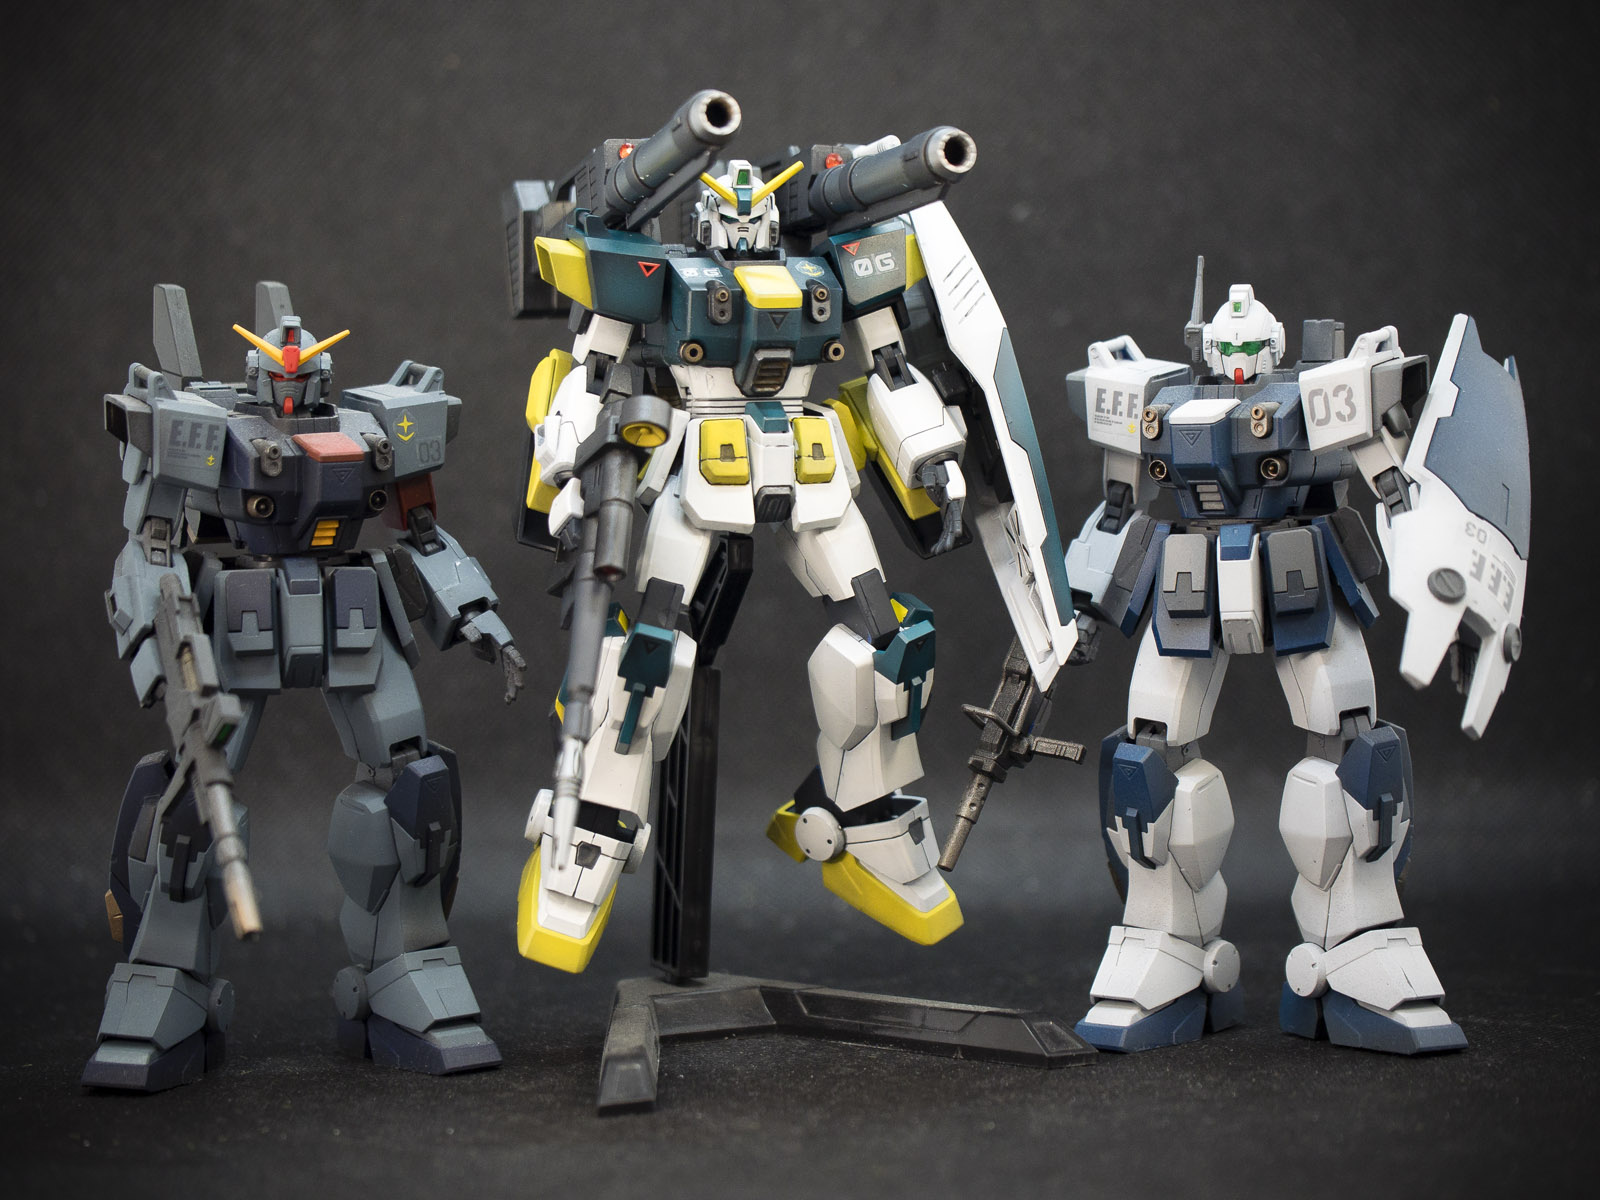
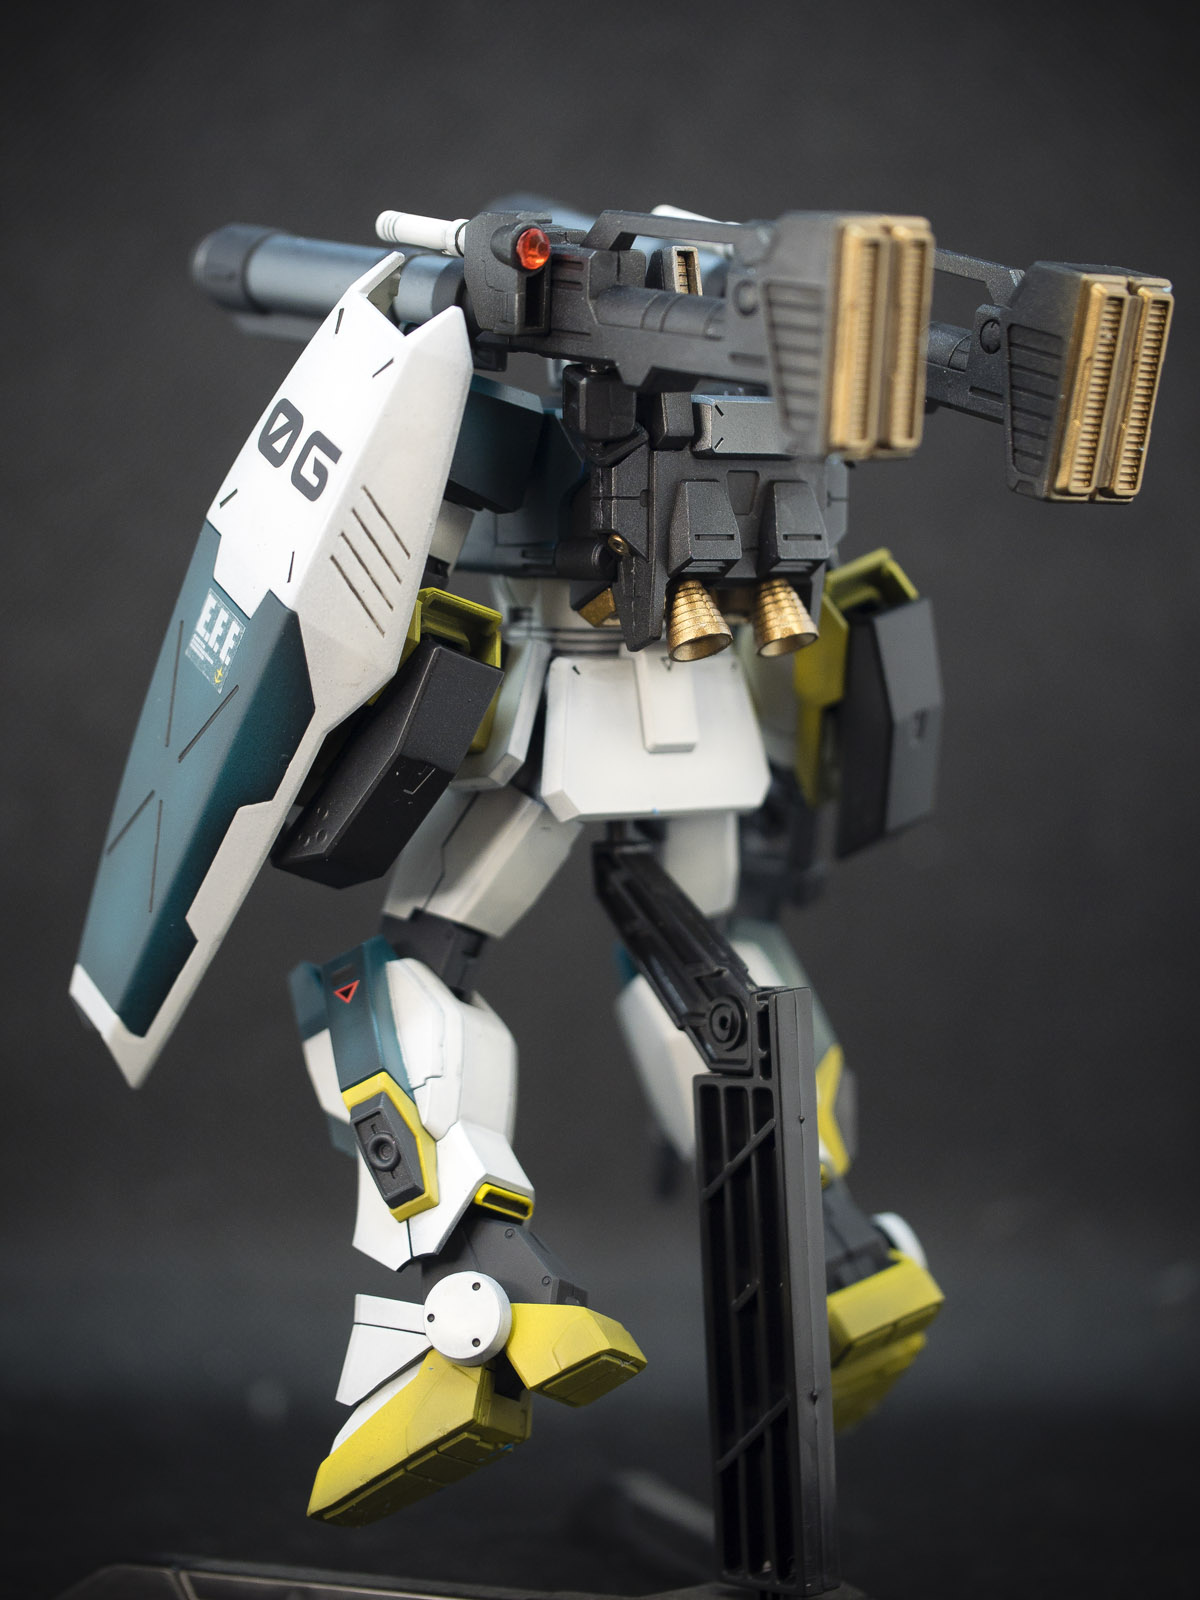
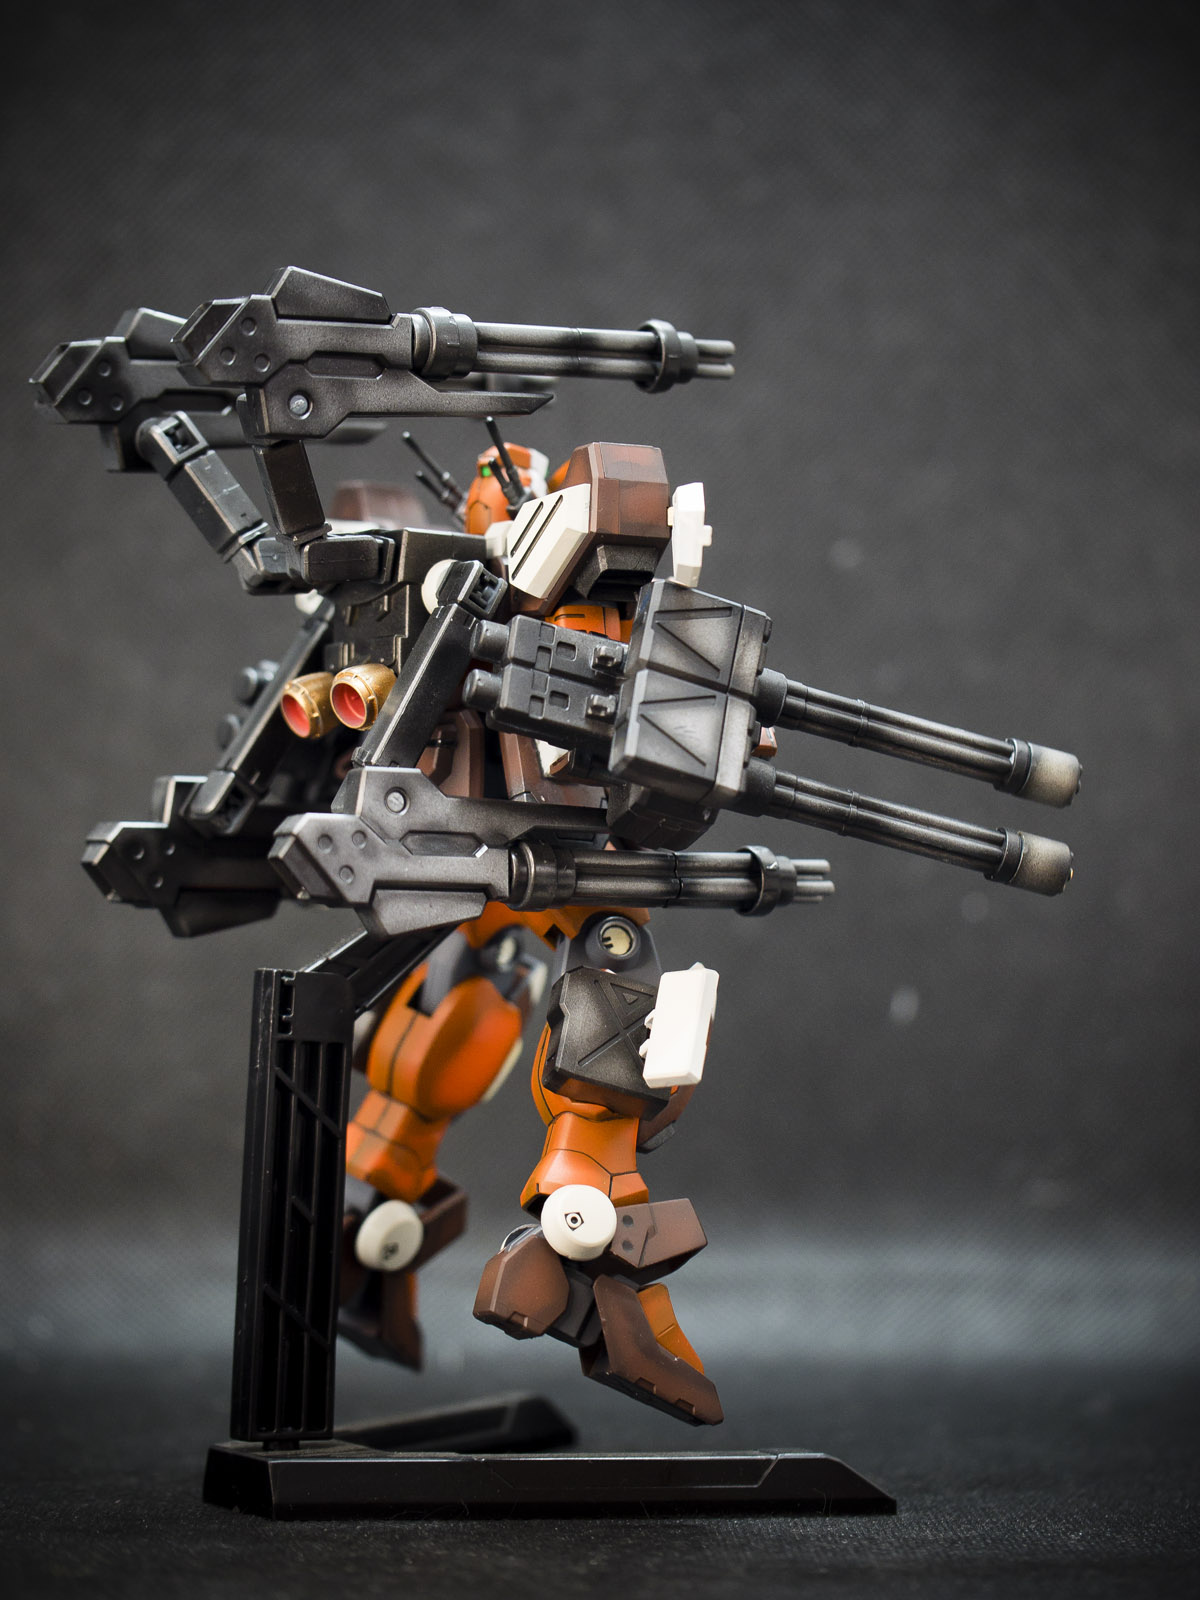
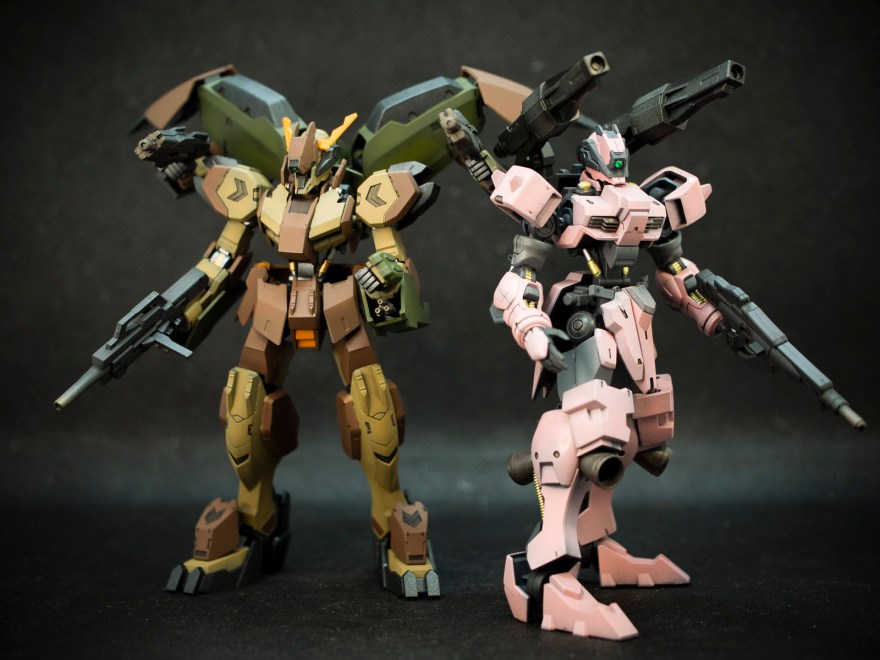
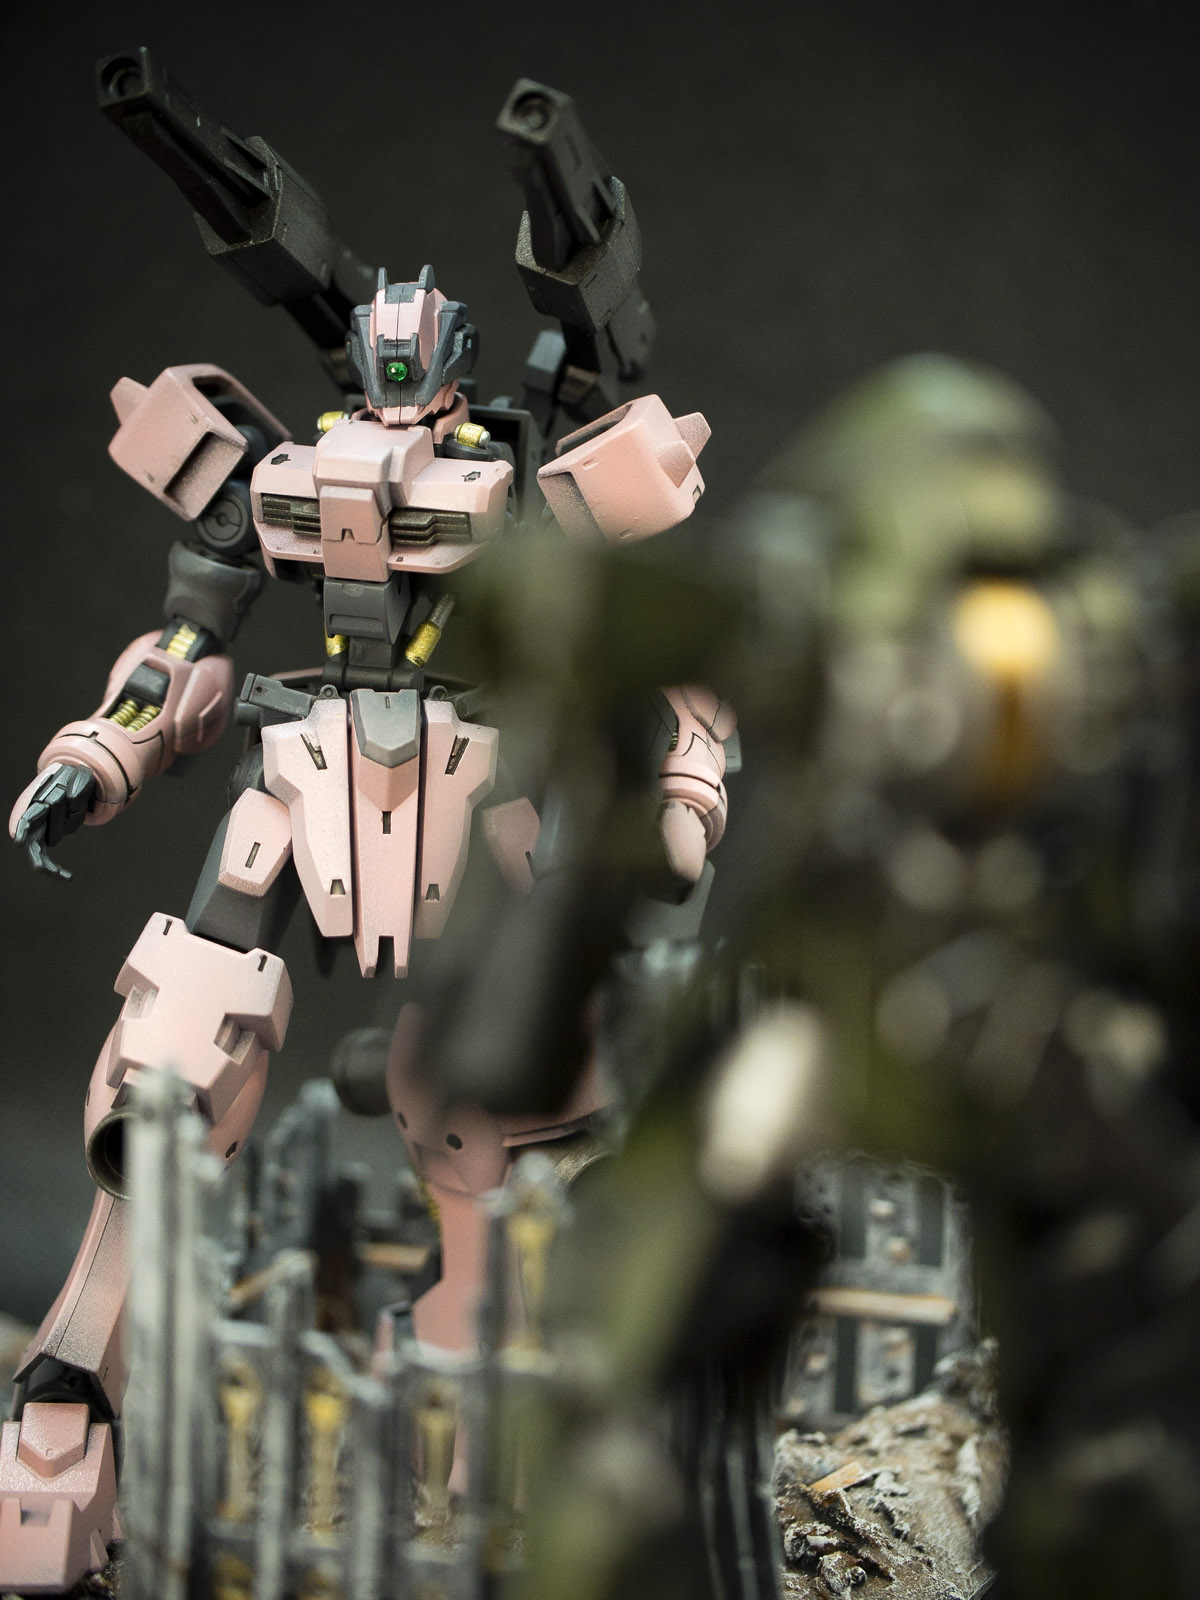
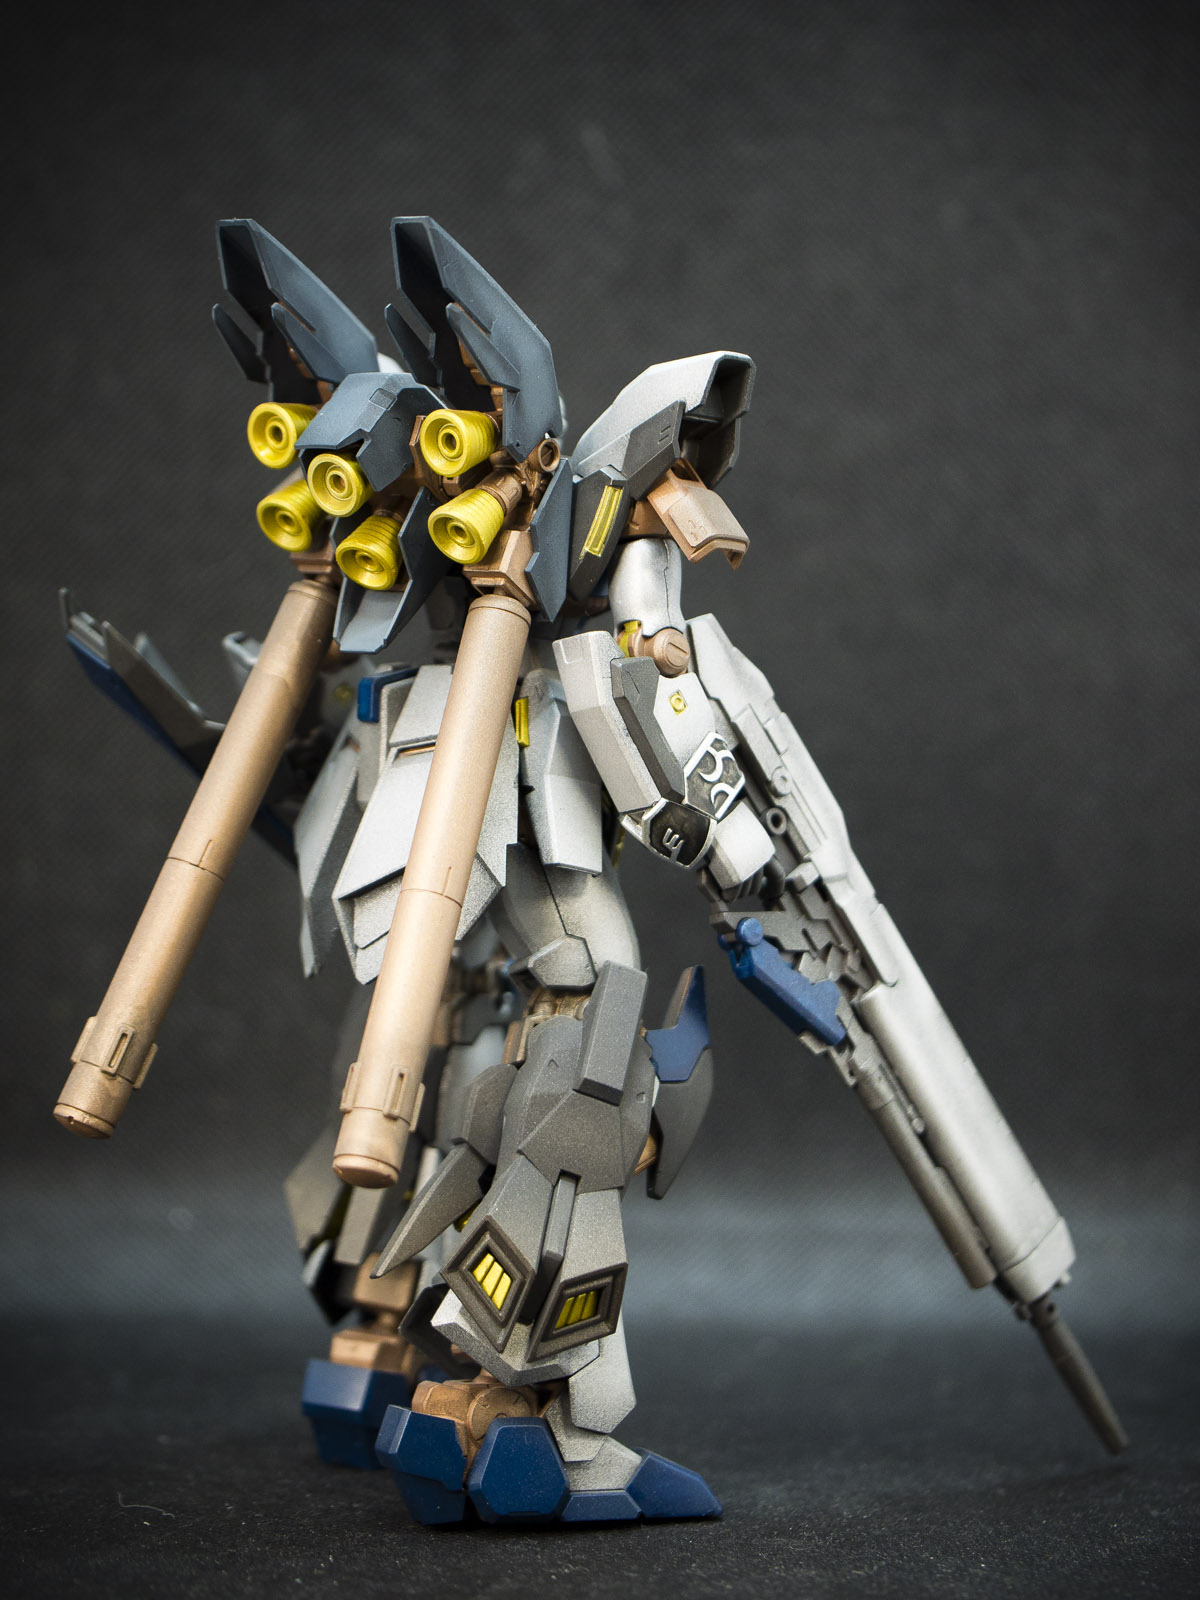
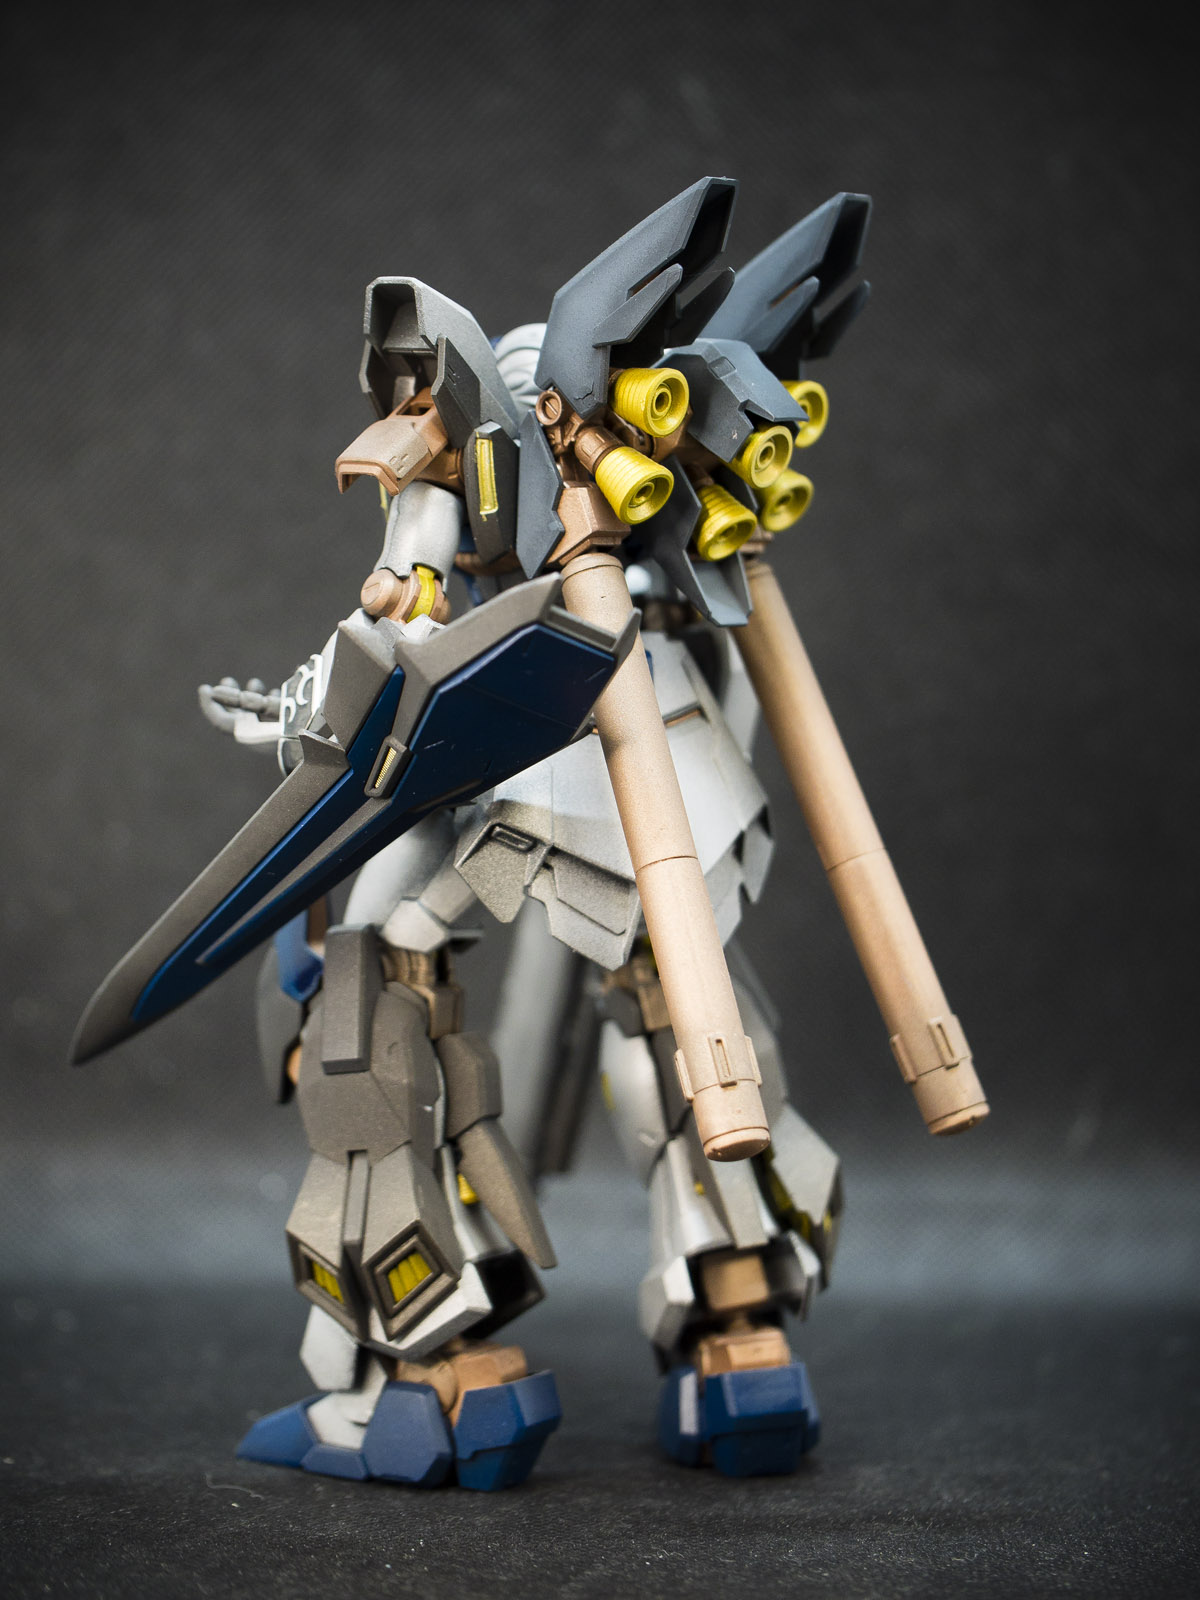
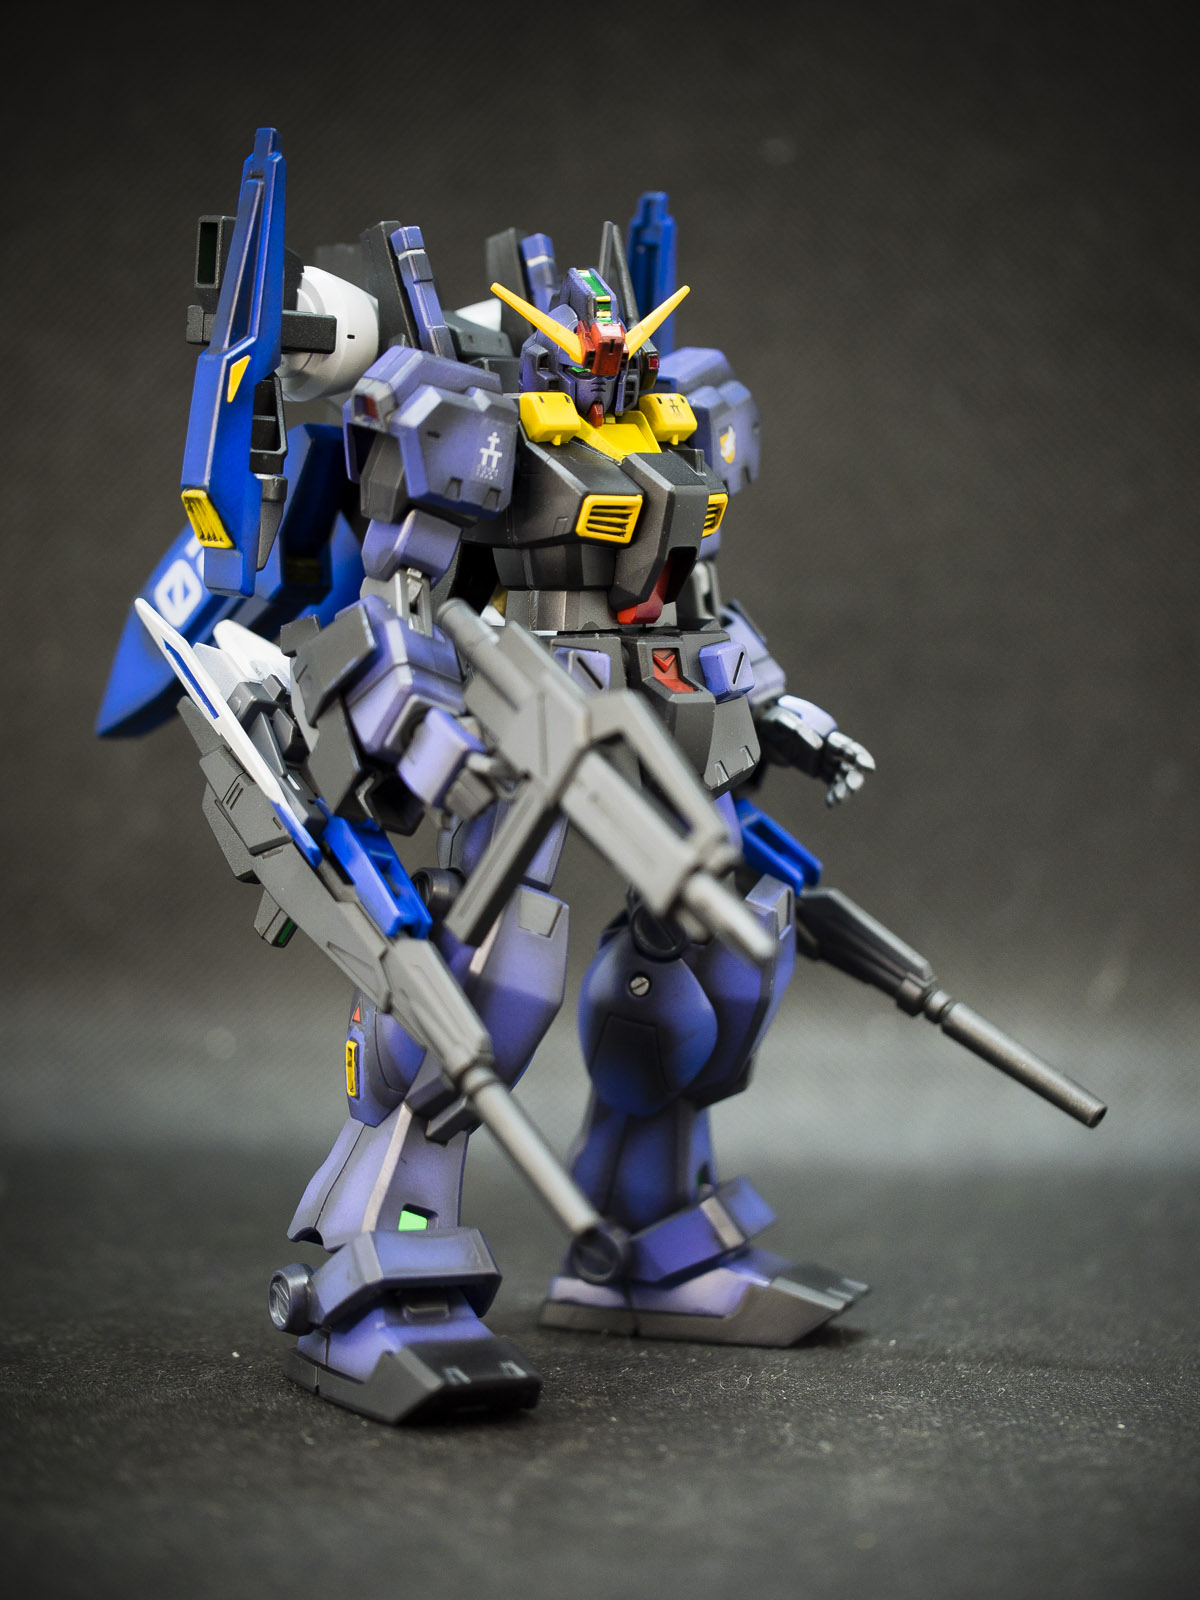
I am not keen on making another Blue Destiny kit, and I was inspired by the latest PBandai Mudrock. The Mudrock is the 6 variant of the RX-78 design; it is modified to improve on the original design by giving it more long range fire power. I thought the Blue Destiny unit is a good start because the chest itself is already equipped with several ballistic weapons. Thus, my kitbash included a head unit from a Ground Gundam, Beam Cannons from Ground Gundams, Heavy Beam Rifle from Gun Cannon, Heavy Shield from Alex NT-1, and Hand Gatling Pods from Powered Arms Powereder Weapons Pack from Build Divers.
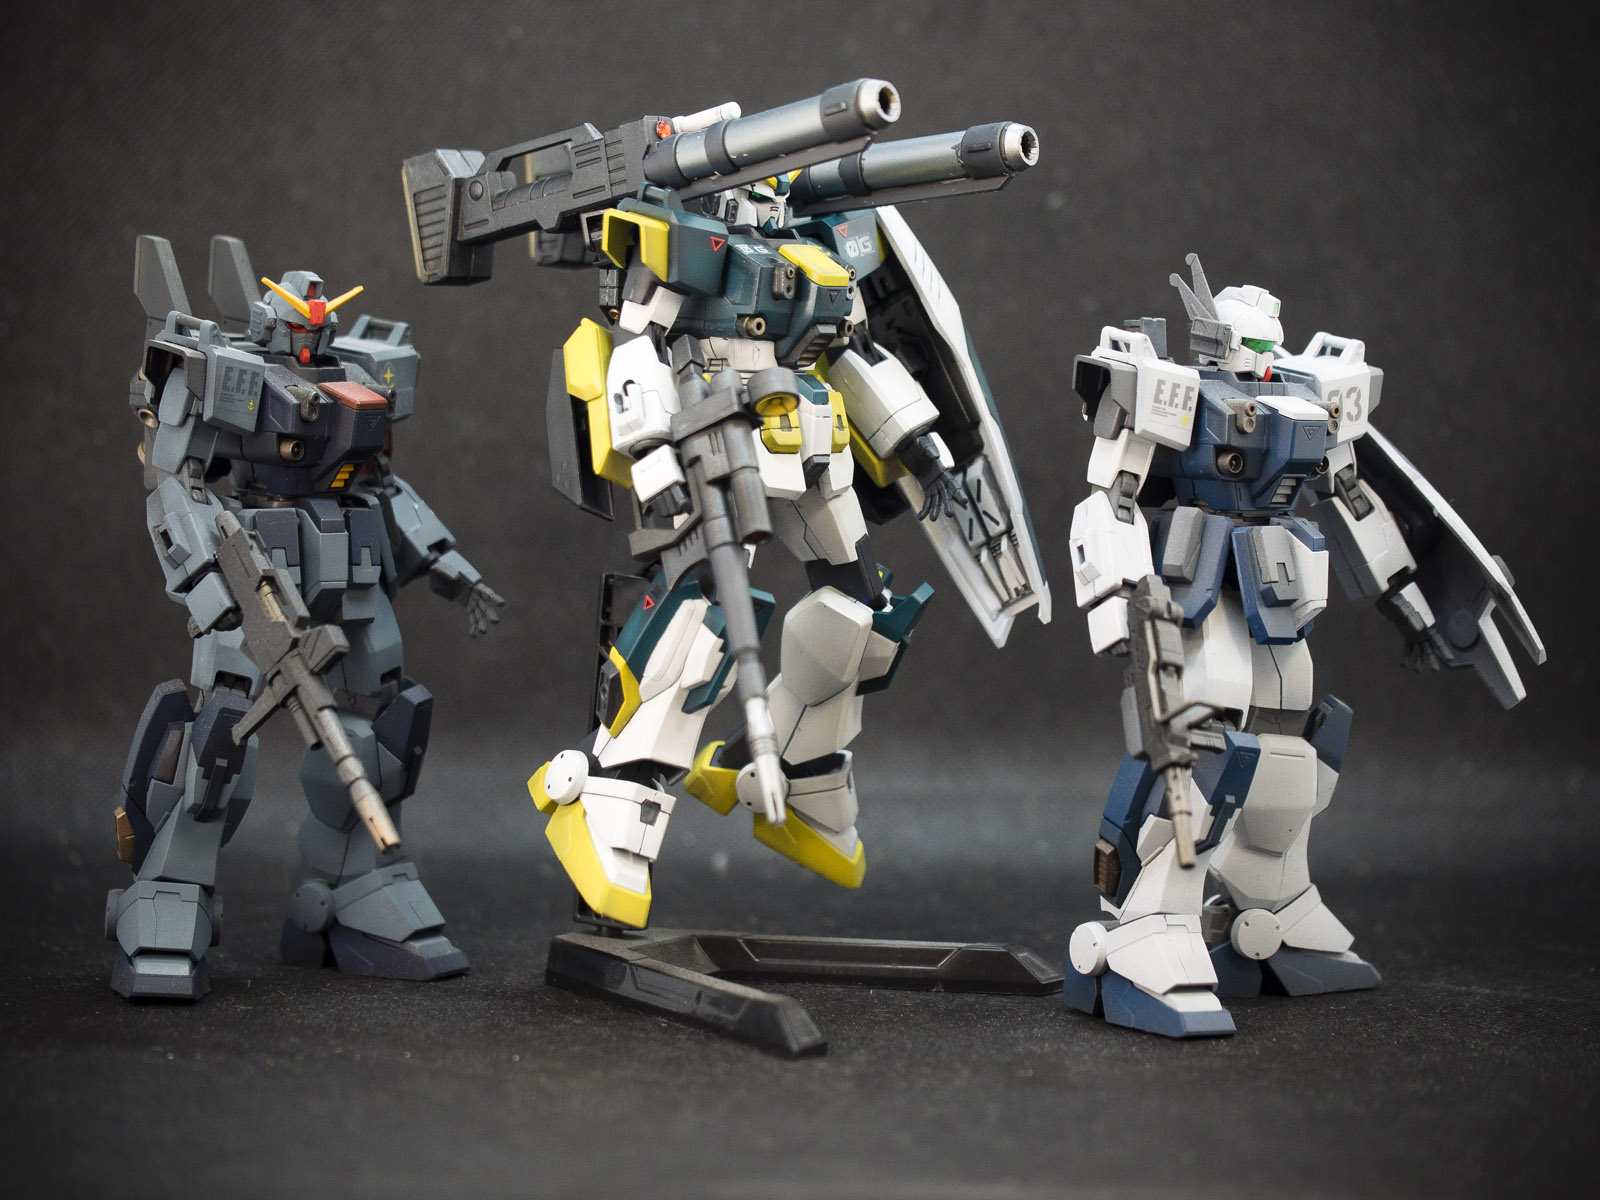
The double Beam Cannon made this Gundam very back heavy and thus I am not able to get it to stand on its own; luckily I have a few spare stands to use.
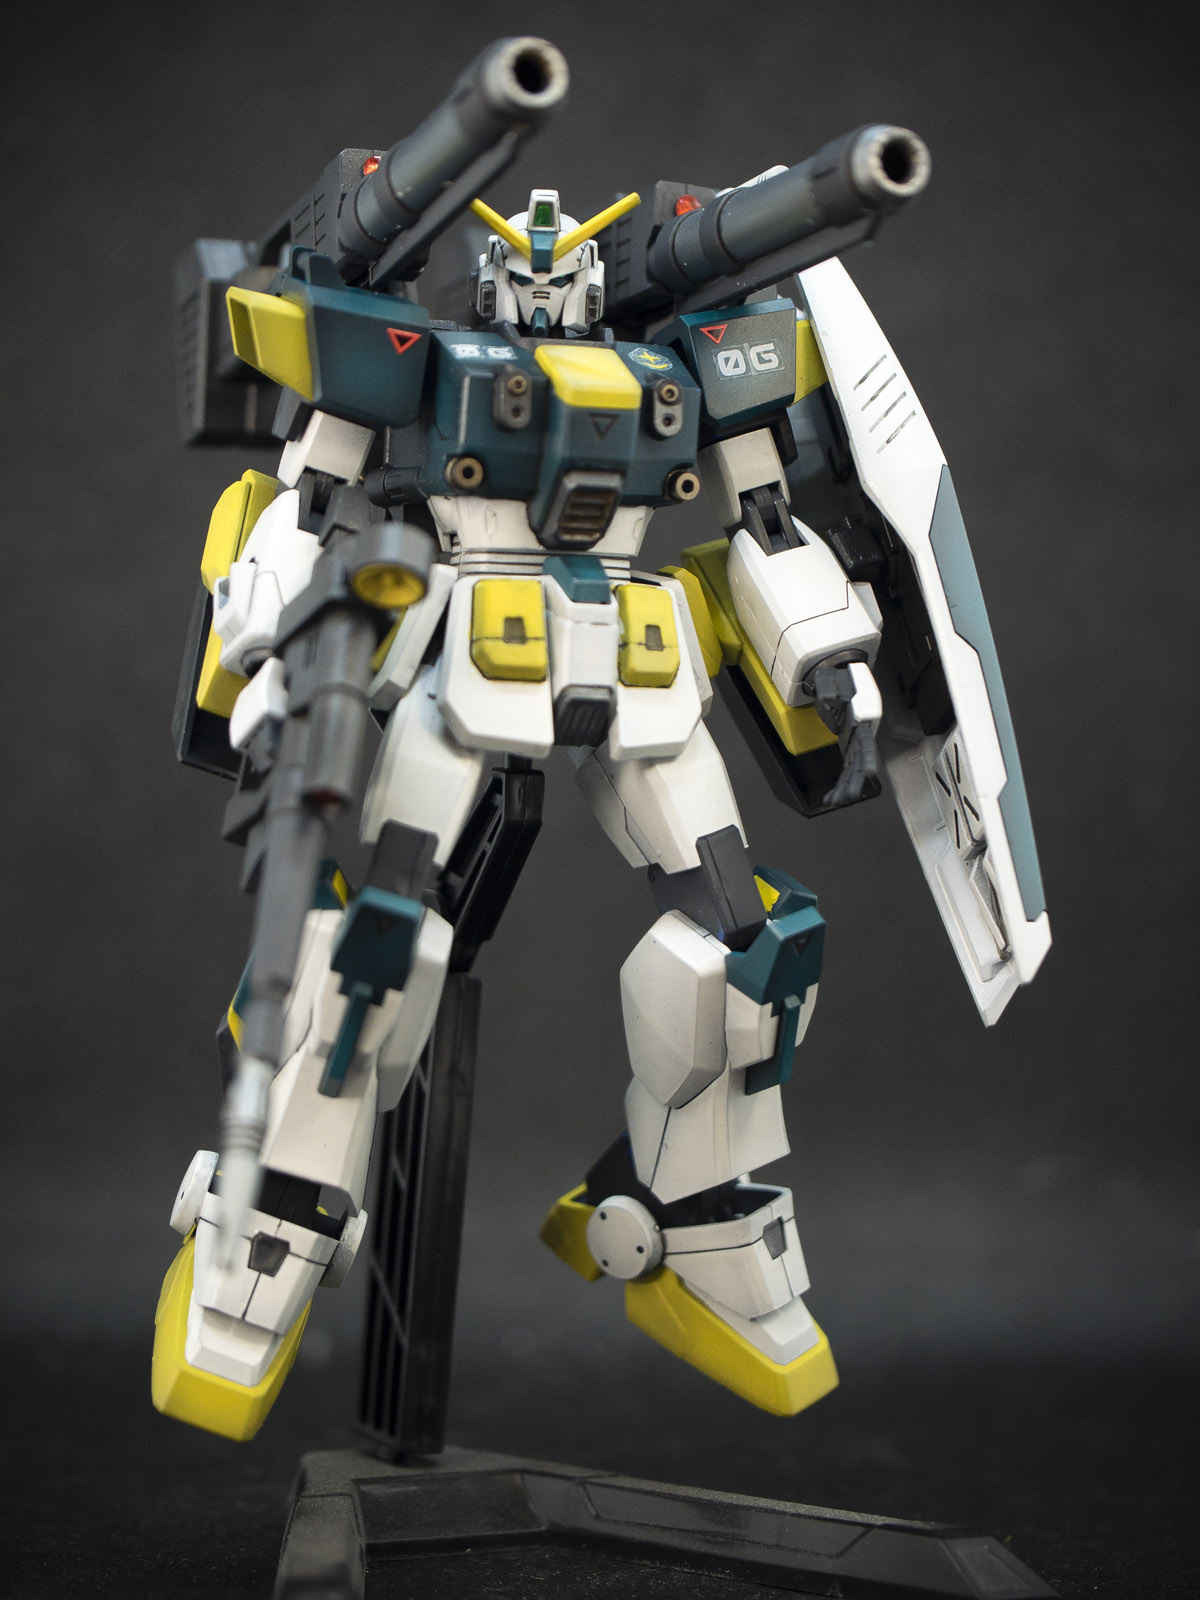
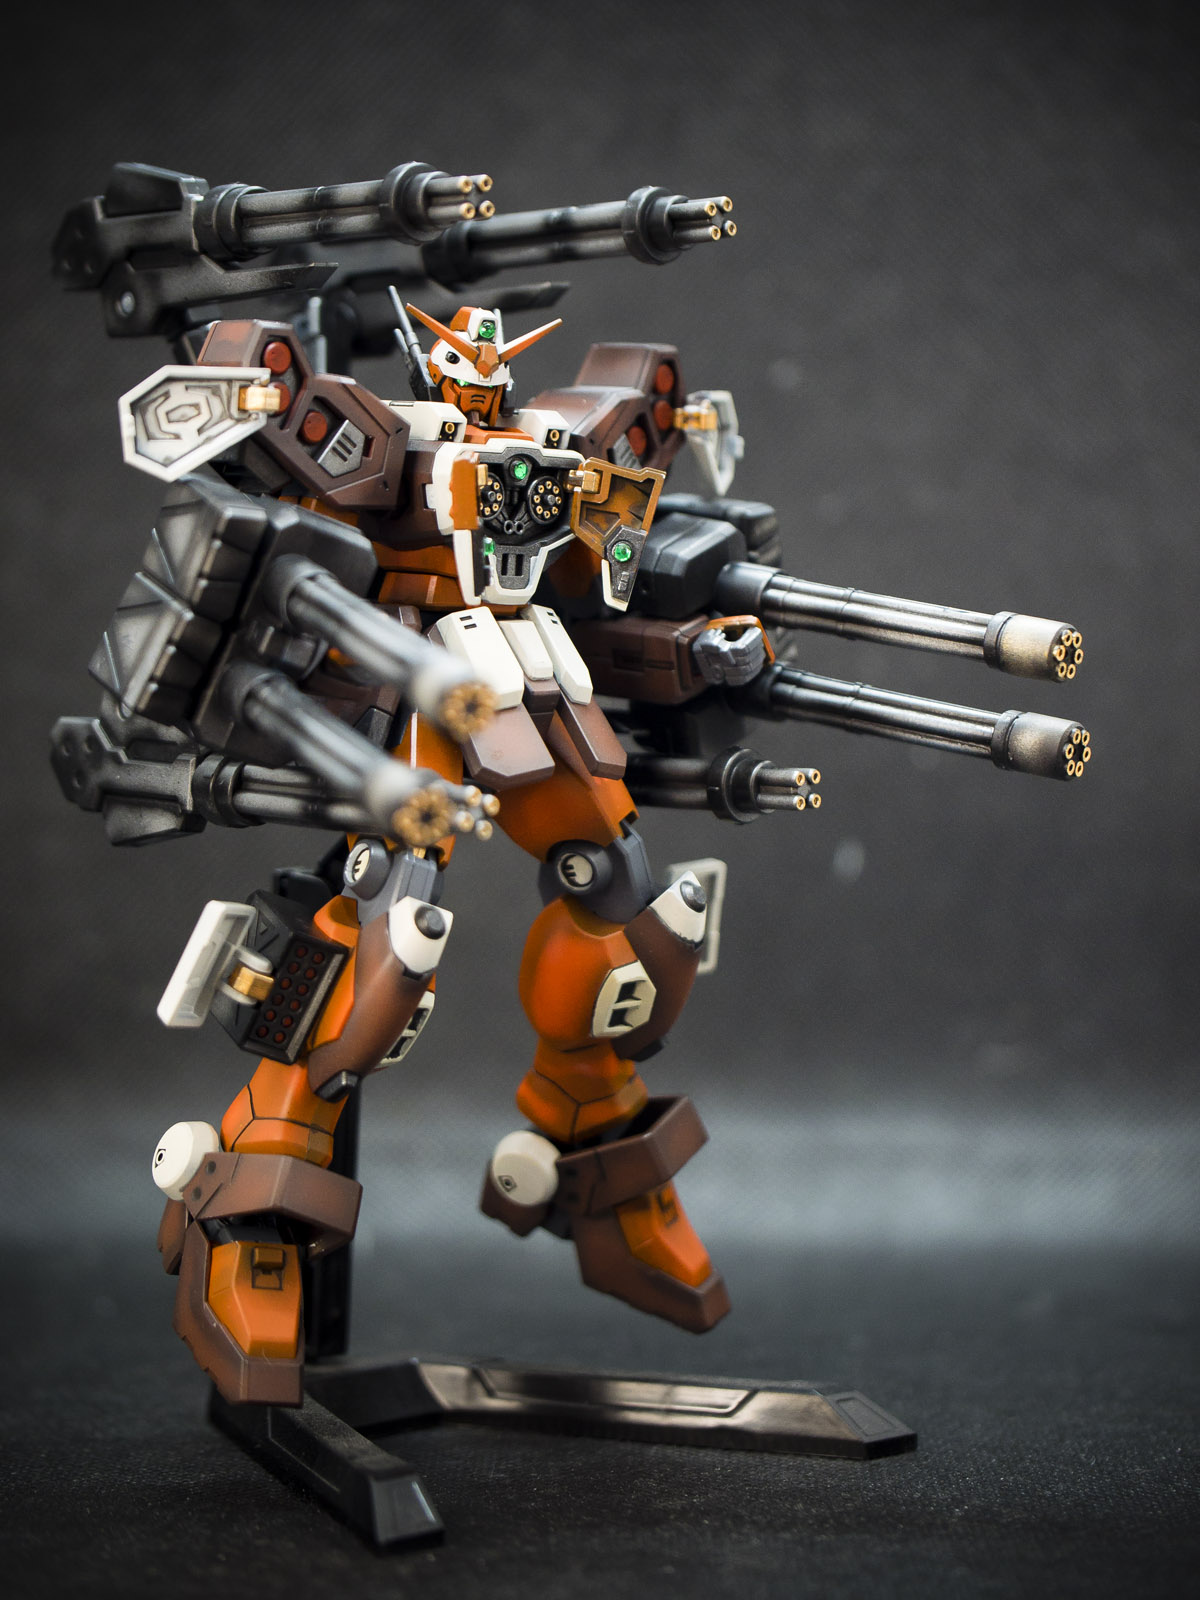
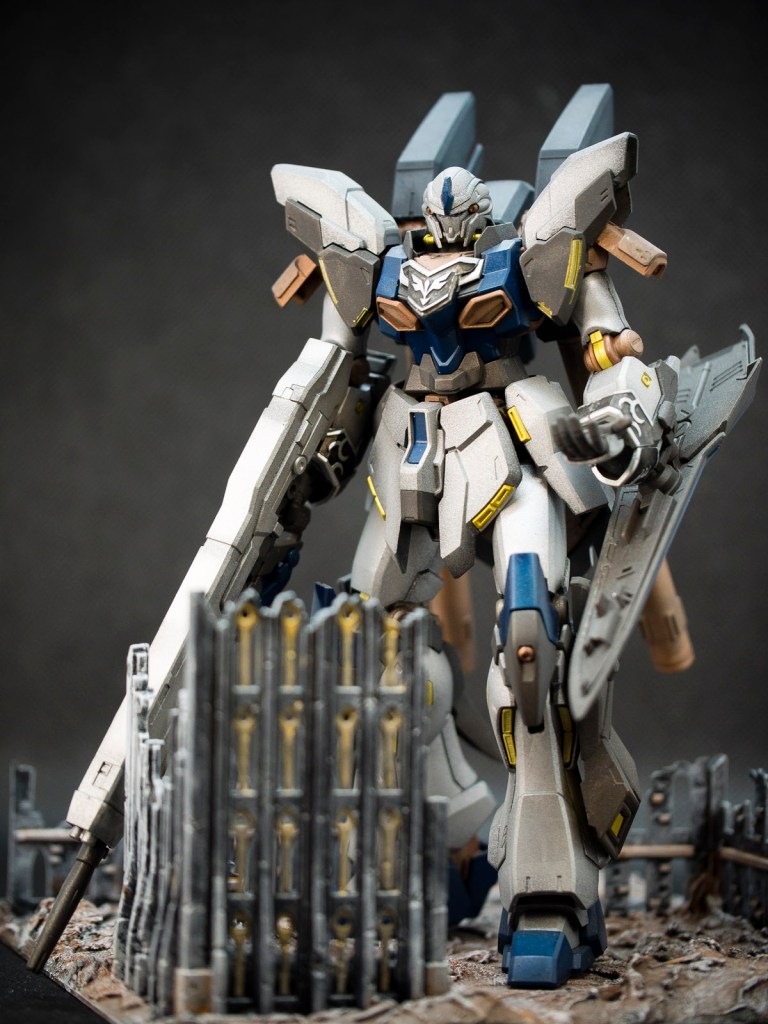
I am not too keen on the original lemony yellow accent of the Mudrock but after playing with some colours, the Teal blue and off white base colours actually worked quite well together. Don’t look too closely on this kit, the details and panel lines are not deeply cut in early 2000 hence there are lots of searing from panel lining, I tried to clean up as best as I could, but I am not patience enough. Also my masking isn’t really up to scratch, there are several places with the paint bleeding and I have to touch up using hand brushing.
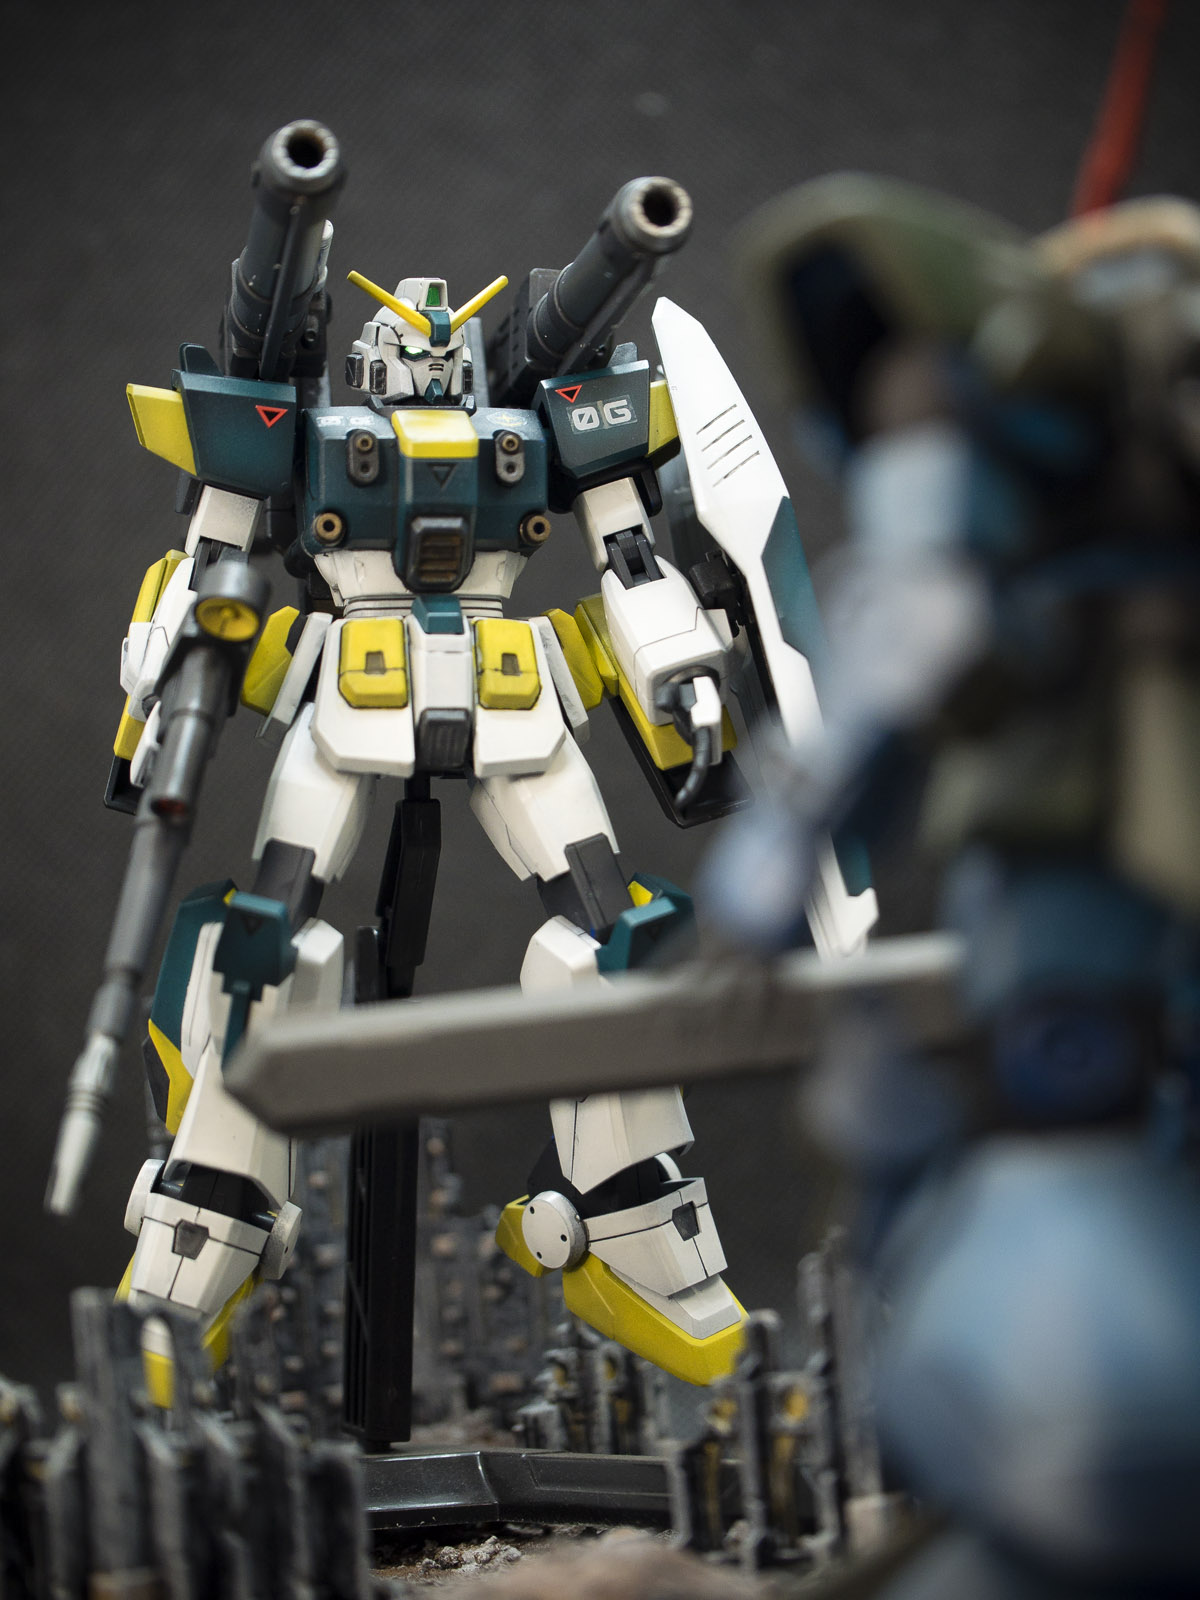
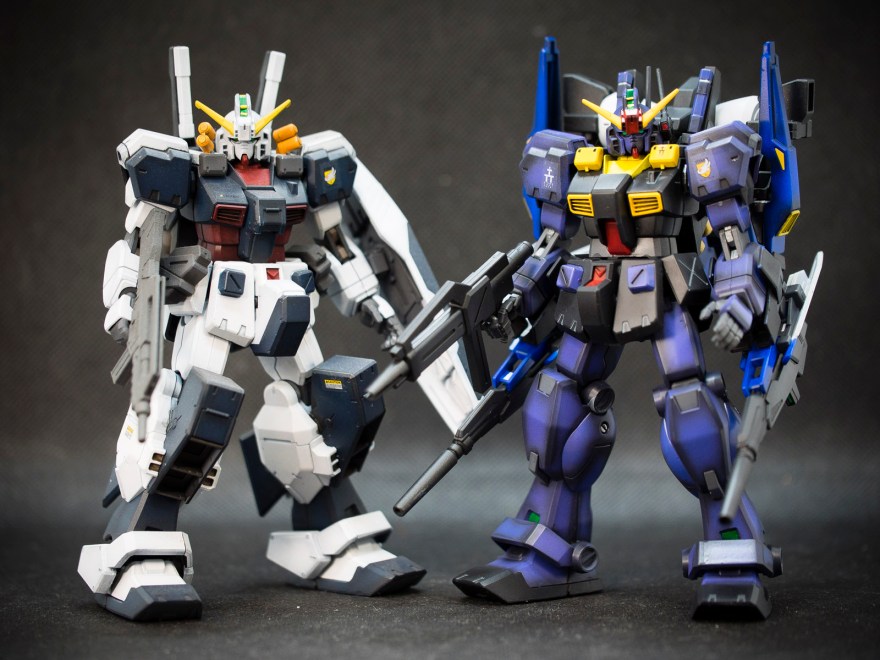
Saying that, once I completed everything and assembled everything together, I am really surprise how well the colour combination turned out. The kit looks mecha handsome with its edgy corner, the huge weapons and shield gave it a battle ready look. Both my Mudrock Custom and EG RX-78-2 look like they are ready to be deployed.
This is my Mudrock Custom standing next to the mine other improved moulding of the Blue Destiny. Although you may not seeing the parts separation, but you can clearly see the vents and waist cannons on the previous units looks sharper and more defined. There are not much difference in terms of design between the newer moulding and the old, but I can see that the Mudrock as a slightly slimmer leg tight compared to the new models. This makes the new models having a slightly stubby look.
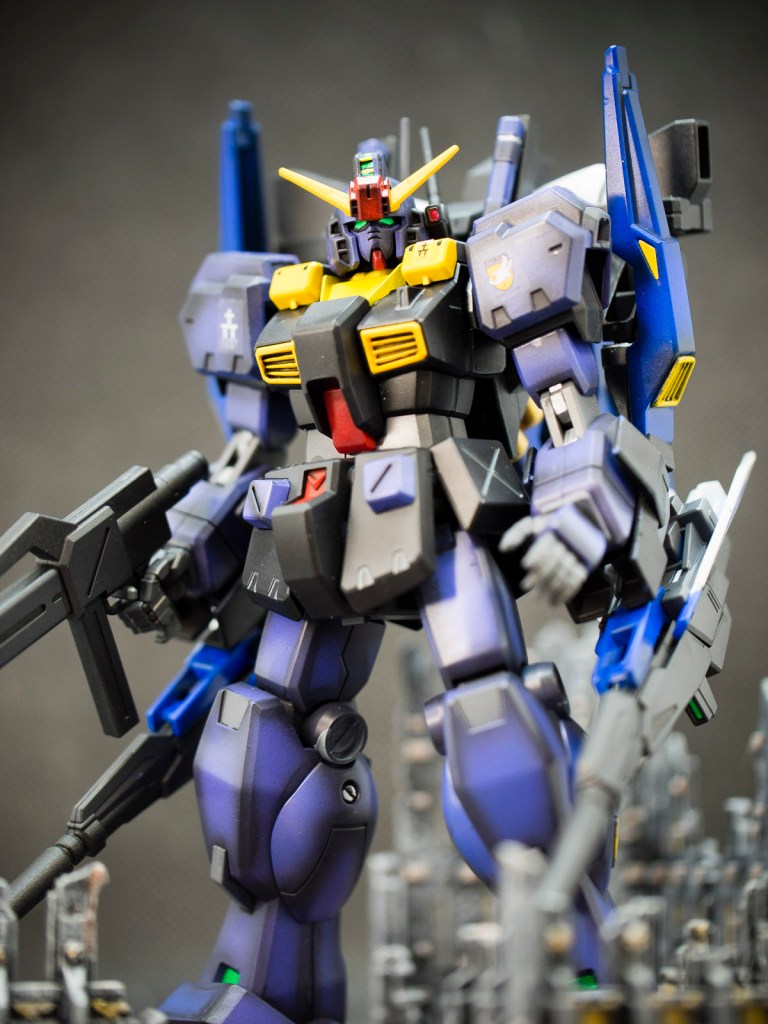
I gave my Mudrock Custom the number “06” because it is the 6th variant of the RX-78, I also used some red triangles to help give it a more closer representation to the actual Mudrock. Deep down, I know I had made a lot of mistake painting this, but I actually do like the colour, the customised weapons and look. This unique colour kind of refreshes and stood out on the shelf of my other entire similar colour Gundam. This is also a trash kit of the year for me but I am glad I finished it.
If you like my work, please consider liking my blog post and take a look at my previous projects so that I can proof to my wife that these plastic toys taking over the shelves are more influential than her Chinas.
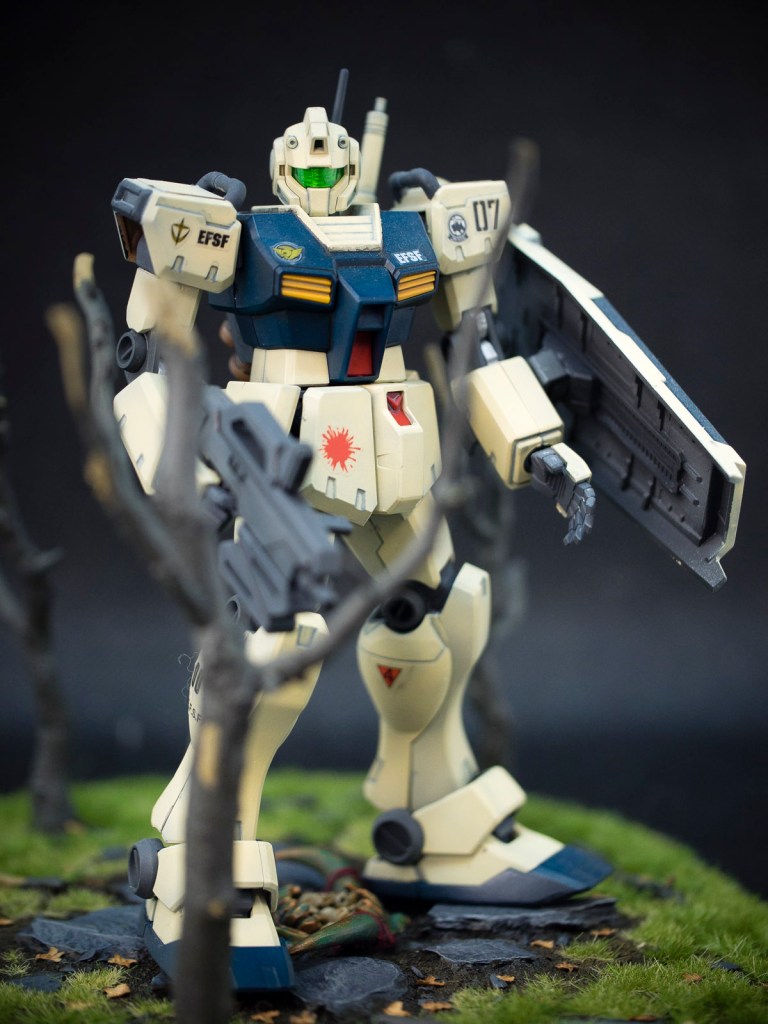
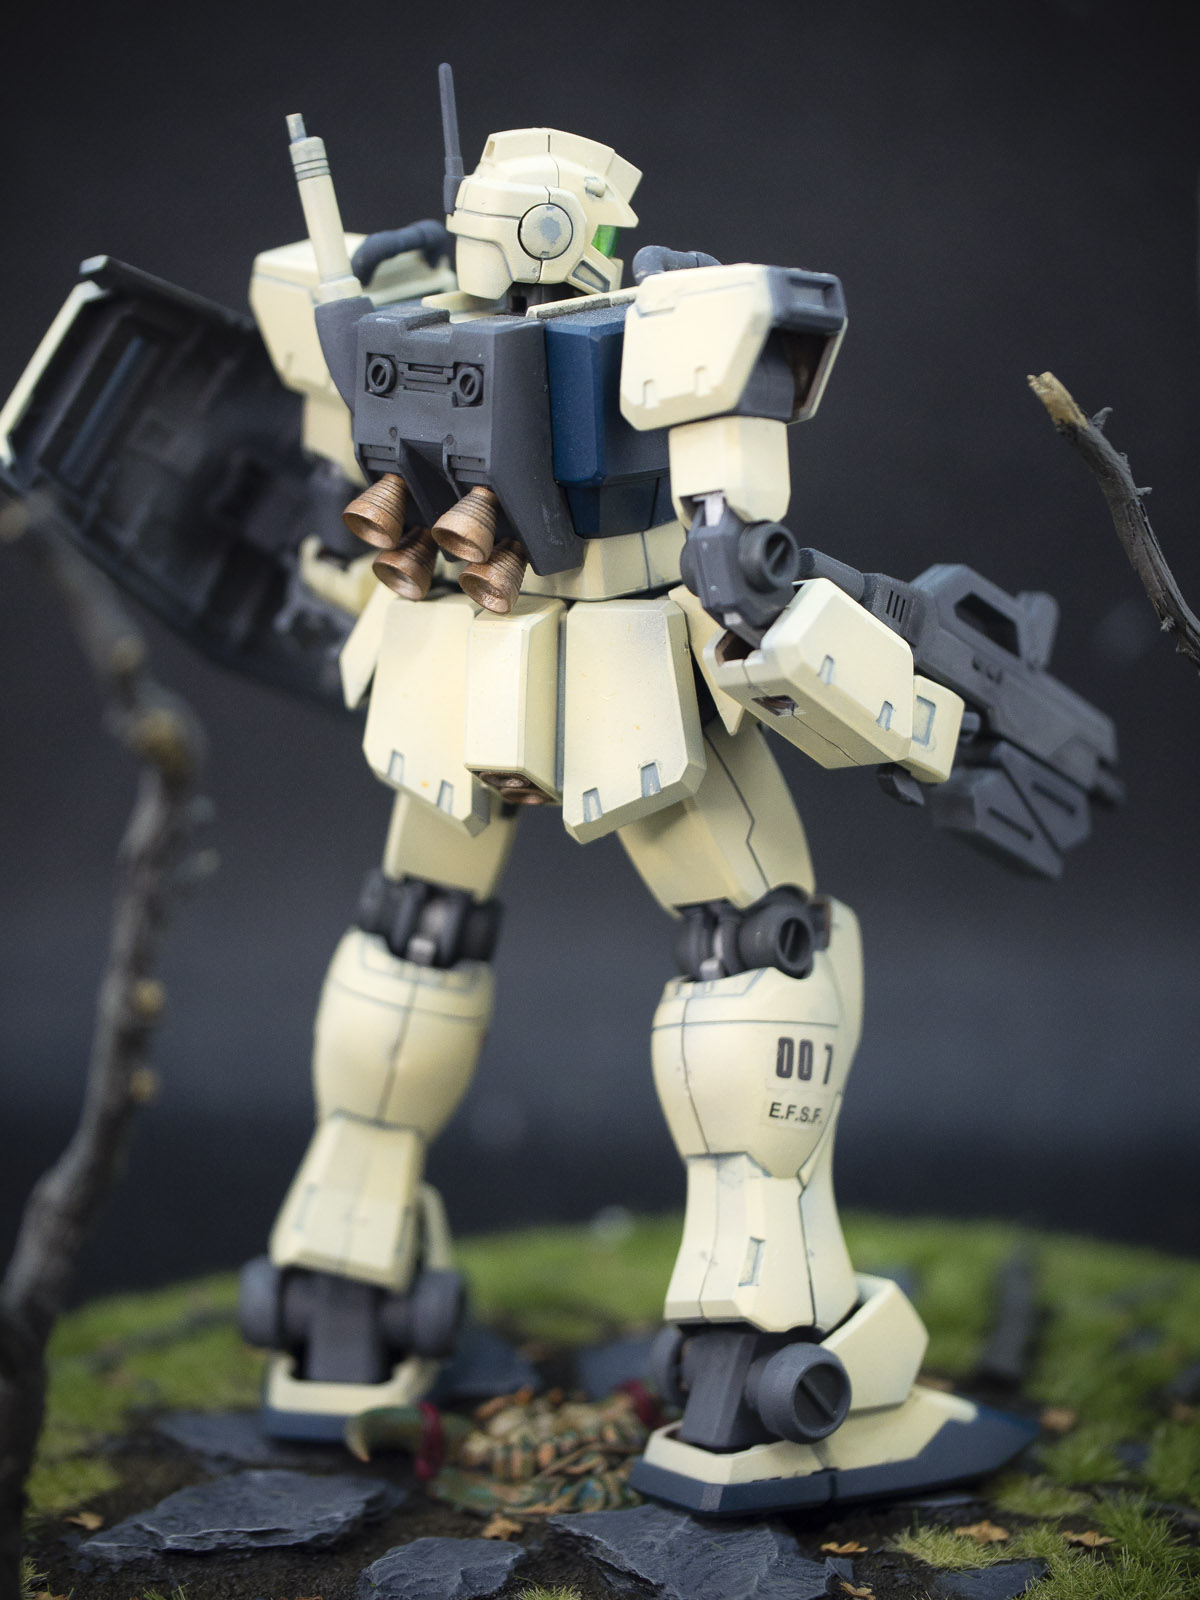
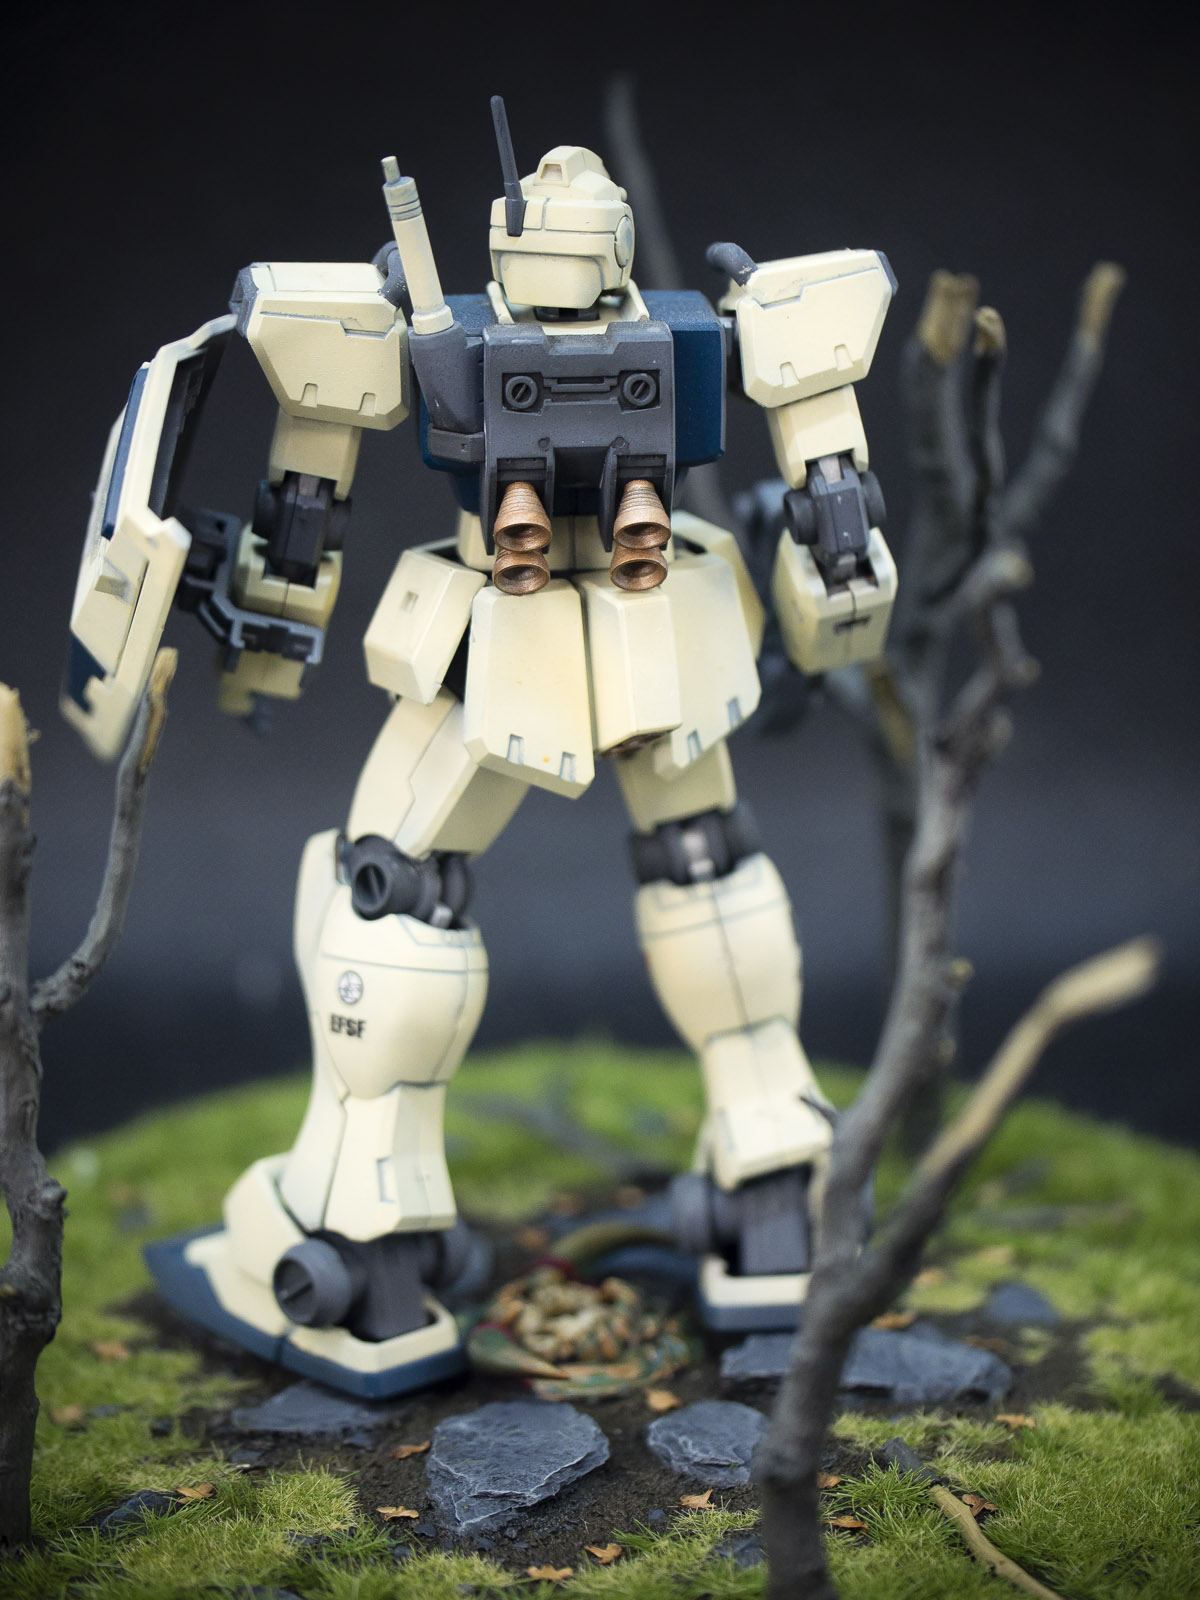
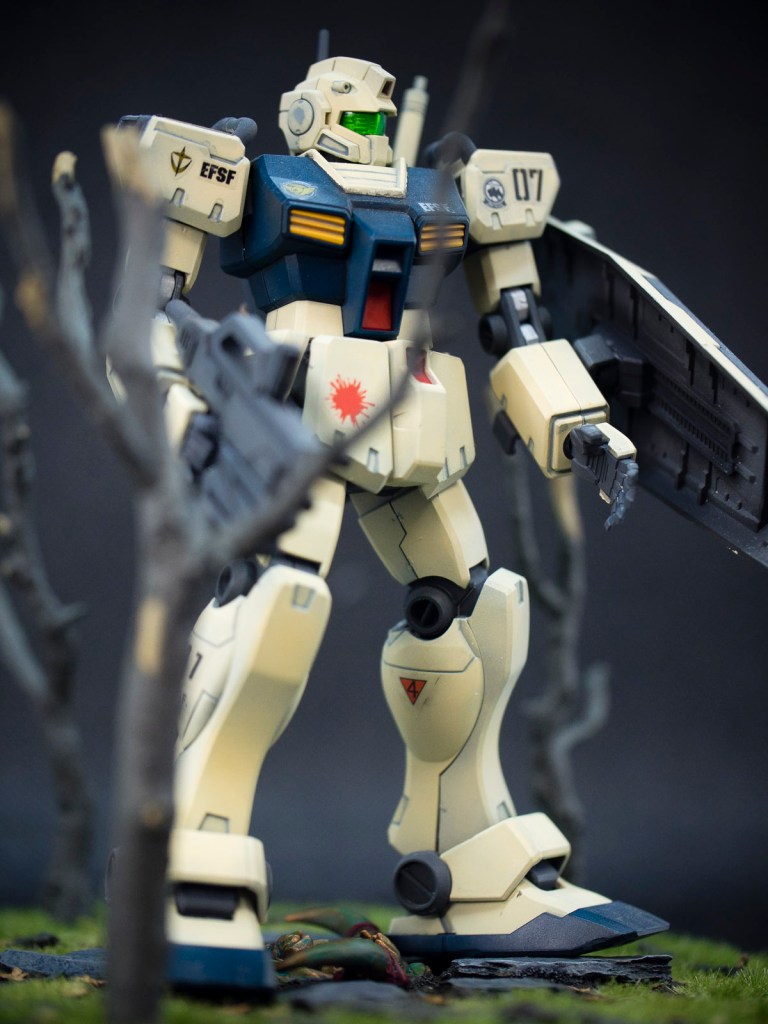
This is another attempt to update my older blogs with better photos. Bandai 1/144 HG RGM-79C GM Type C is one of my favourite GM to be fair the anime Stardust Memories came out with several designs that are quite high up on my list of favourites. This is also an anime where I believe more engineering thoughts are put into the mechas’ drawings and design.
I am usually into kitbashing and modify mine kit to give it a personal spin, but I struggle to come up with a better idea other than to paint this to how I remembered it when I was much younger watching the anime. I also gave it a beam rifle from my Hazel.
This Type C GM has become the run off the mill at the later end of the One Year War, I have to say this is a much better looking mecha than the original Red and White cannon fodder GM.
This Type C GM has become the run off the mill at the later end of the One Year War, I have to say this is a much better looking mecha than the original Red and When you compared it to the EG RX-78 Gundam, you can see that the GM Type C has a slightly bulkier design, I would love to say that this Type C is an improved version but sadly no.
If you like my works please consider supporting this page by visiting my other previous projects.
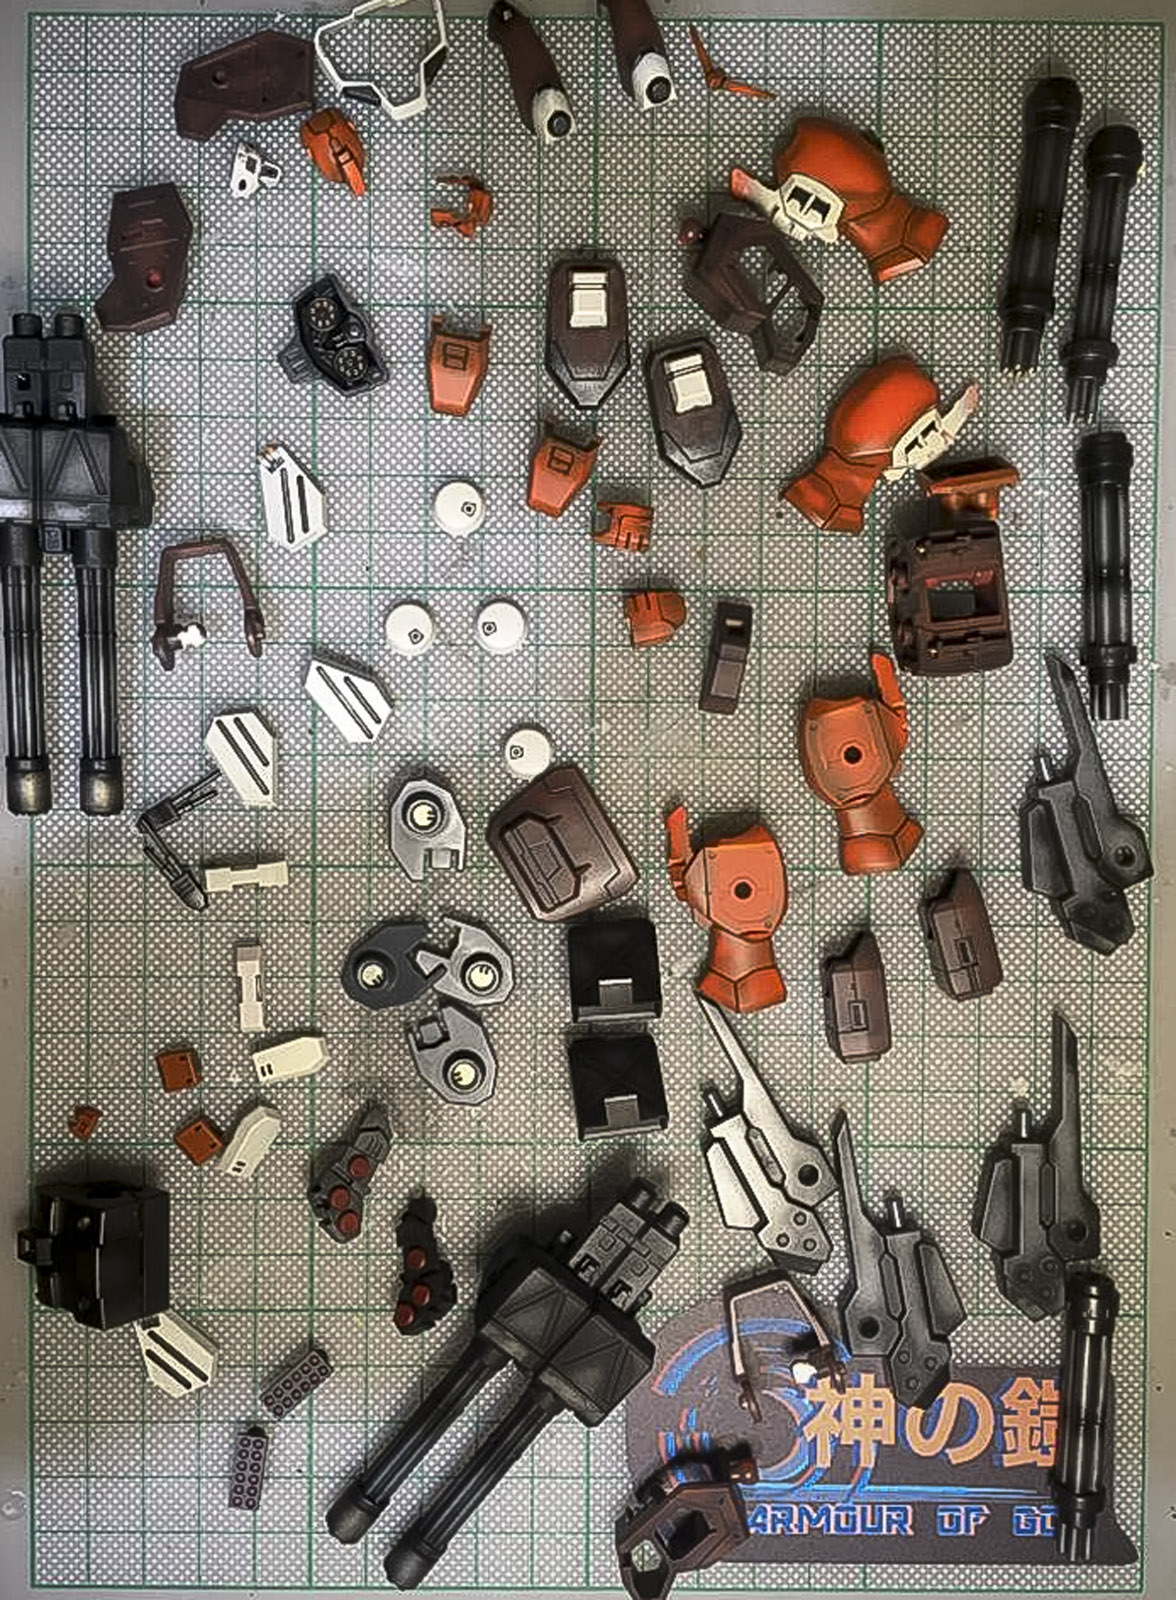
This is the latest “Revive” version of Bandai 1/144 HG XXXG-01H Gundam Heavyarms; if you are ever lucky enough to grow up assembling one of the love & hate anime to plastic toys to help expand an plastic toy empire yes it will be the Gundam Wing Series and if I am not wrong the other most “milked” series in Bandai history. I am not saying the plastic quality are bad, it is actually very good when I was a kid, also if you want a double Gatling Guns for kitbash you will have no choice to get the original 1/144 Heavyarms Custom from Endless Waltz.
I am fortunate enough to get my hands on a pre-order kit from www.armourofgod.co.uk, they are a UK based online shop that has been my main supplier of kits since lockdown from March 2020. Please check them out if you are looking for kits, but be warned they do sell out very quickly.
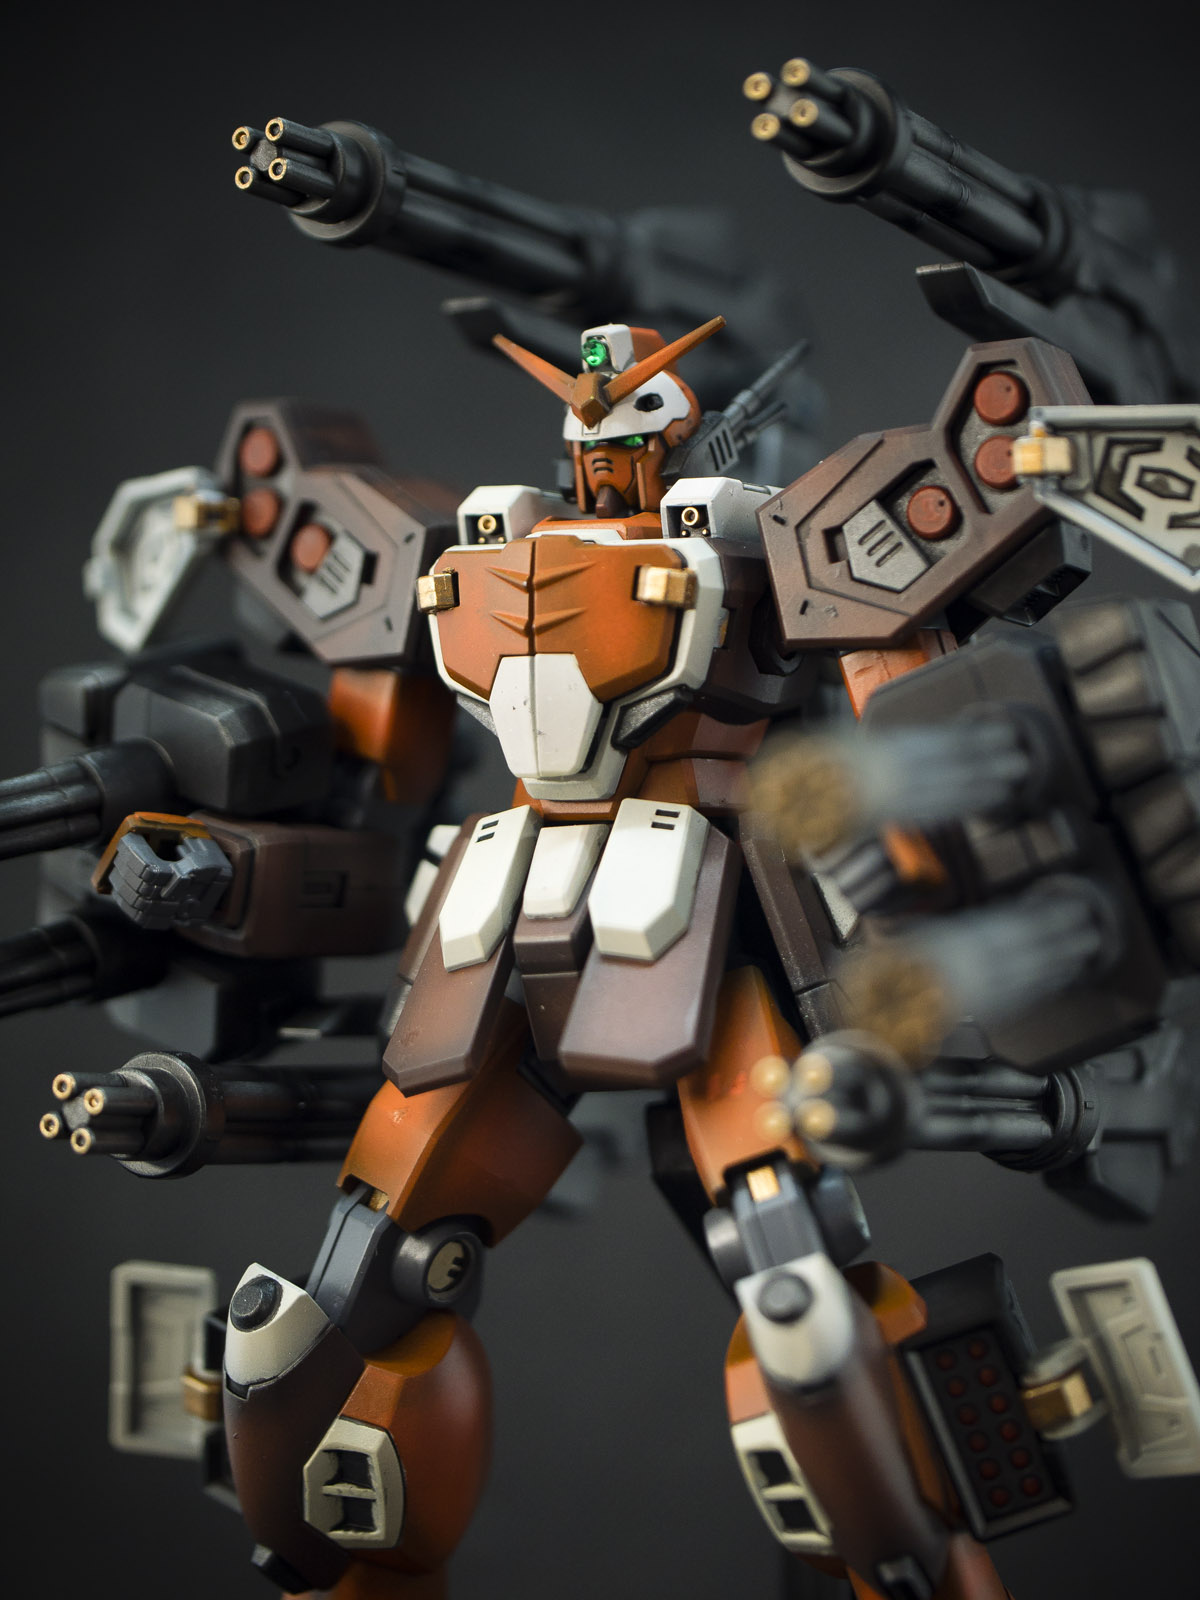
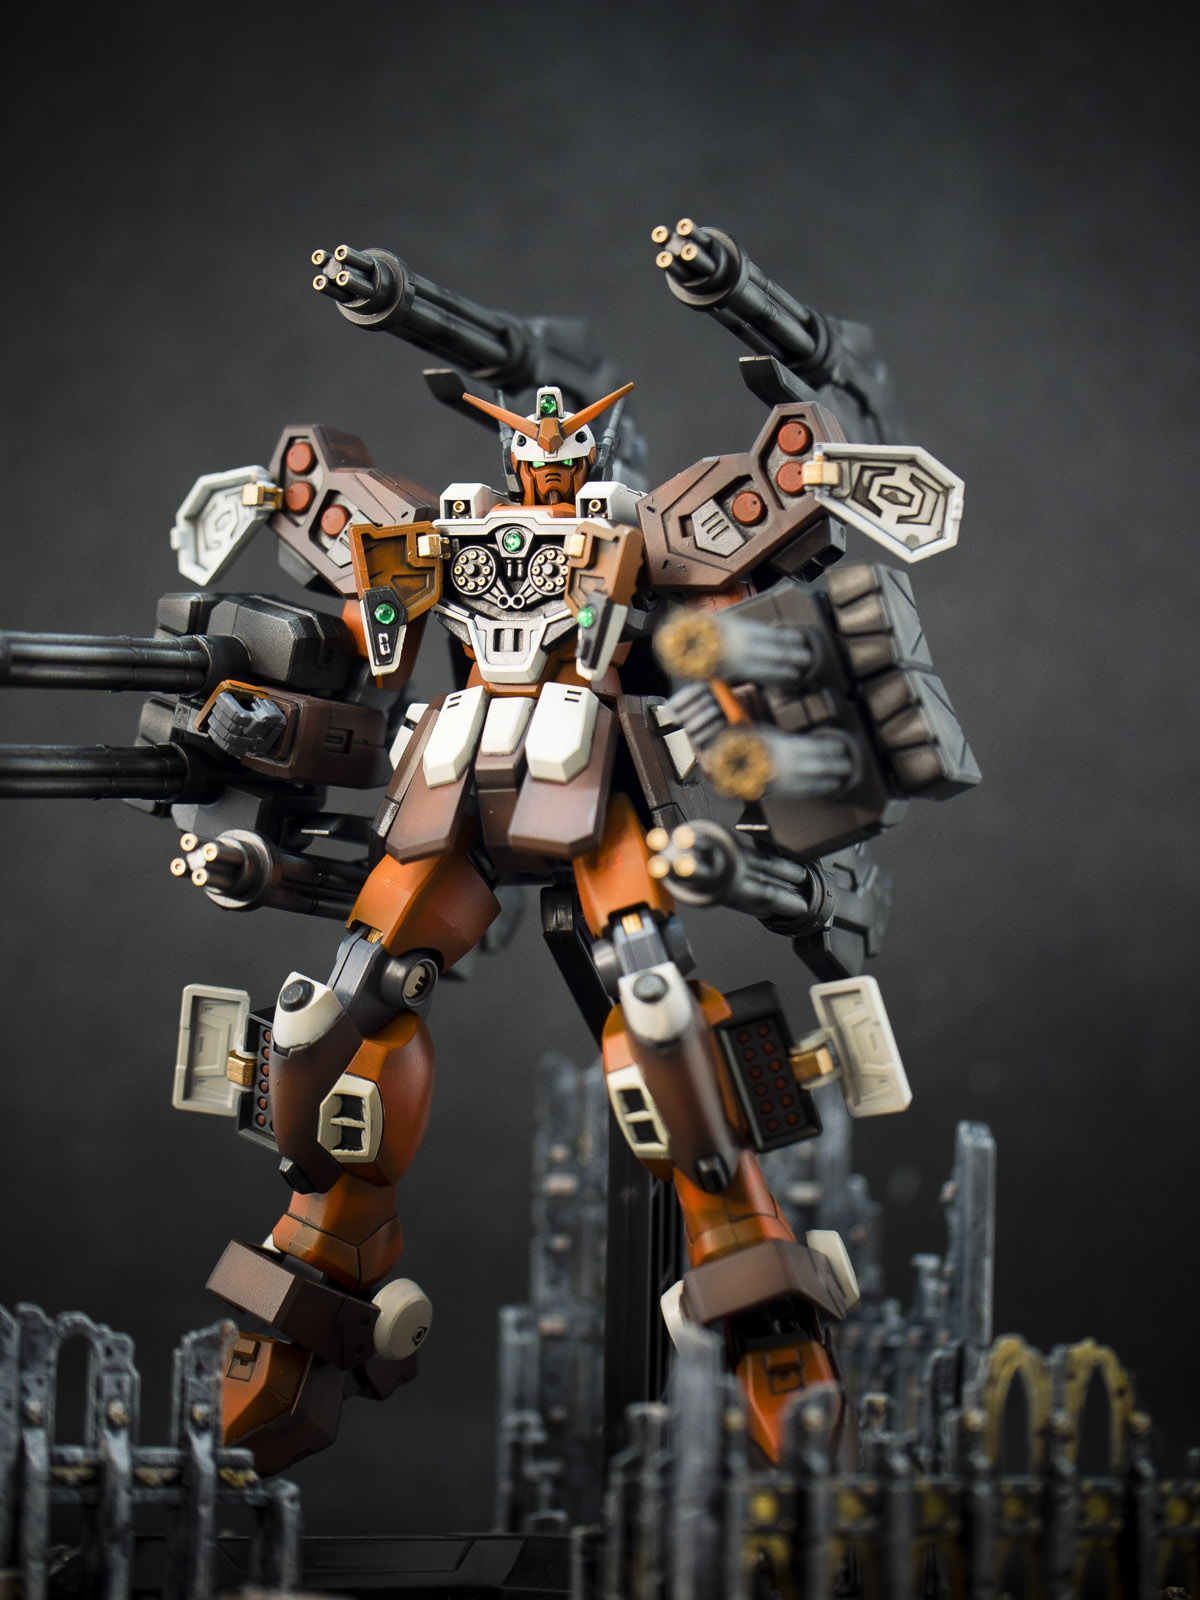
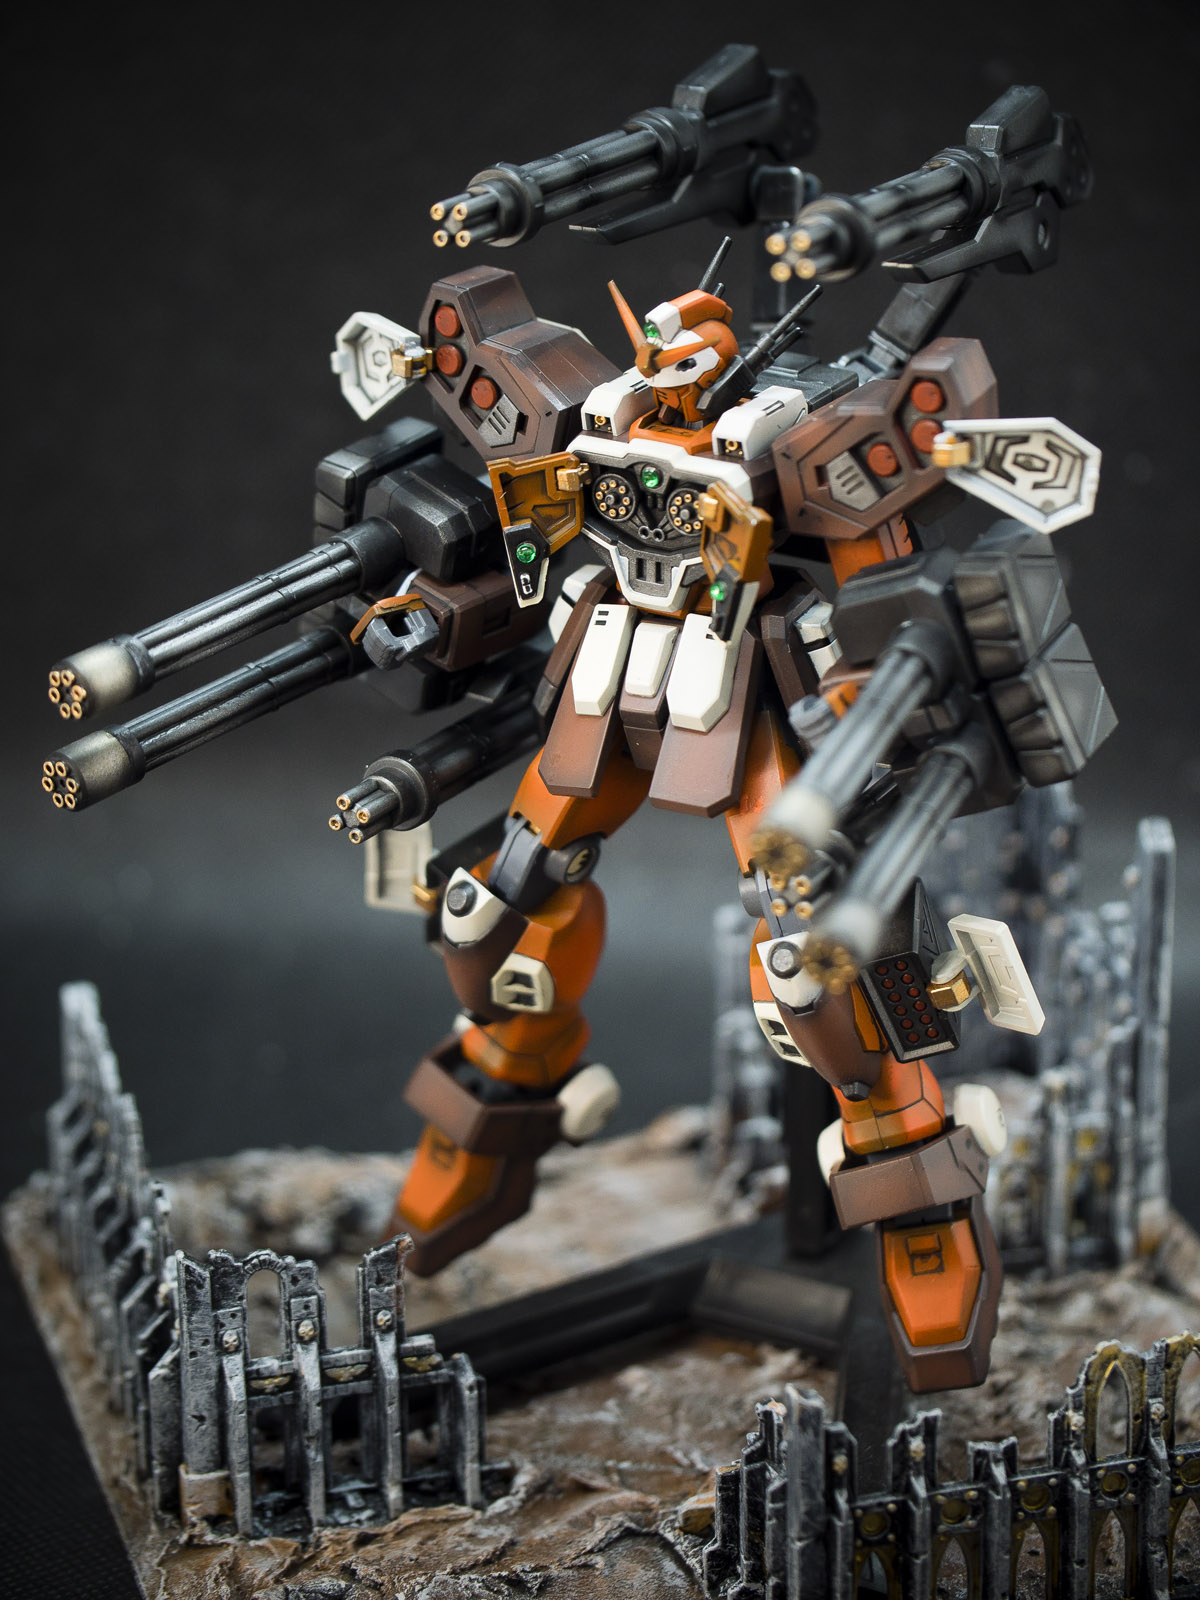
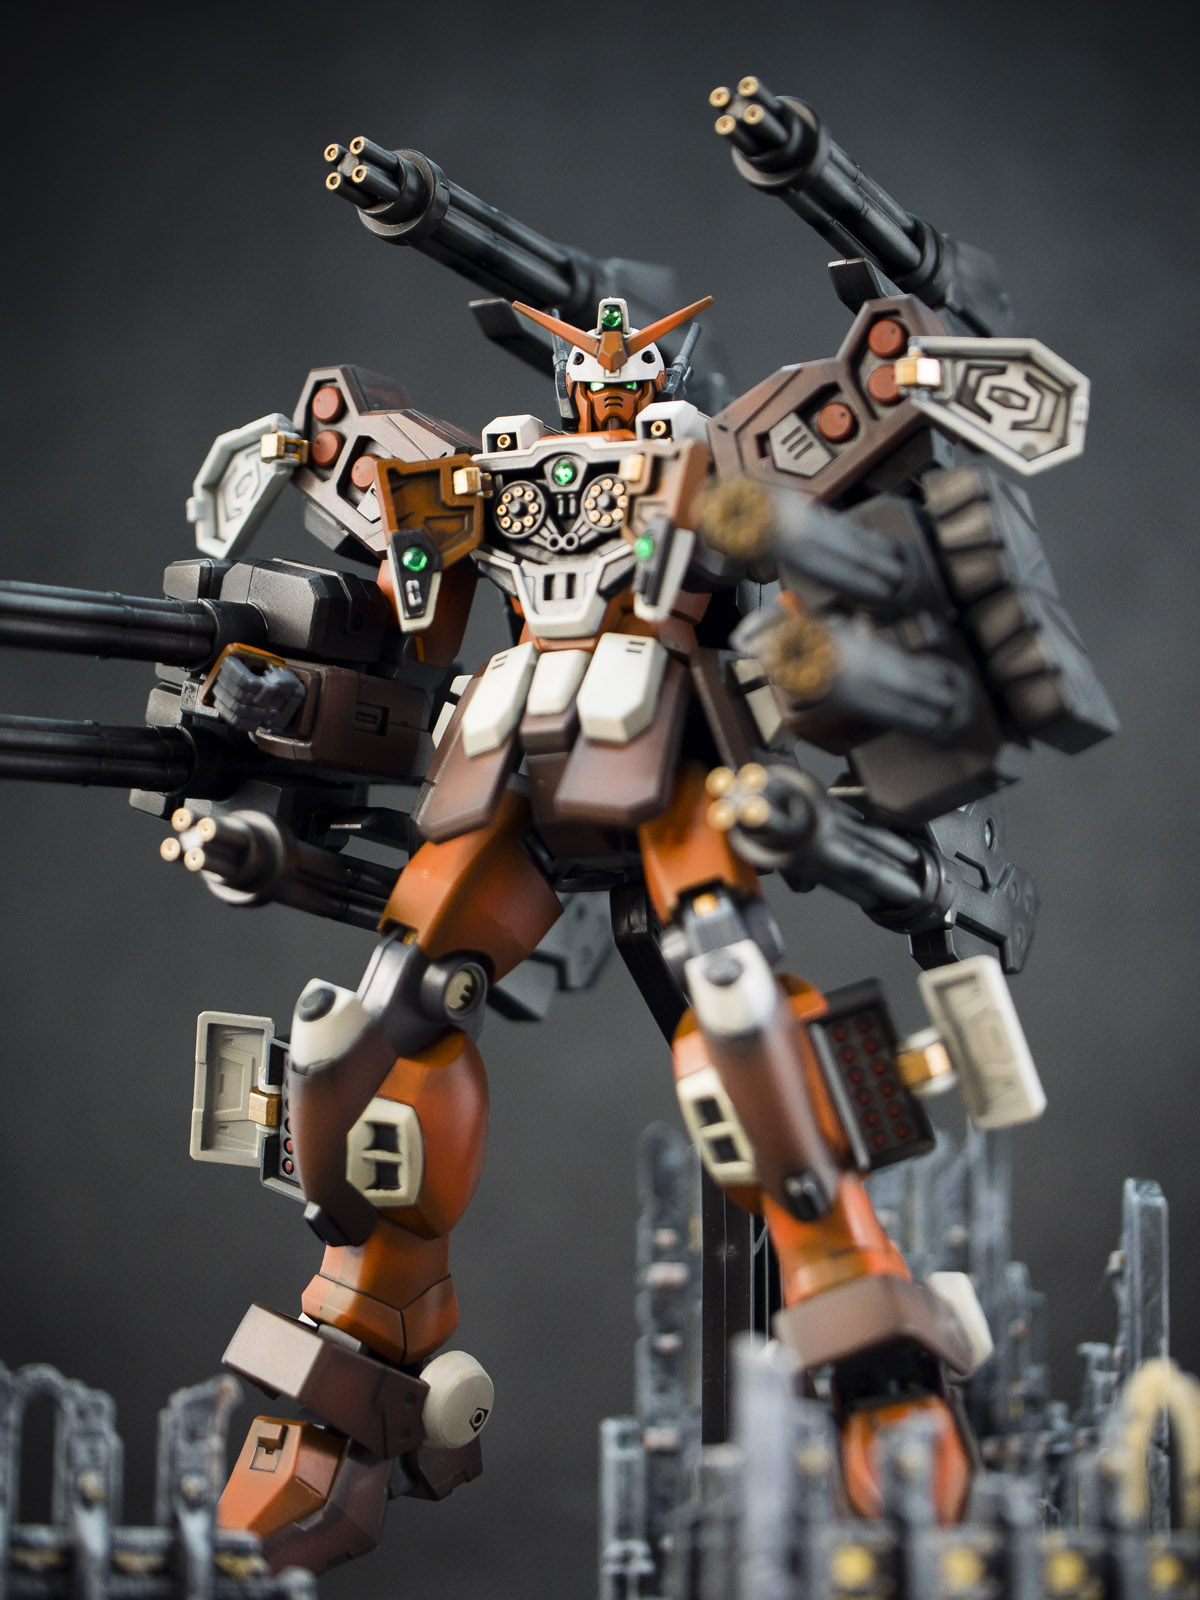
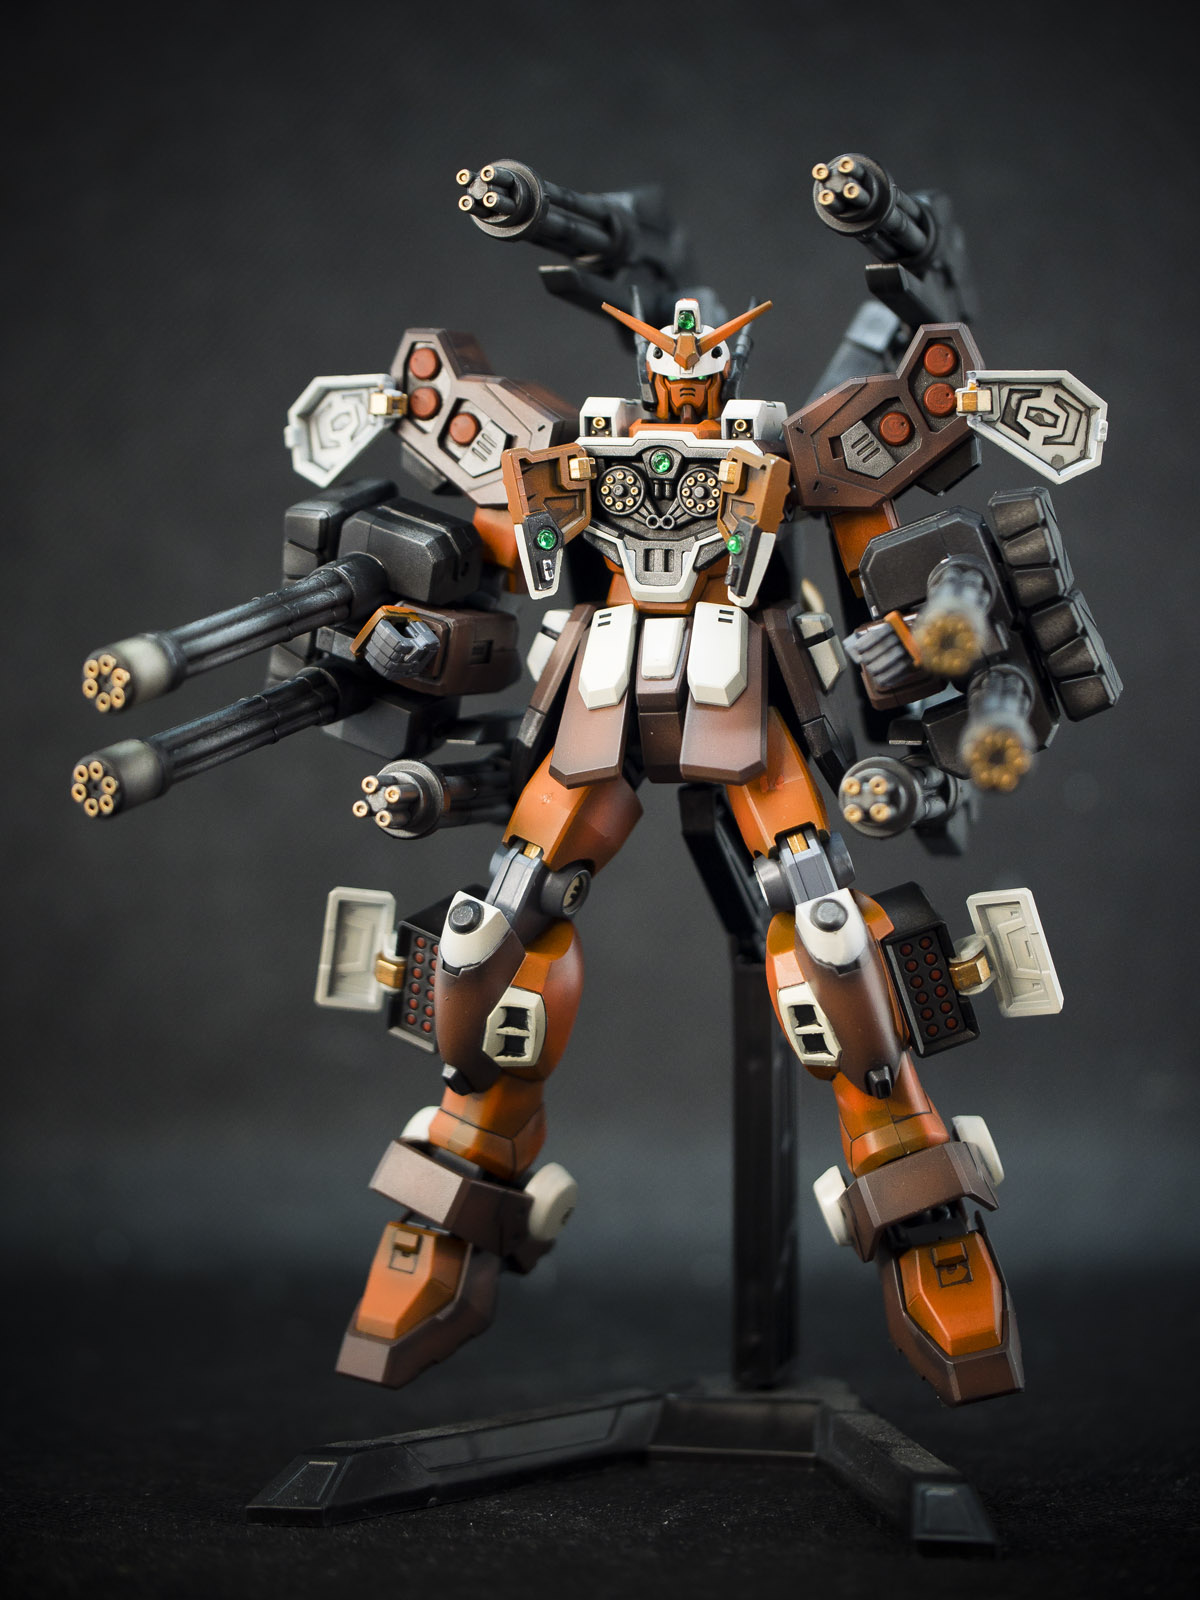
To be honest, I have not been Heavyarms greatest fan, being an engineer and army I just do not believe in chest Vulcans or a heavy Gatling Gun as a hand (it makes it so imbalance…part of the Gundam lore); I mean it is a cool gimmick when I was a kid but I think it just takes the sci-fi fantasy one step too much for me. Ok ok! Mine quadruple Gatling guns are a bit over the top but I am just “compensating” and trying to help the pilot to shift the weight balance of the machine for efficient manoeuvrability
The other gripe I have with Heavyarms is the White/Orange colour which just for me do not match with the heavy gun blazing machine; I think the series did tried to fix it by giving it a new colour in Endless Waltz by changing it to White/Blue but it is still a bit of a half arse fix because the colour don’t even match the personality of the pilot.
Nonetheless, this is Gunpla and I am able to change out the colour to whatever I want. Thus, one of the reasons why it took me a while to get this kit started is because I can’t make up my mind about which colour scheme to go for BUT if you really want to know, I blame Covid for delaying the postal service from overseas (I think Brexit played a part too).
I finally went for a Cheddar Cheese colour which is based on Beam Master and Baster Master from the Build Divers Series. The Beam Master and Blast Master design is based around a long range support unit with lots of weapons. Hence I thought since my custom Heavyarms will be kitted out with lots of guns I thought it will be great to give it an Orange based colour and take up a support role for the other Wing Gundams.
While building this, I come to realise that the kit quality and assembly design has really come a long way since. The parts separation for colours and painting is actually really good; even if the parts are not separated they have relatively sharp corners to allow easy masking. Thus, I am really able to mix if lots of different colour combination on a HG kit.
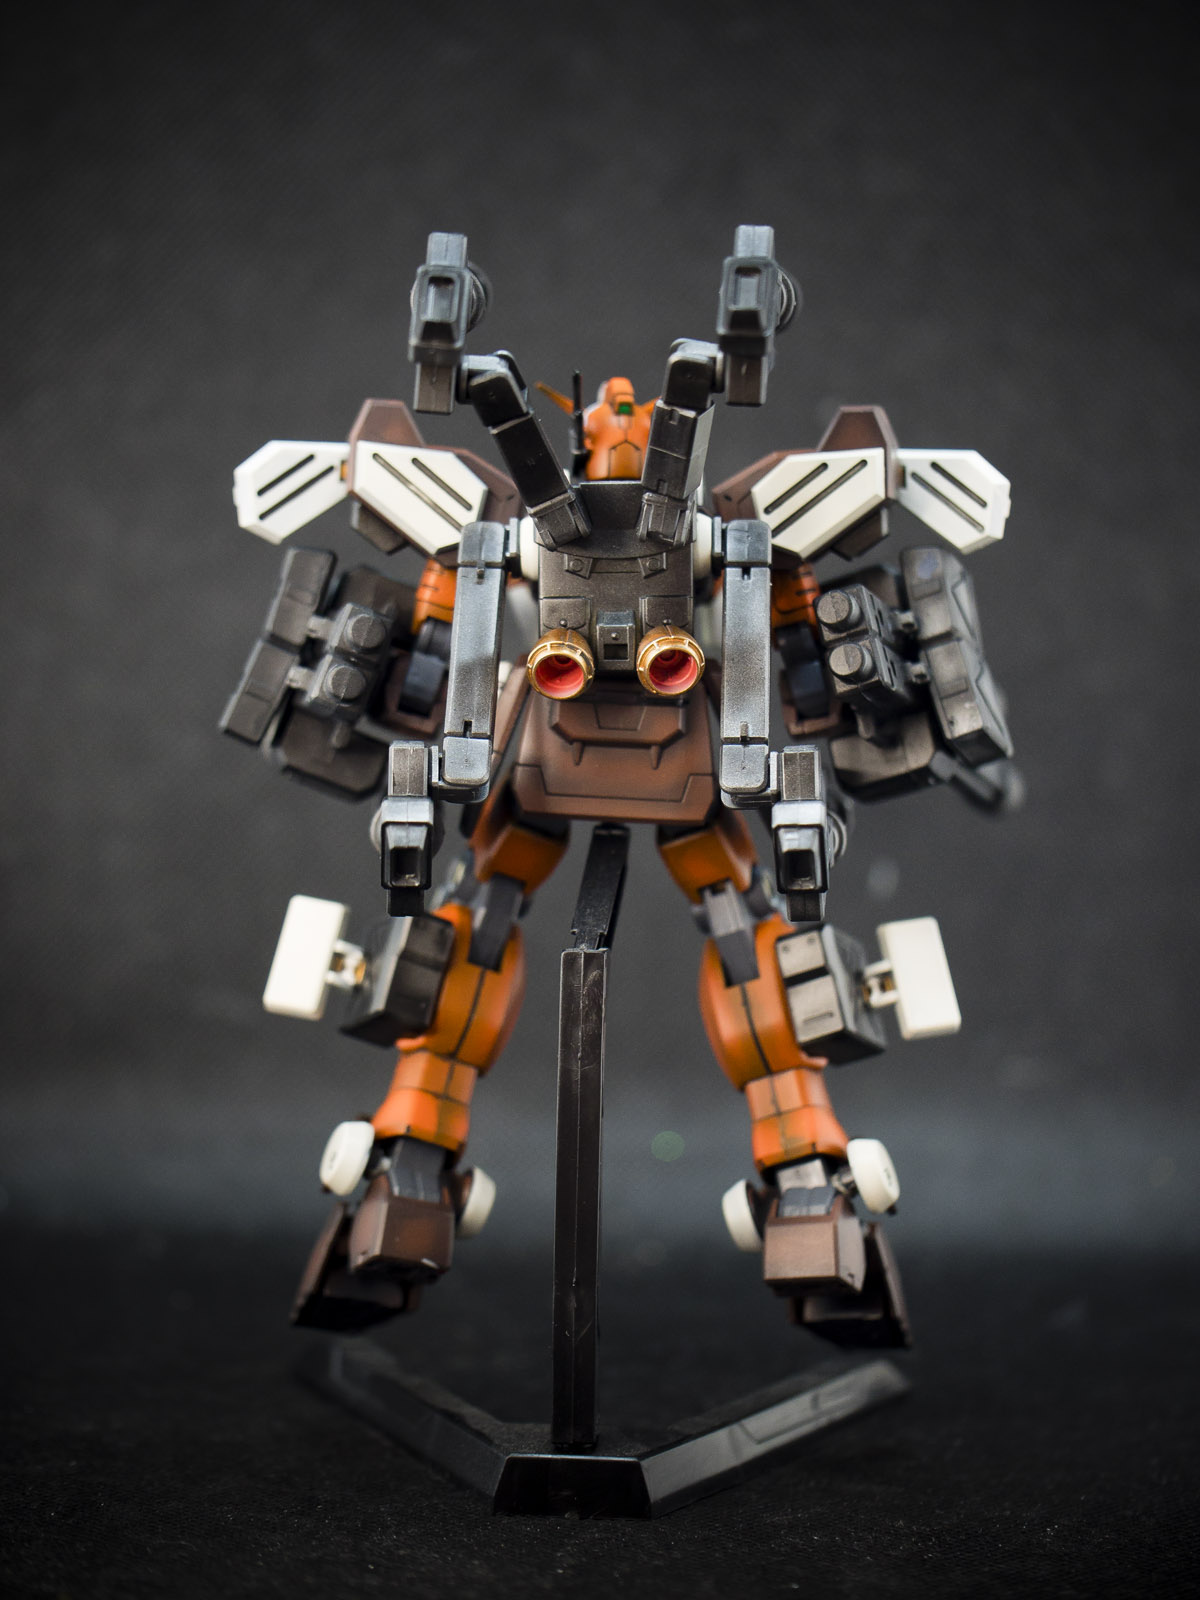
Articulation is not bad as well, but because I have overloaded my Heavyarms the legs tend to separate on its own after a while, hence I have to put it on a stand; or some people will strength the hip joint with dry glue.
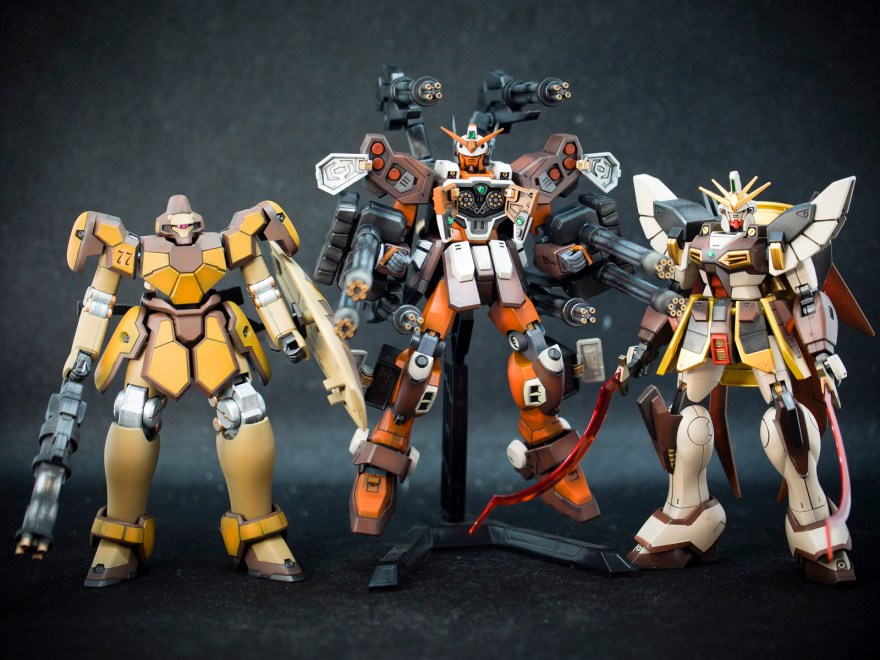
Slowly and surely, my customised Wing Gundam Team is coming along well, Bandai did recently announced that the HG Deathscythe will be released later in 2021. In a way I do like to customised my kits and I like them to be uniquely different from others, hence each of my Wing Team members have quirky kitbash to showcase its own individuality. From the left it is mine Altron, Heavyarms, Wing Zero and Sandrock.
In the anime, Heavyarms and Sandrock pilot came to work together in their own strange ways and hence I thought it will be good to at least pay a tribute to their friendship with a Maganac.
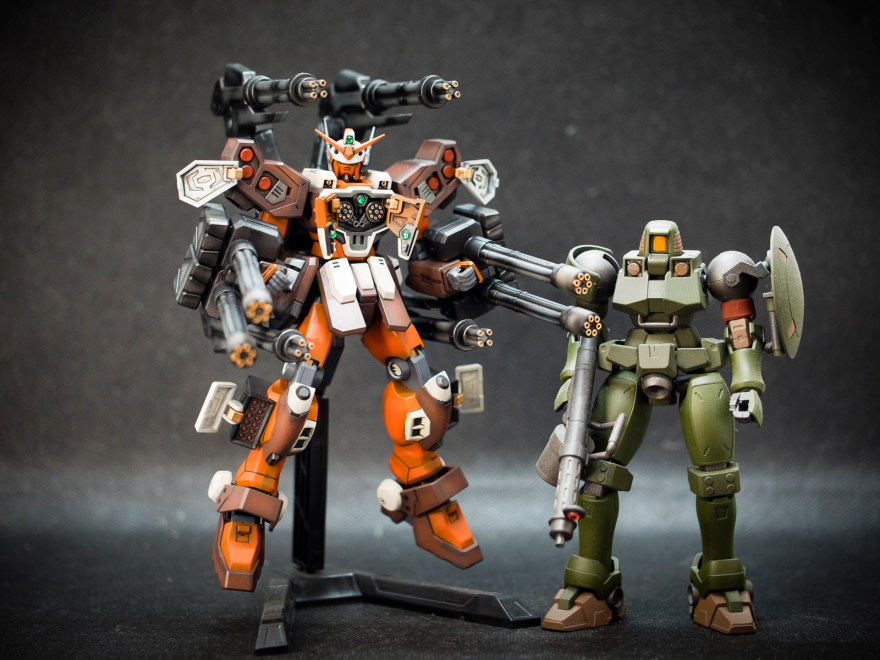
And finally it is fair to give a shout out to the Leo which is the receiving end of all the bullets Heavyarms spewed out throughout the anime. Oh Poor Leo!
And as part of a tradition of this blog I would do a side to side comparison of a common HG kit as a benchmark of size and design. I used to use a HG RX-78-2 Origin, but I think the EG RX-78-2 is a more common kit now days which most people starting out will probably had come across or build one.
If you like my projects, please consider supporting the continuation of my work by looking at my other projects so that I can build up a strong number of viewership to prove to my wife that this is worth replacing the china on the shelf with more plastic toys; I meant art with a “G”!
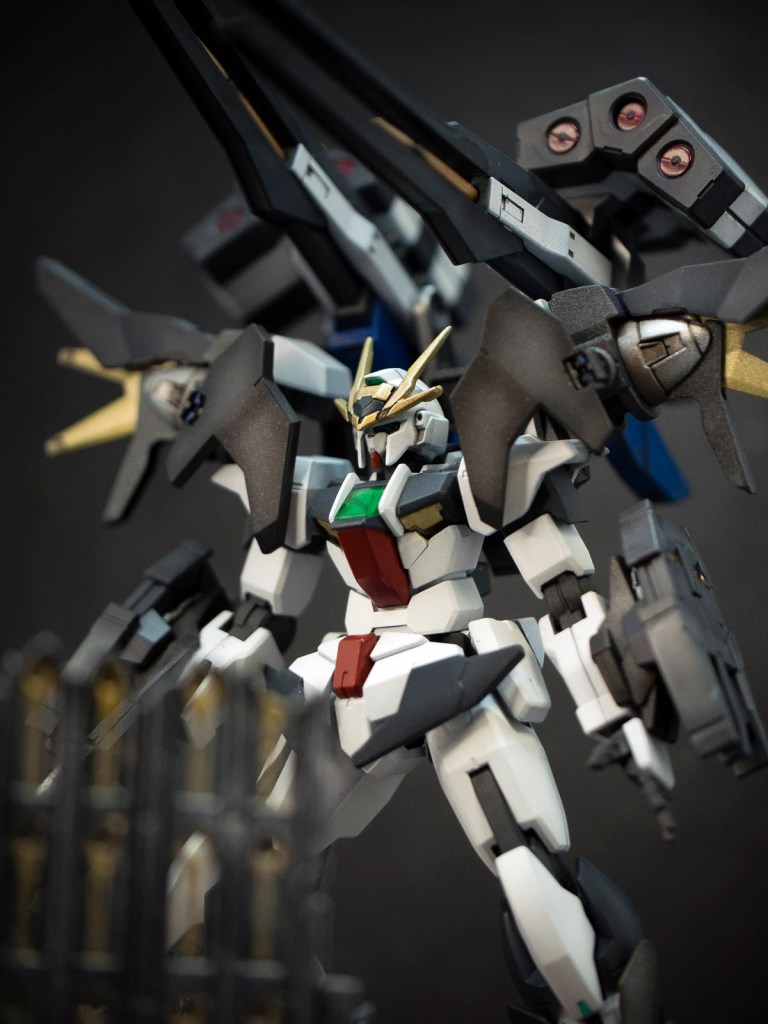
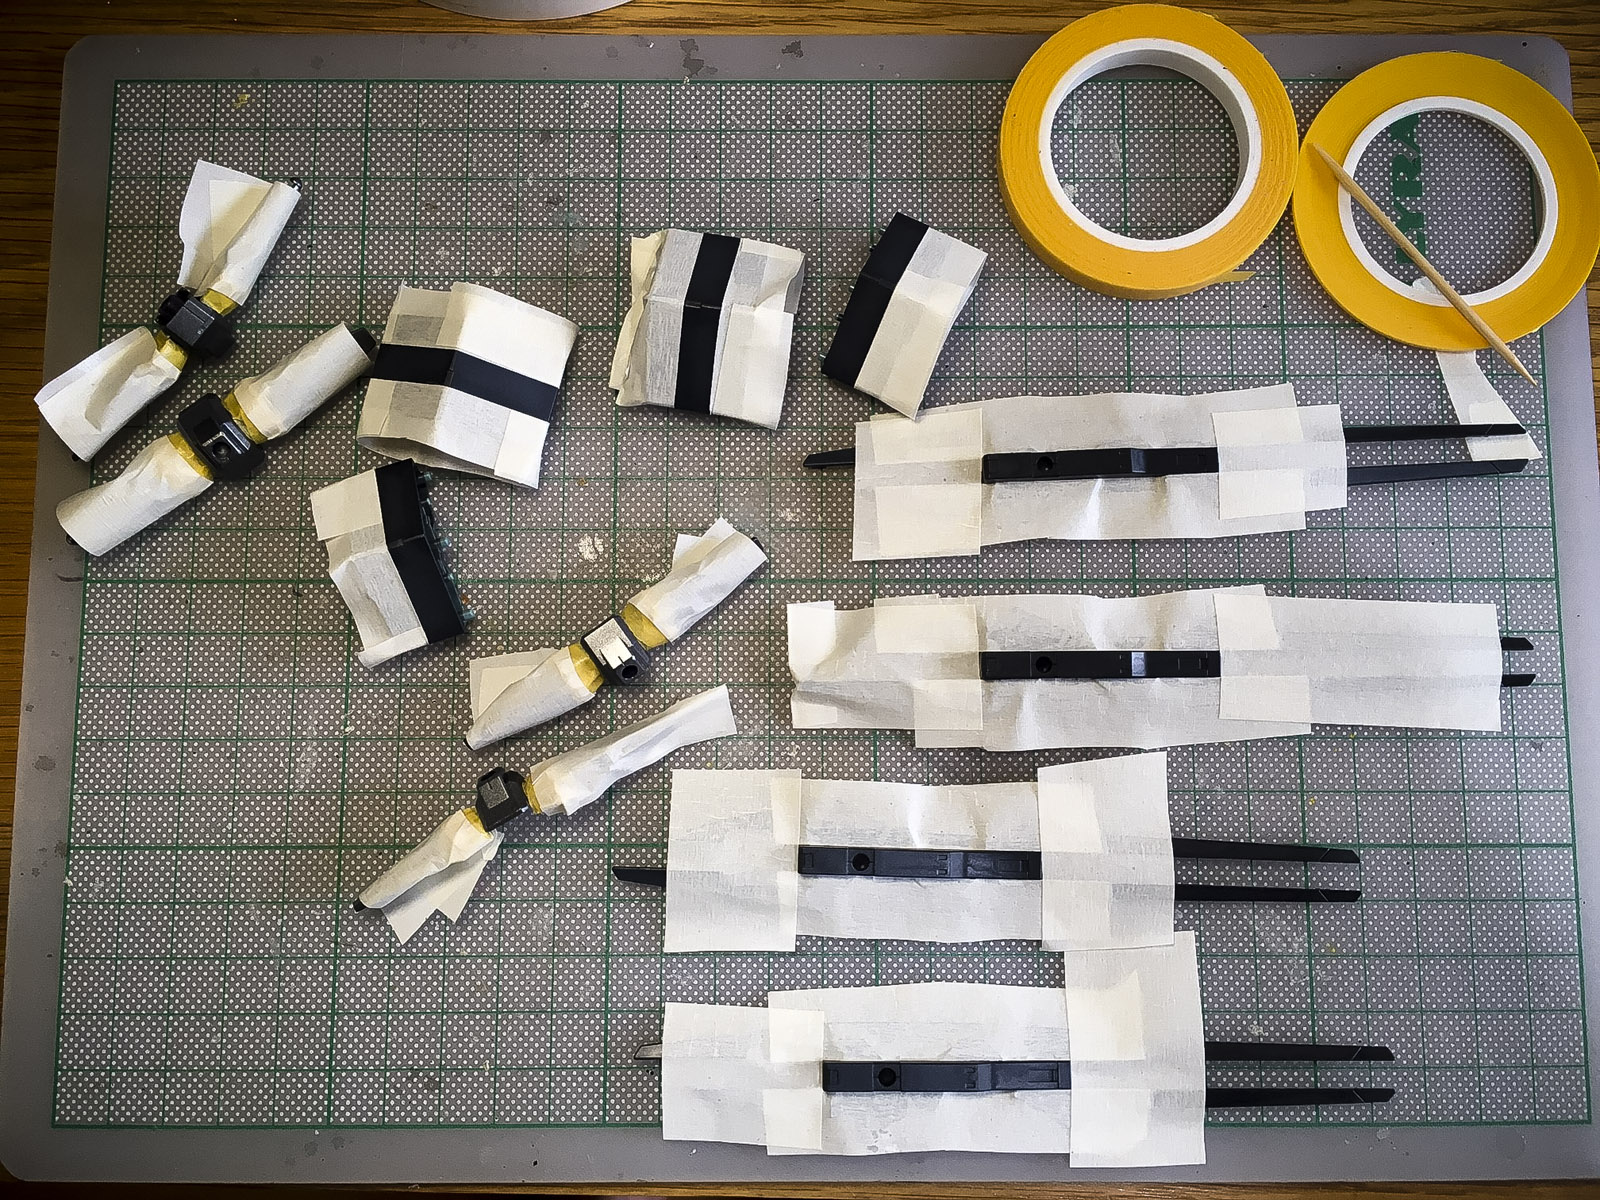
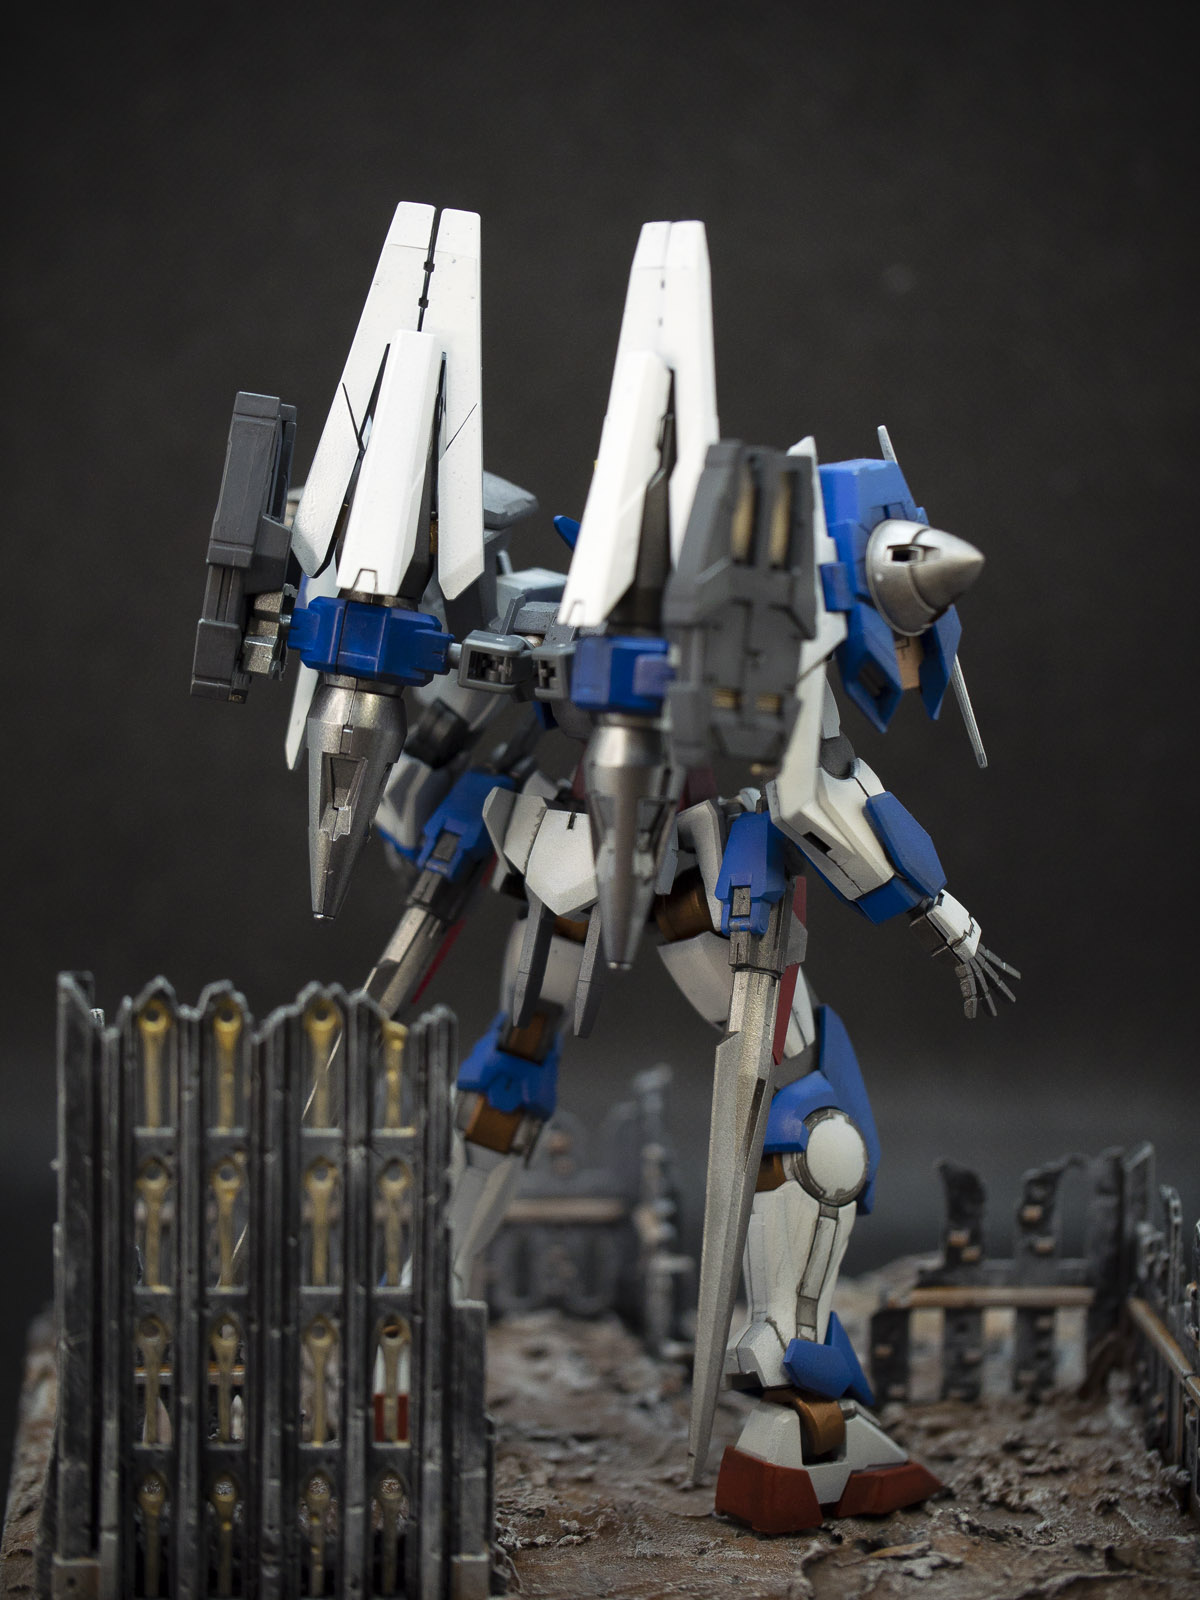
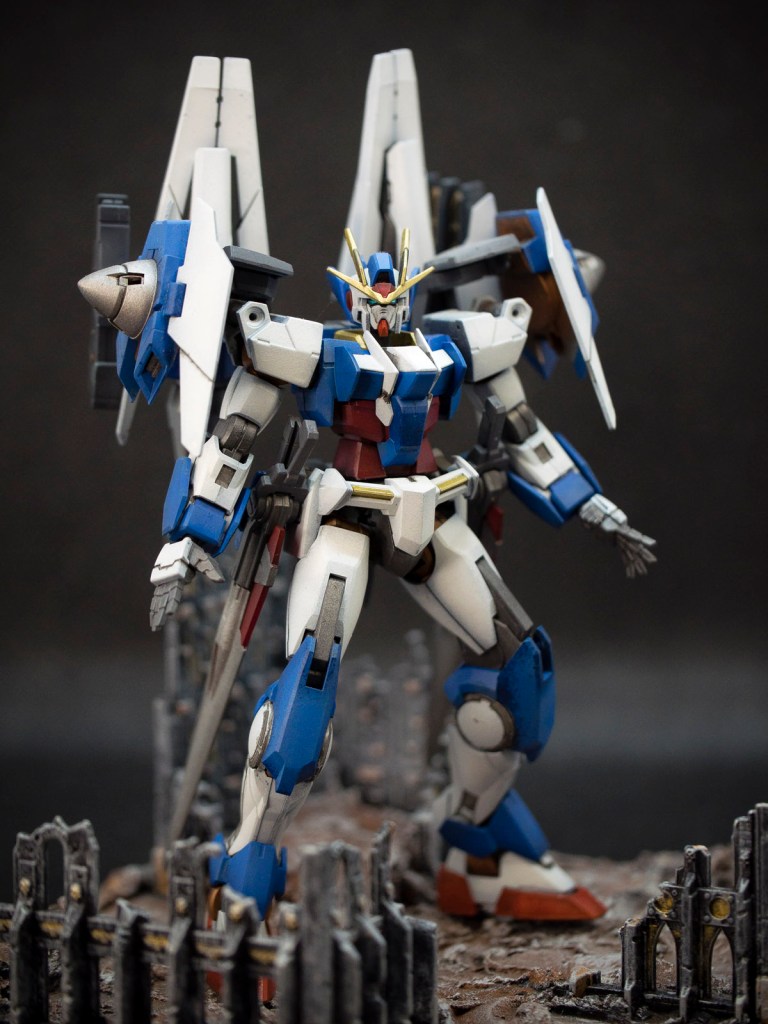
Bandai recently released another iteration of OO Sky with a backpack weapon set since I already have a OO Sky I just don’t need another similar version. But it happenes that www.armourofgod.co.uk has this kit in stock and just thought why not and bought a set off them to upgrade my own OO Sky.
The weapon set came with 2 different backpack option sets for the OO Sky and AGE2 Magnum, but since I do not have a AGE2 Magnum, I do have a OO Diver. The AGE2 weapon set does look like a GN drive so I thought it will fit nicely on my OO Diver.
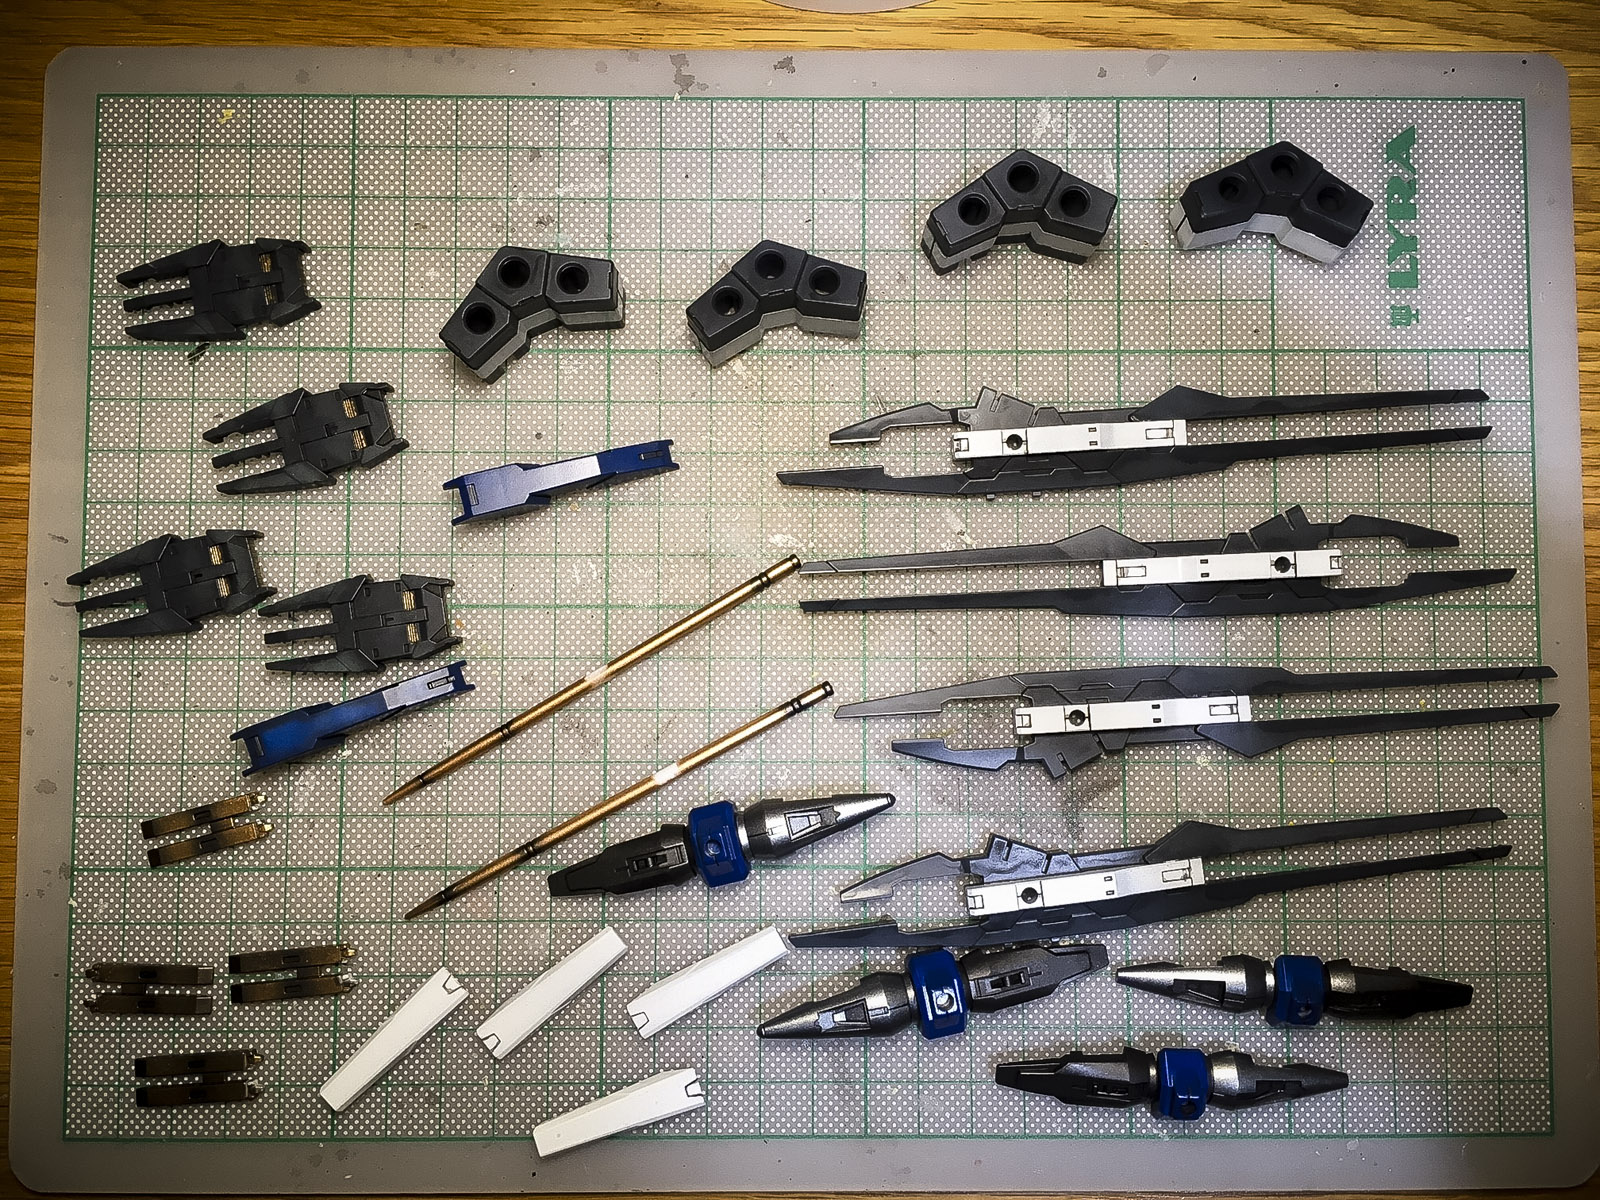
The weapon set is relatively simple and I have to say parts separation could have been better. Details are not bad but luckily most of the parts have good edges for masking. Yes lots of masking to make it look at least half decent.
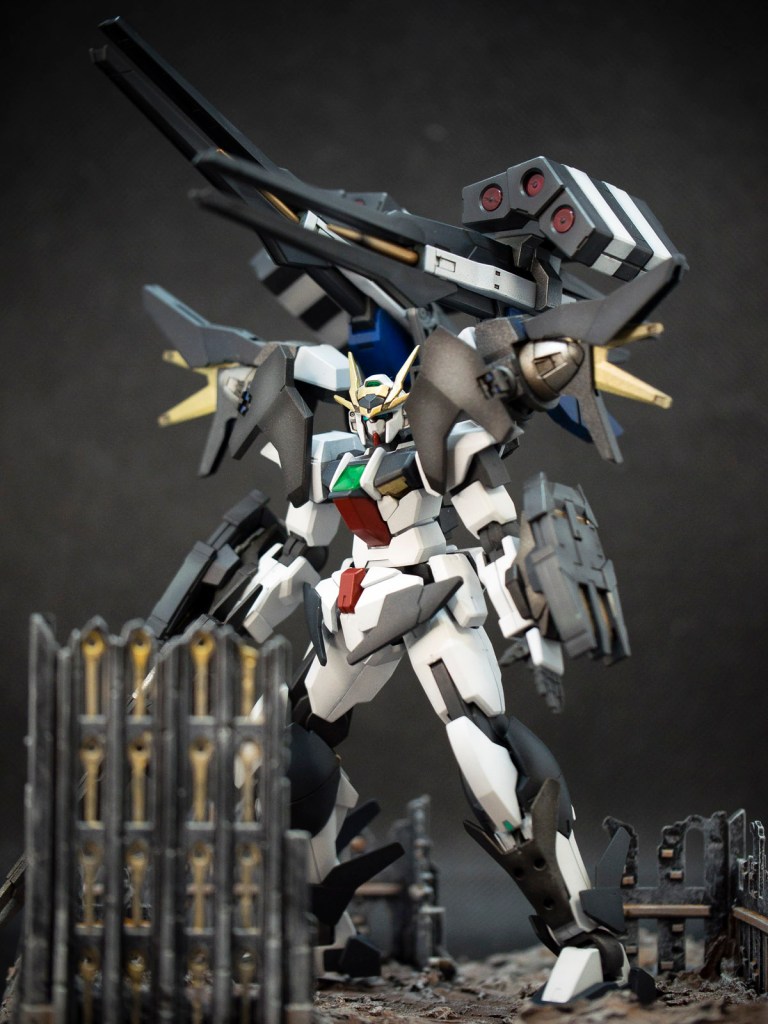
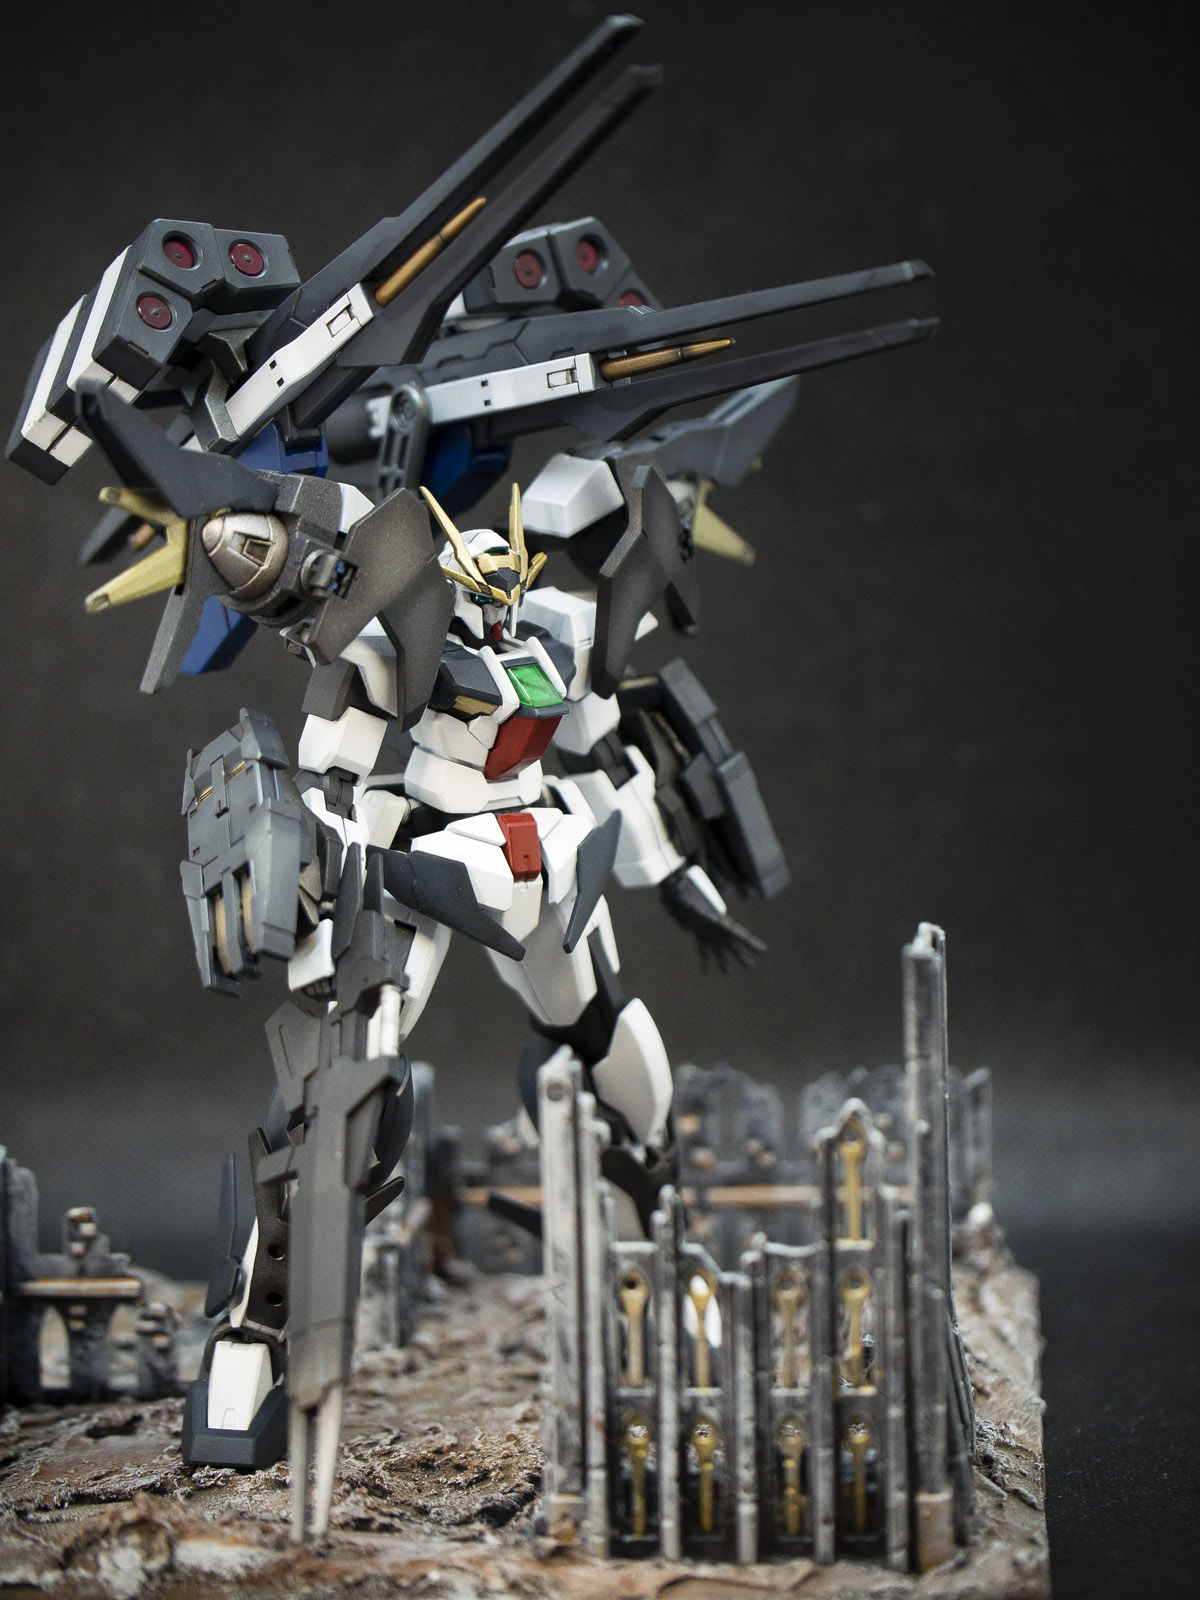
Both the weapon packs looks good on both OO Sky and OO Diver. The OO Sky has become slightly back heavy and it falls over a lot easier. Good thing the weapon set comes with a stand and I will be posing the OO Sky with the stand going forward. Even so, I think it is a great upgrade. It gave my OO Sky and OO Diver a fresh look!
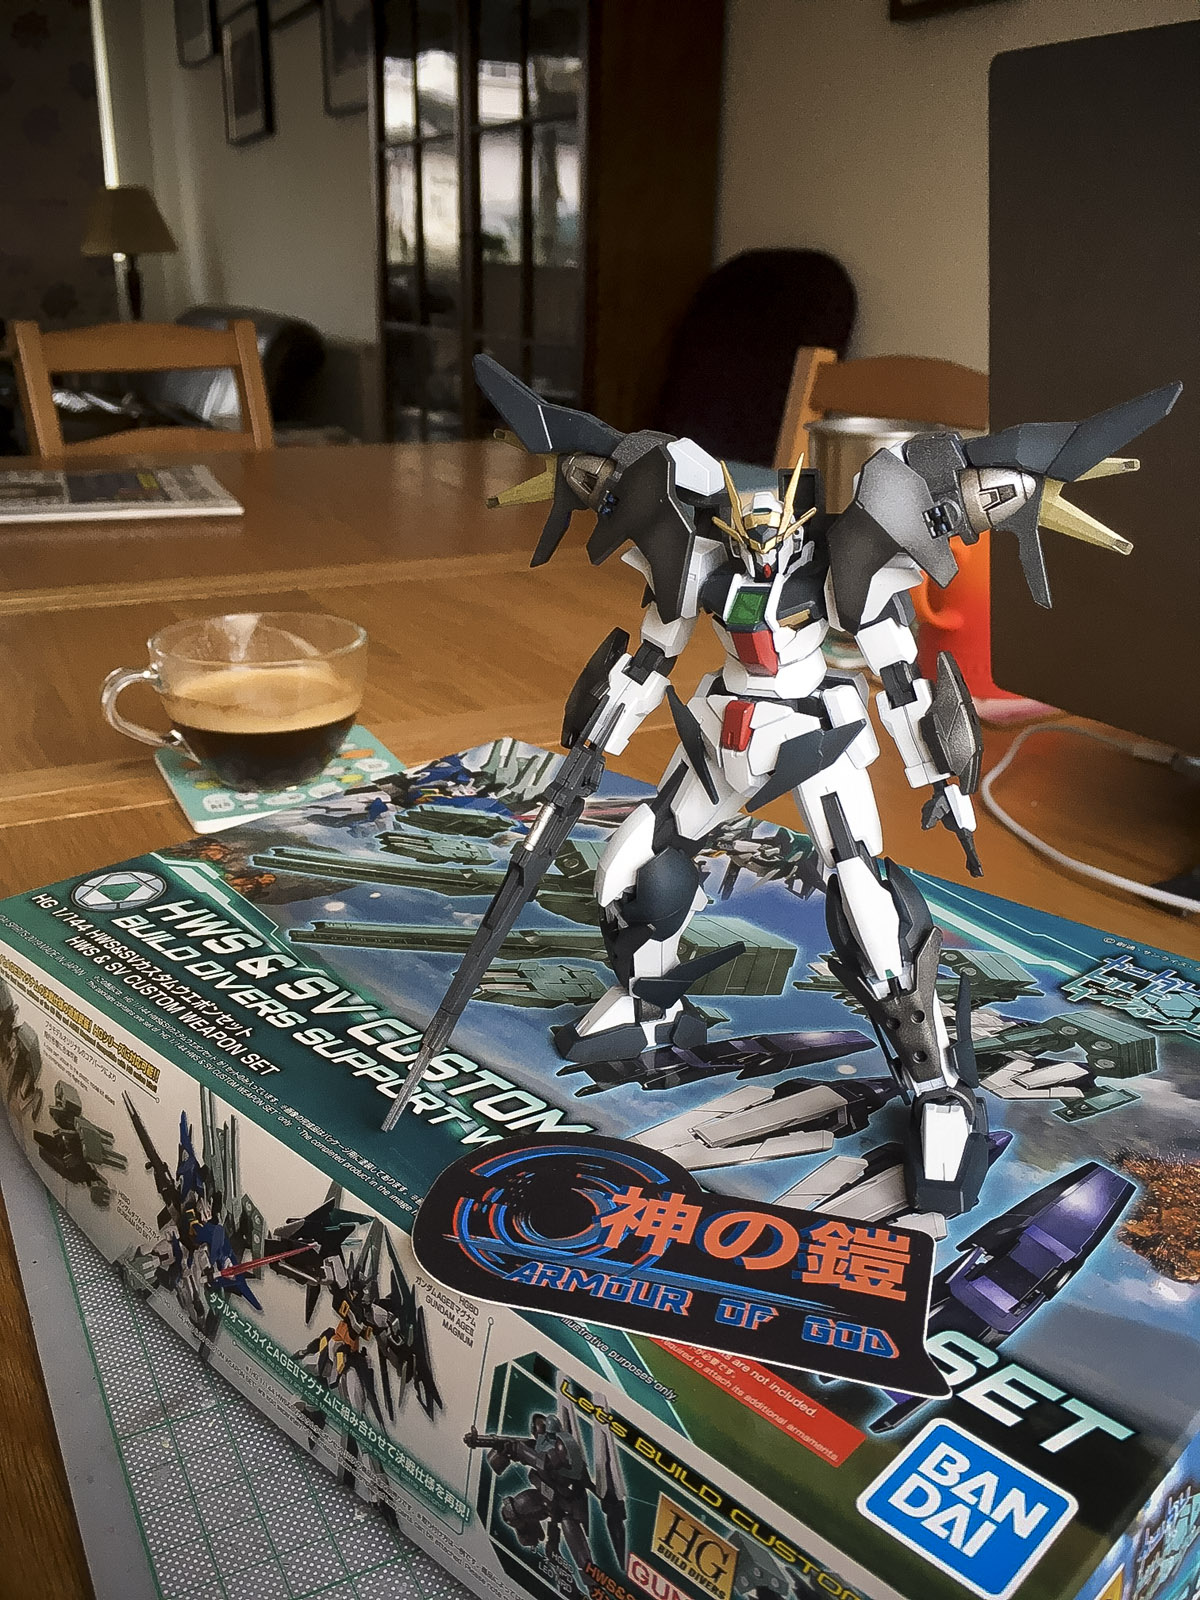
I really like the weapon set, it makes the OO Sky looks a lot more ready for battle! I prefer my custom colour scheme as well, it looks more adept and fitting on my OO Sky as compared to the original teal green colour..
Even though the weapon pack does not belongs to the OO Diver, I think it gives the OO Diver more bulk and battle ready look.
If you like my work please feel free to visit my other projects to keep this site going!
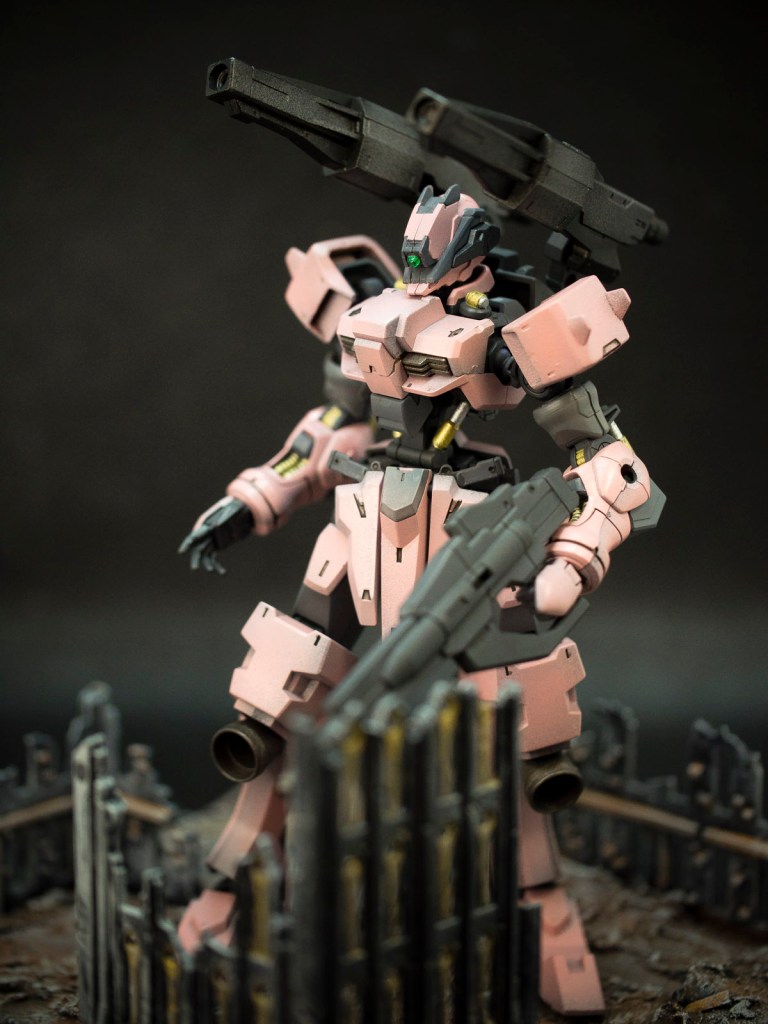
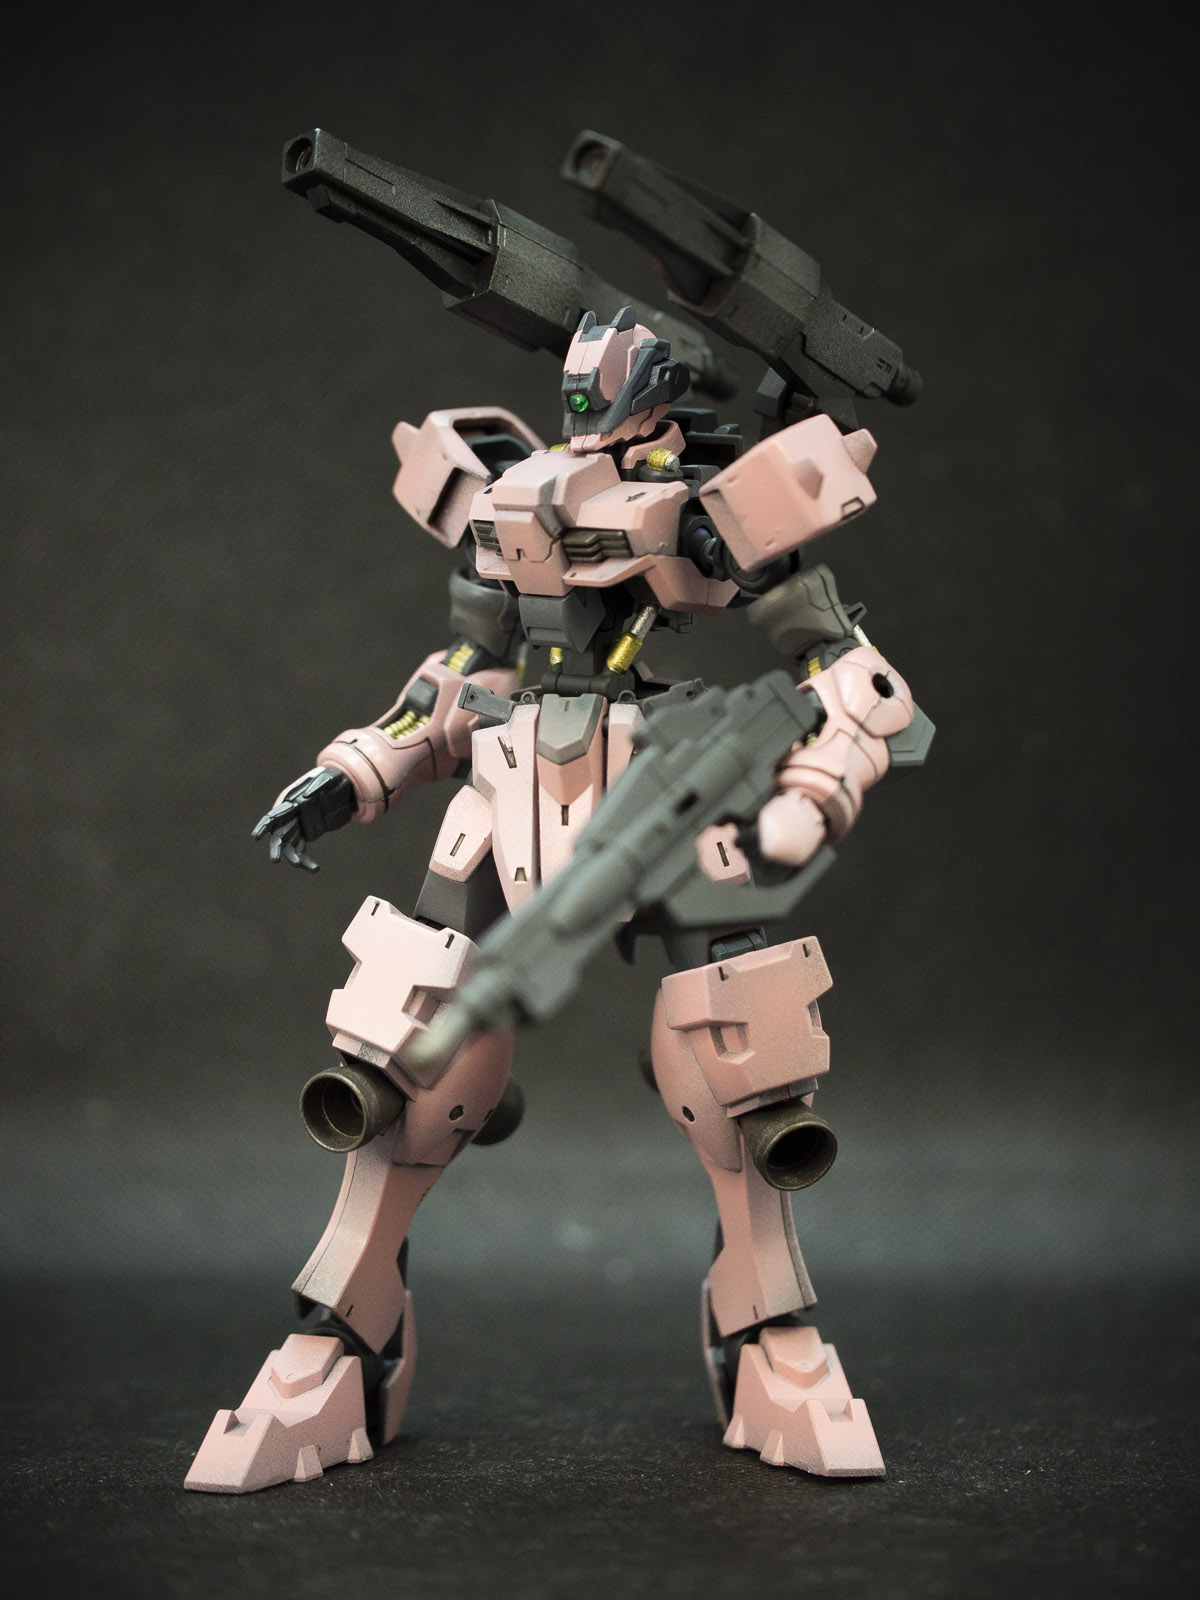
I started this as a “frankenstein” experiment to see if I am able to kit bash a box of spares and unwanted High Grade kit from Ebay. Bandai Iron Blood Orphans kits are actually quite easy to work with especially most of the kits shares the same “inner frame”. This blog post is just basically to update my previous Pinkinstein with new photos and a short video. Please take a look at my other projects to support this website and my work.
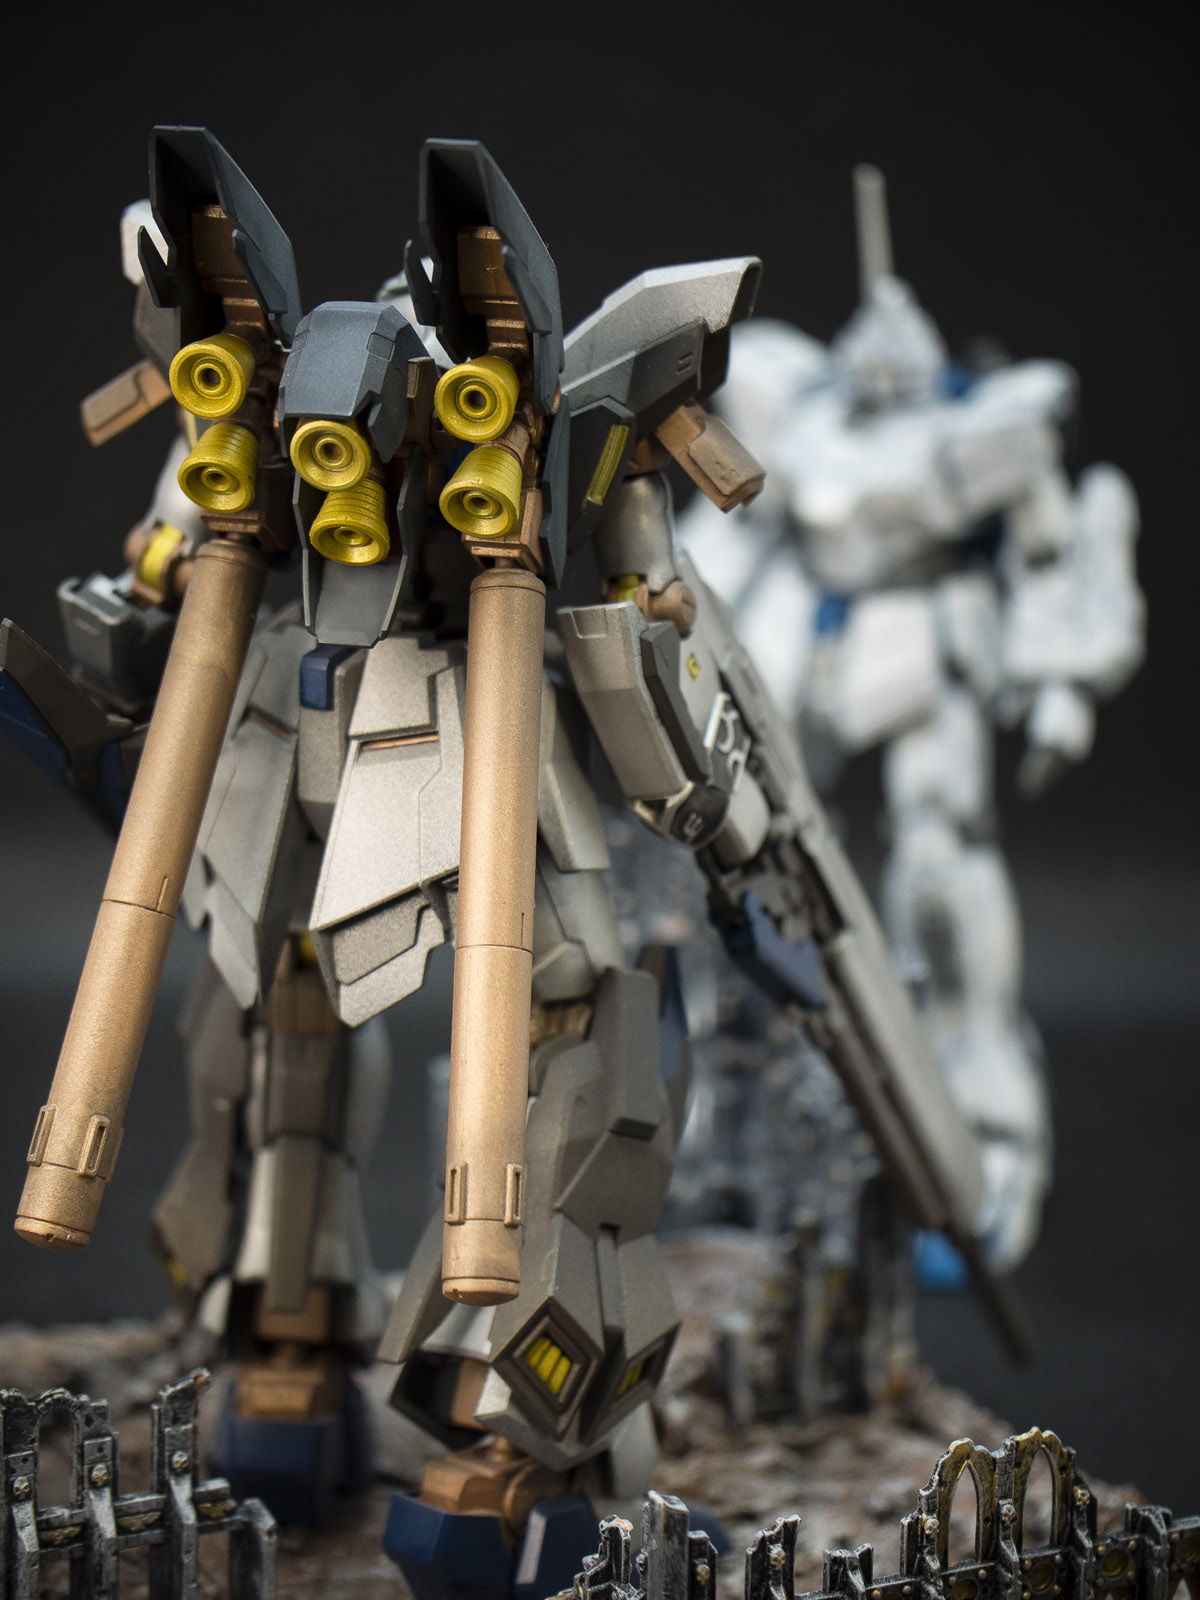
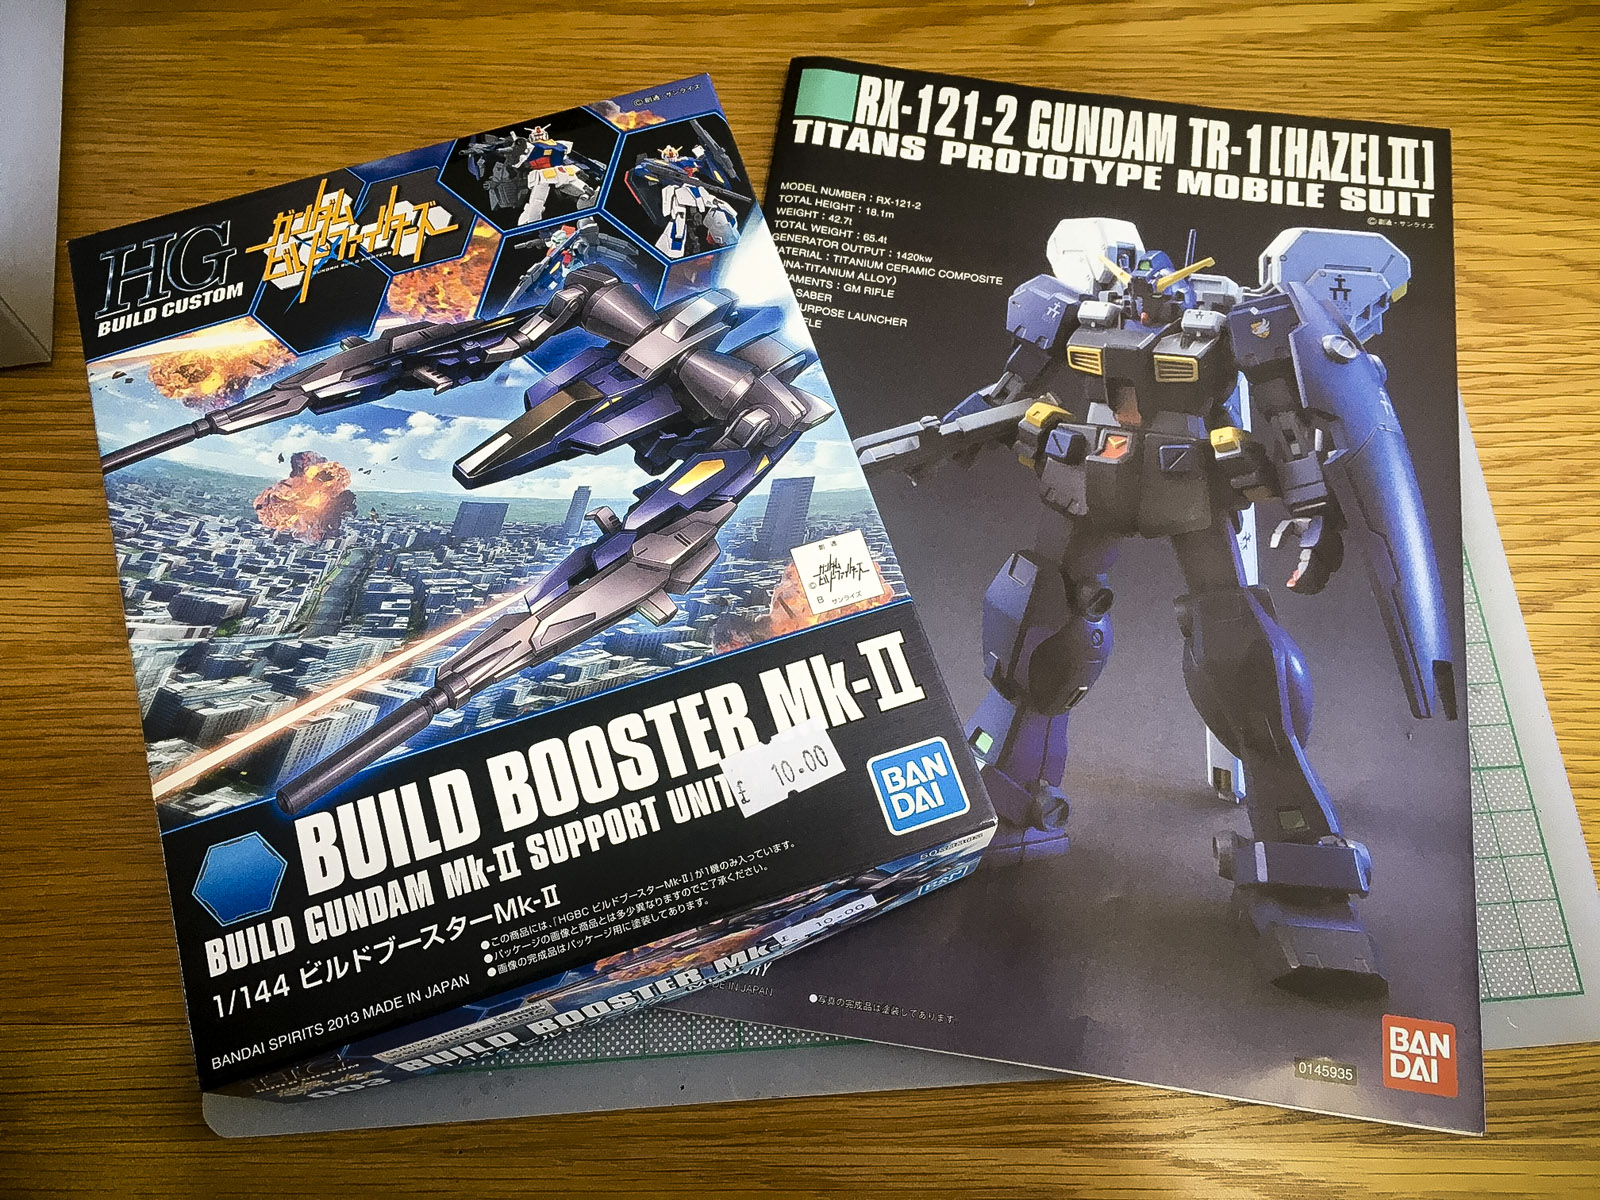
Bandai 1/144 HG RX-121-2 Gudam TR-1 [Hazel 2] is released in 2006. It is a realtively old kit, but the sculpt is relatively mecha handsome and looks good in different angles. Since it is an old design the joints are basically plastic against polycaps; so don’t expect this kit to hold a pose for long if the joints are weighted down. I bought this kit from Galactictoys Ebay; bascially it is the same but I find that this is easier to manage as it sort out the custom and delivery as one purchase.
I always wanted a Titans’ colour mobile suit, but I struggle to get the colour correct because it is either a Titan’s blue in some box art or purplish in the anime. Thus I can never decide on what to do, also I already have a Gundam Mk2 in white hence I don’t really want another Mk2 just for a colour change. The Hazel 2 gave me a good compromise as it came with a RX-78 type head with different head camera options. Hence this Hazel is a Gundam Mk2 wannabe but with some modifications.
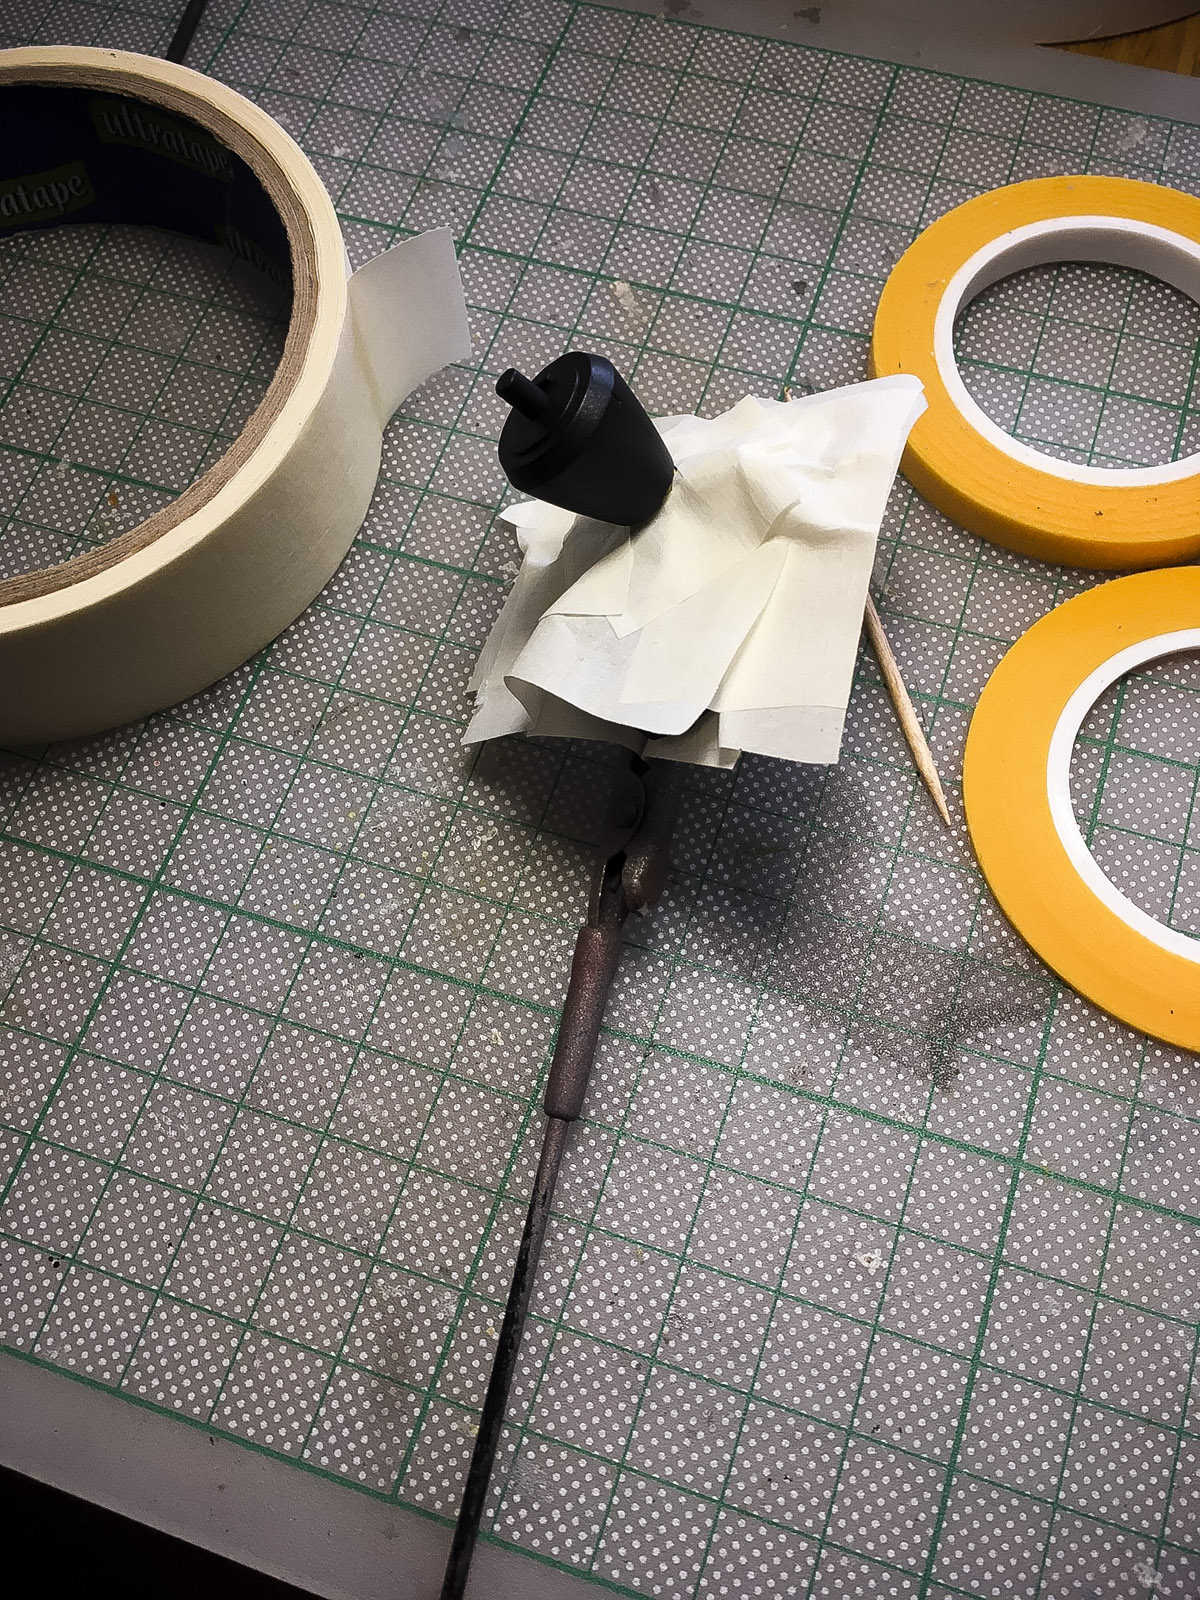
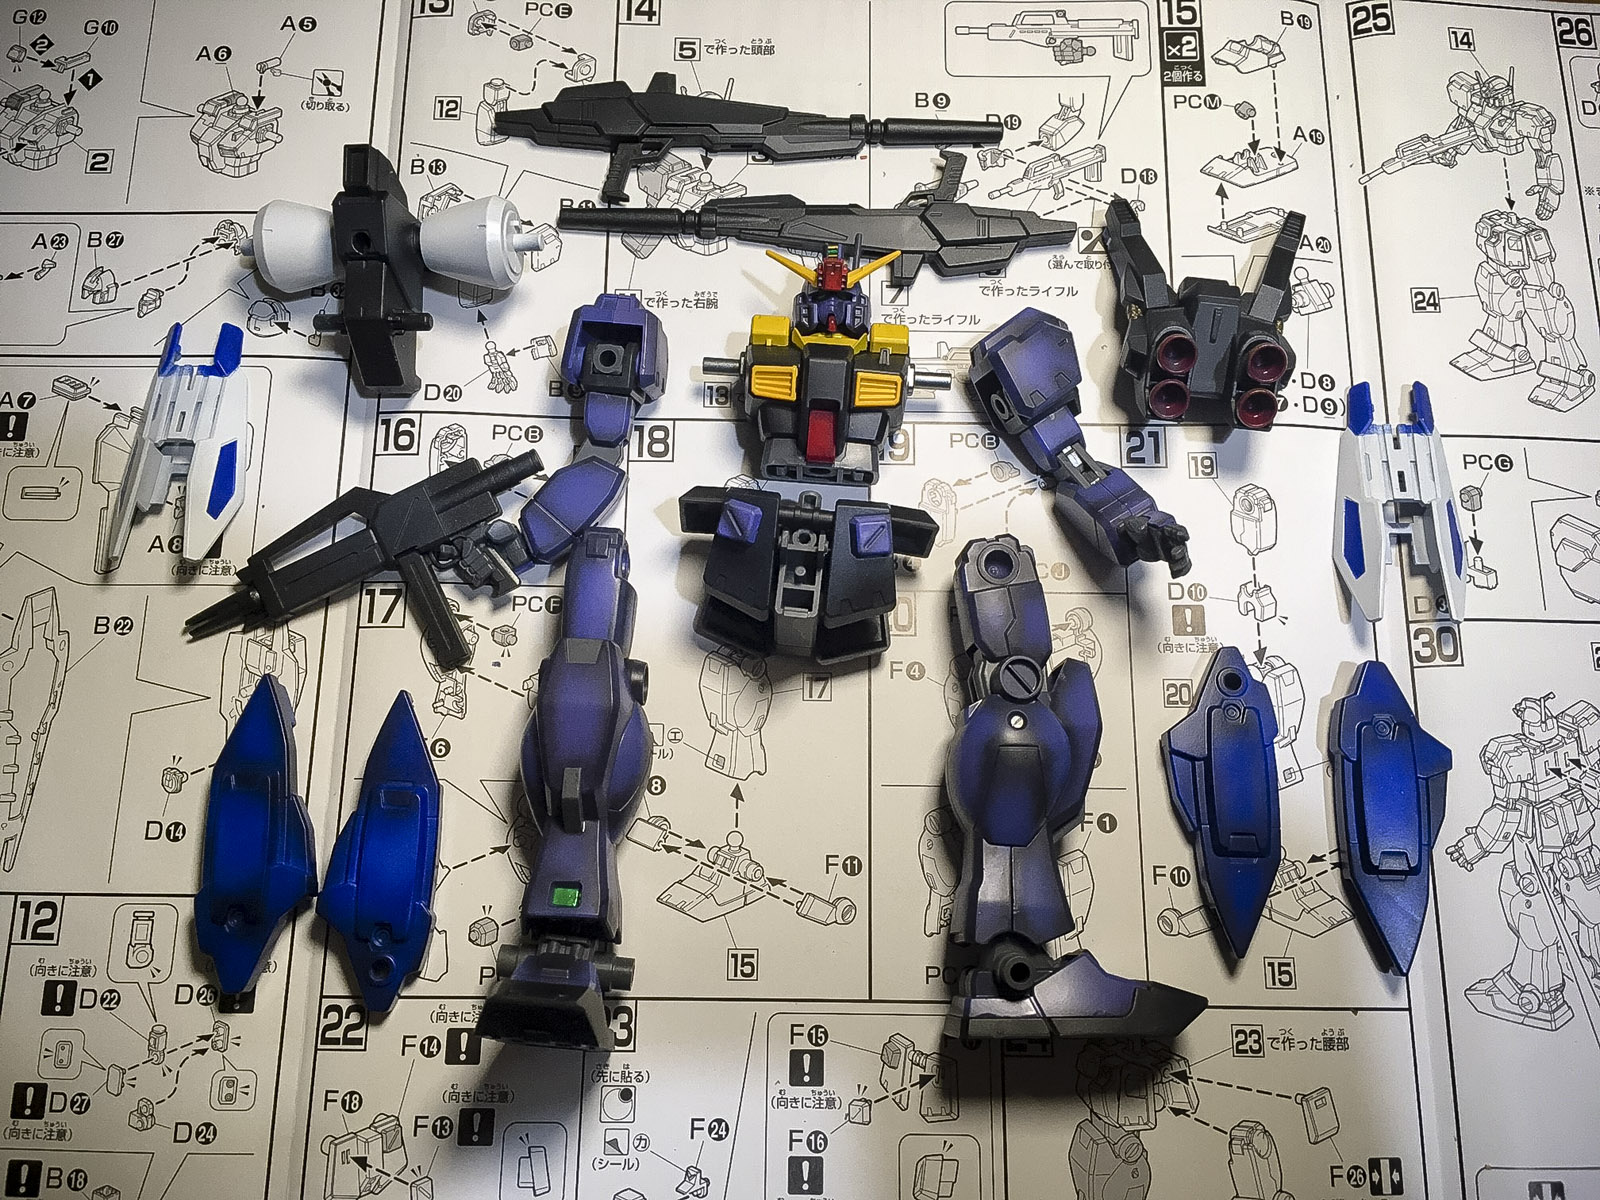
I am also inspired after watching Build Fighters anime where they used a modified Gundam Mk2 with a G-Defensor booster! It was quite difficult to get my hands on the Build Fighter Mk2 and I am not really keen on the head and chest design hence I thought this Hazel 2 will look great when customised with a Booster backpack instead. I also kit-bash my Hazel with GM3 backpack, head vulcan and beam machine gun from Jegan, Side skirt armour from GM Command. In order to get the booster to retro-fit securely to the GM3 backpack, I have to drill a 2mm hole to accept the peg from the booster; I could used super glue as well but I thought a hole and peg will give me more options in the future.
I love how it comes together despite the terrible seam lines. I tried to remove the seam lines with the least effort possible such as the tights and legs. It is basically glueing it together and wait for it to dry and sand it off using my new sponge sanding sticks by DEPIAE. I bought my from www.armourofgod.co.uk.
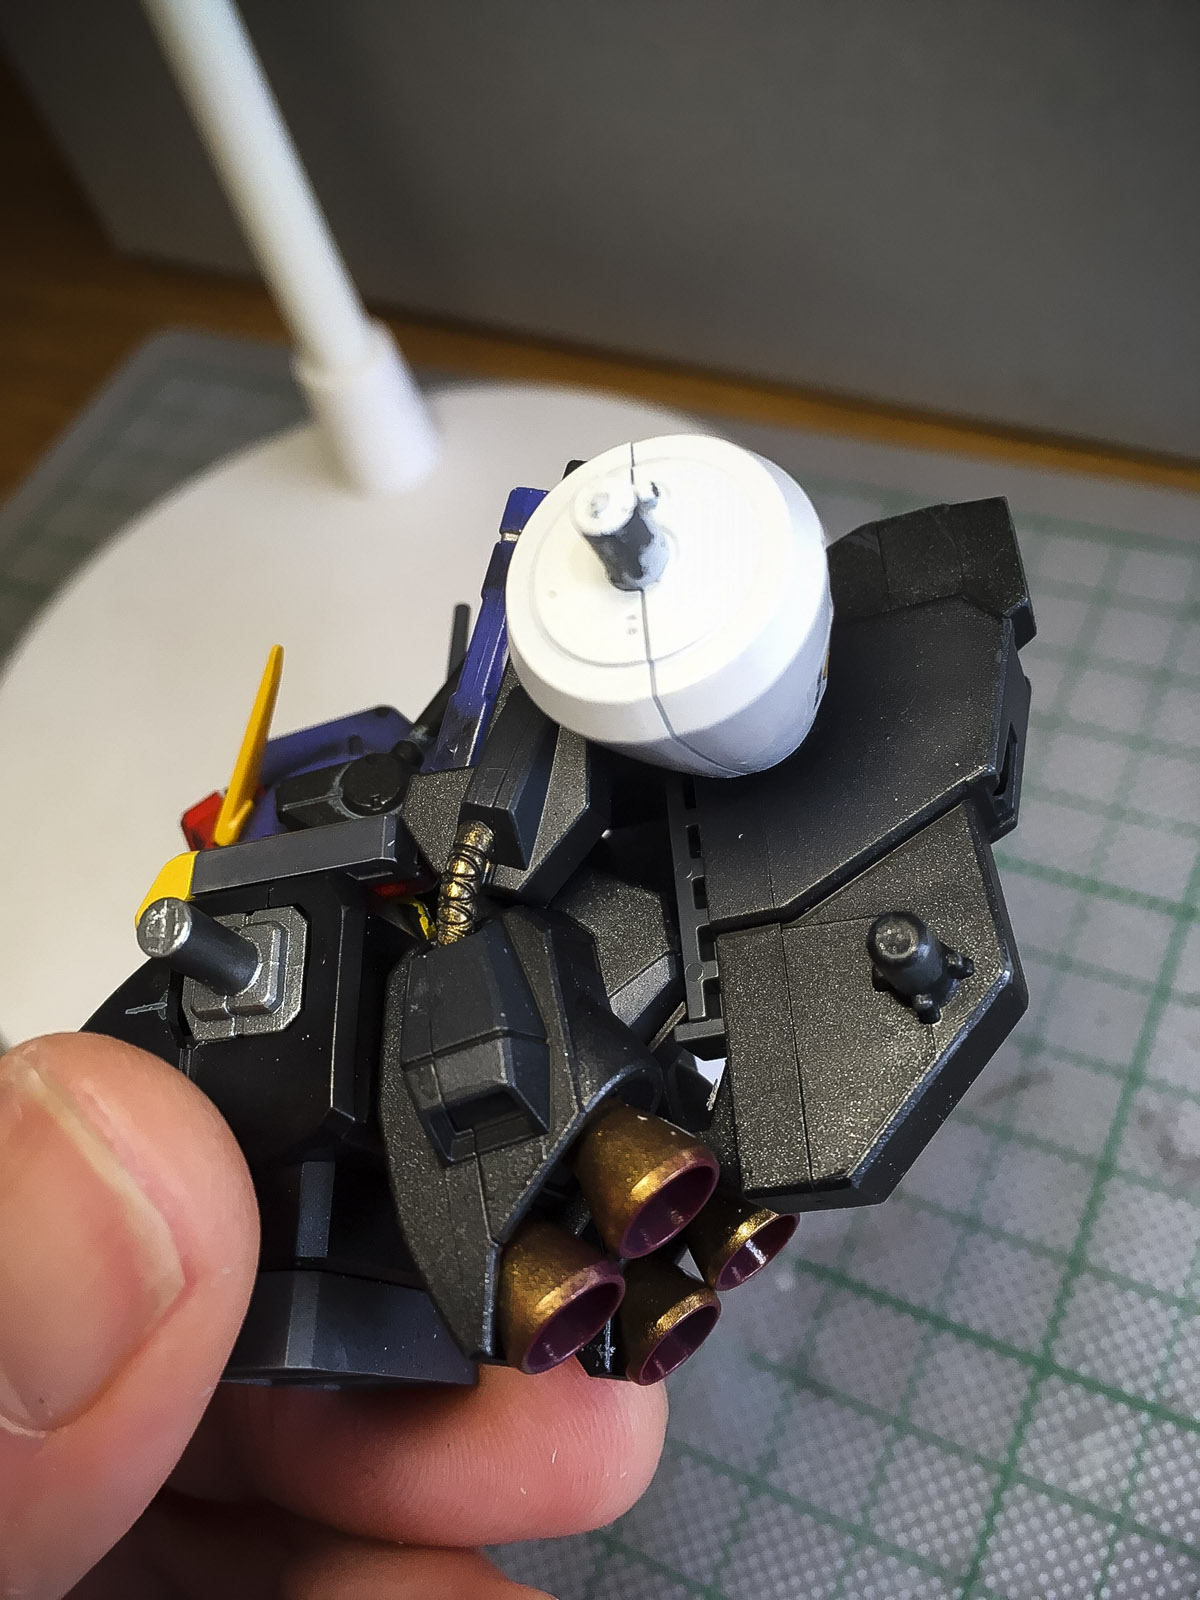
My inspiration is to create a unique Gundam Mk2 look-alike and I think I did a pretty good job! The shoulder armour chest vents, add-on head vulcan, ad GM3 backpack does helps.
In reality, the Hazel is actually a Quel with a different head. I painted my Quel in GM Custom colours because I prefer the Quel simplistic design over than the GM Custom with it extra wider shoulders. The Quel have huge calf muscles and legs, it is good to know that the Titans do not skip legs days at the gym. As said although the Hazel is based on the Quel, the upper chest and back connector for the backpacks are different on the hazel but otherwise they are completely the same (apart from the head design).
I was quite please it is all assembled together. I had reservations on the Hazel 2 huge backpack and that is one of the reason why it had not bought this kit, but with the booster pack it looks like a total different machine. Also the dark purplish tint, this gundam stands out on the shelf with my other design and now I know why Titans called it the “Dark” Gundam.
This is a side-by-side comparision to my older Hazel which I have kit-bashed it with a Tristan backpack for the same reason I did not like the backpack the Hazel came with. I painted the Hazel in Gundam Thunderbolt colour since I was inspired that the Hazel is my working front line machine. Both kits are similar is some ways and shared similar parts but the Hazel Custom has different legs design which makes this another unique Gundam kit on my shelf.
This is my Hazel standing side-by-side with my RX-78 Origin for size comparision. Interestingly the Hazel looks a lot more beefy and “muscular” compared to the slim RX-78. Look at the calves muscles on the Hazel!
That said, I like this kit a lot and enjoyed looking at it but because I was too excited with the kit potential I rushed quite a bit in the painting process and kind of overshaded some parts and when masking I did not pay too much attention on how well the masking tape sticks down. I ended up with several paint bleeds and because the violet blue was a custom colour I wasn’t able to replicate the same tint hence it looks messed up at places.
If you do like my work, please consider supporting this page by visiting my other projects and help get this website some exposure!
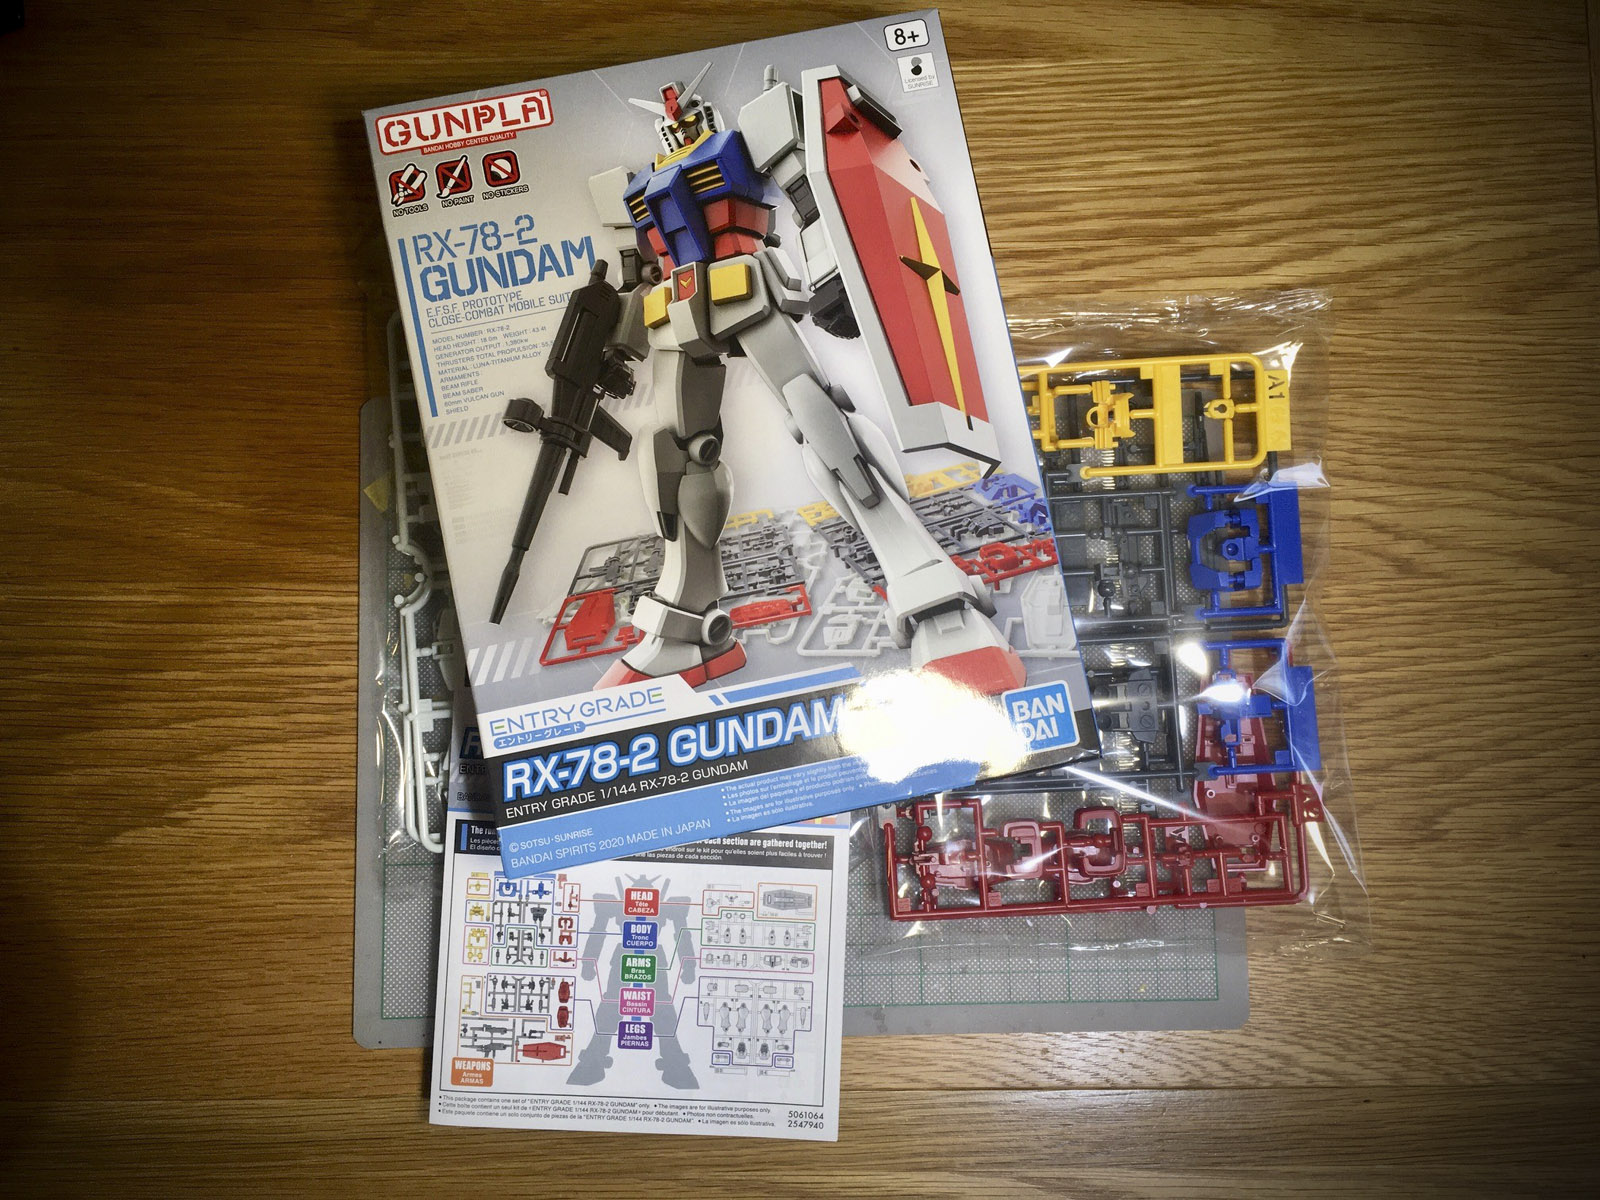
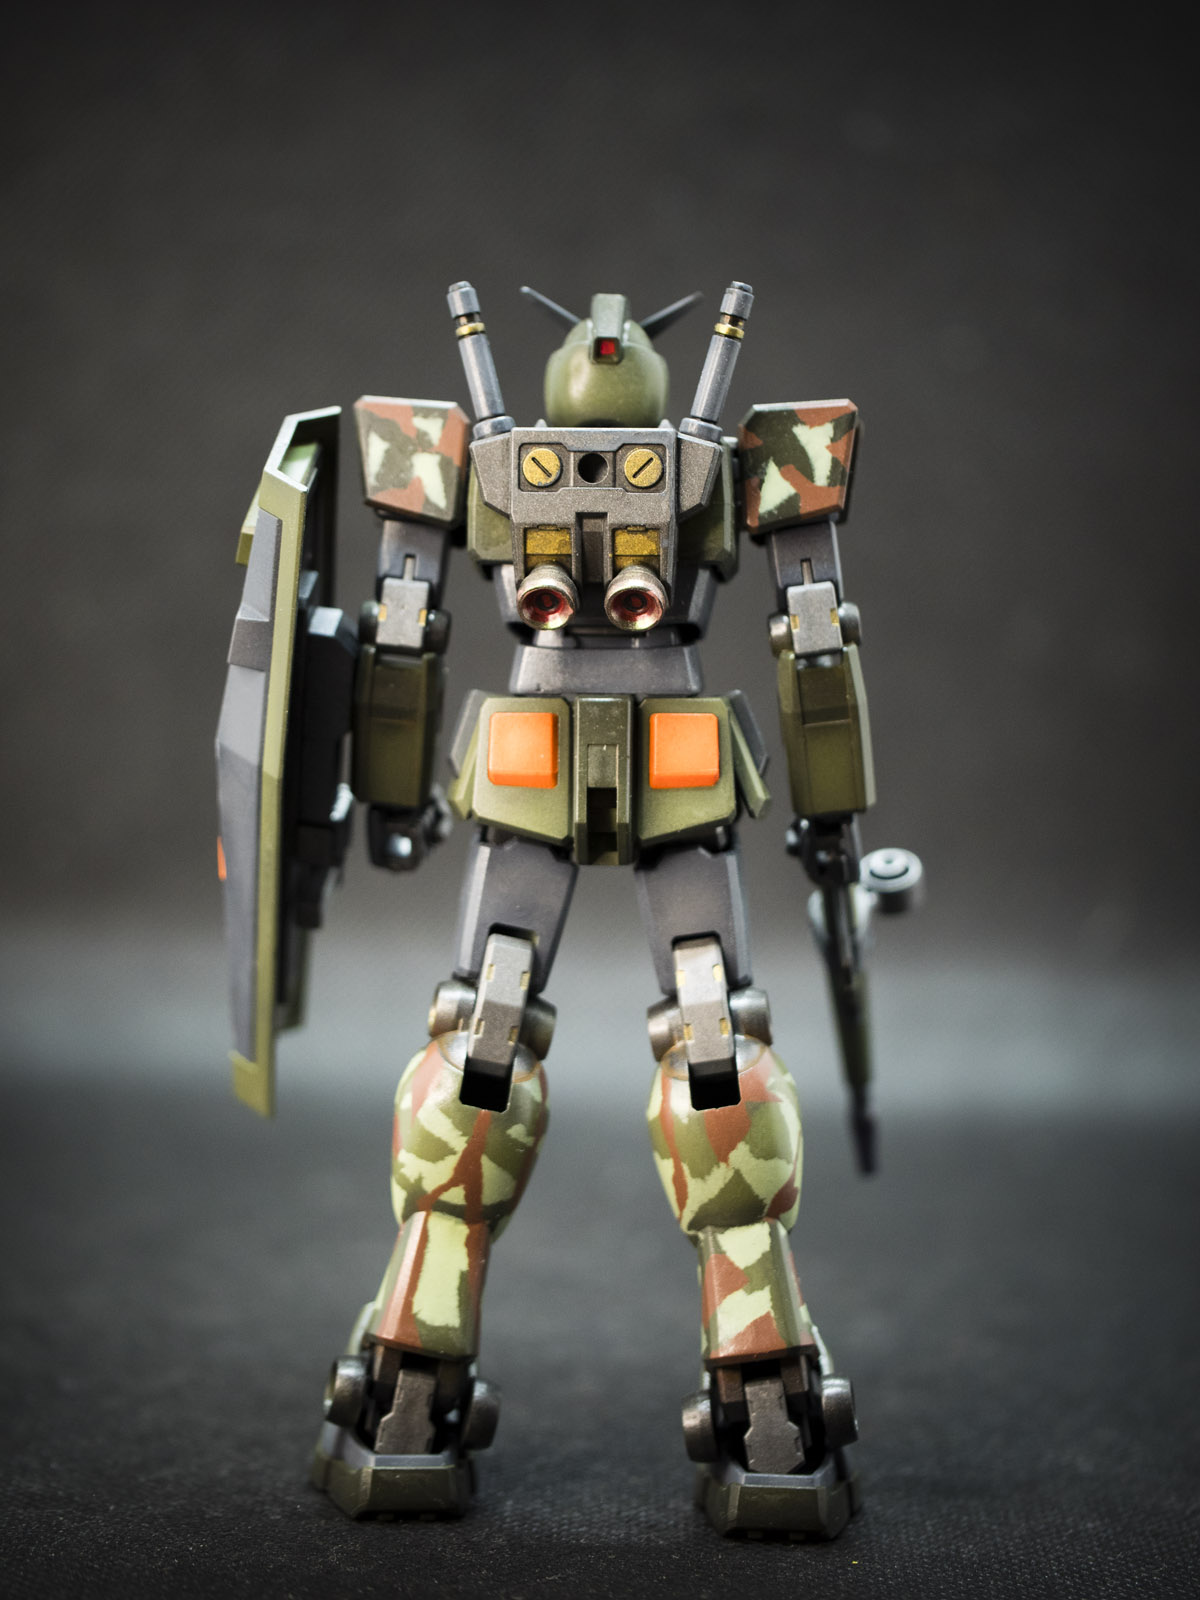
Bandai EG 1/144 RX-78-2 Gundam was aimed for begineers new to this gunpla hobby. The kit was relatively easy and the parts can be removed from the sprues without using a nippers. The parts separation were actually not bad and the “V”sign at the waist was actually moulded as a separate part and not a sticker! Surface details were not great or acutally none but you can’t expect a HG quality kit for kit that probably cost less than half a normal HG kit.
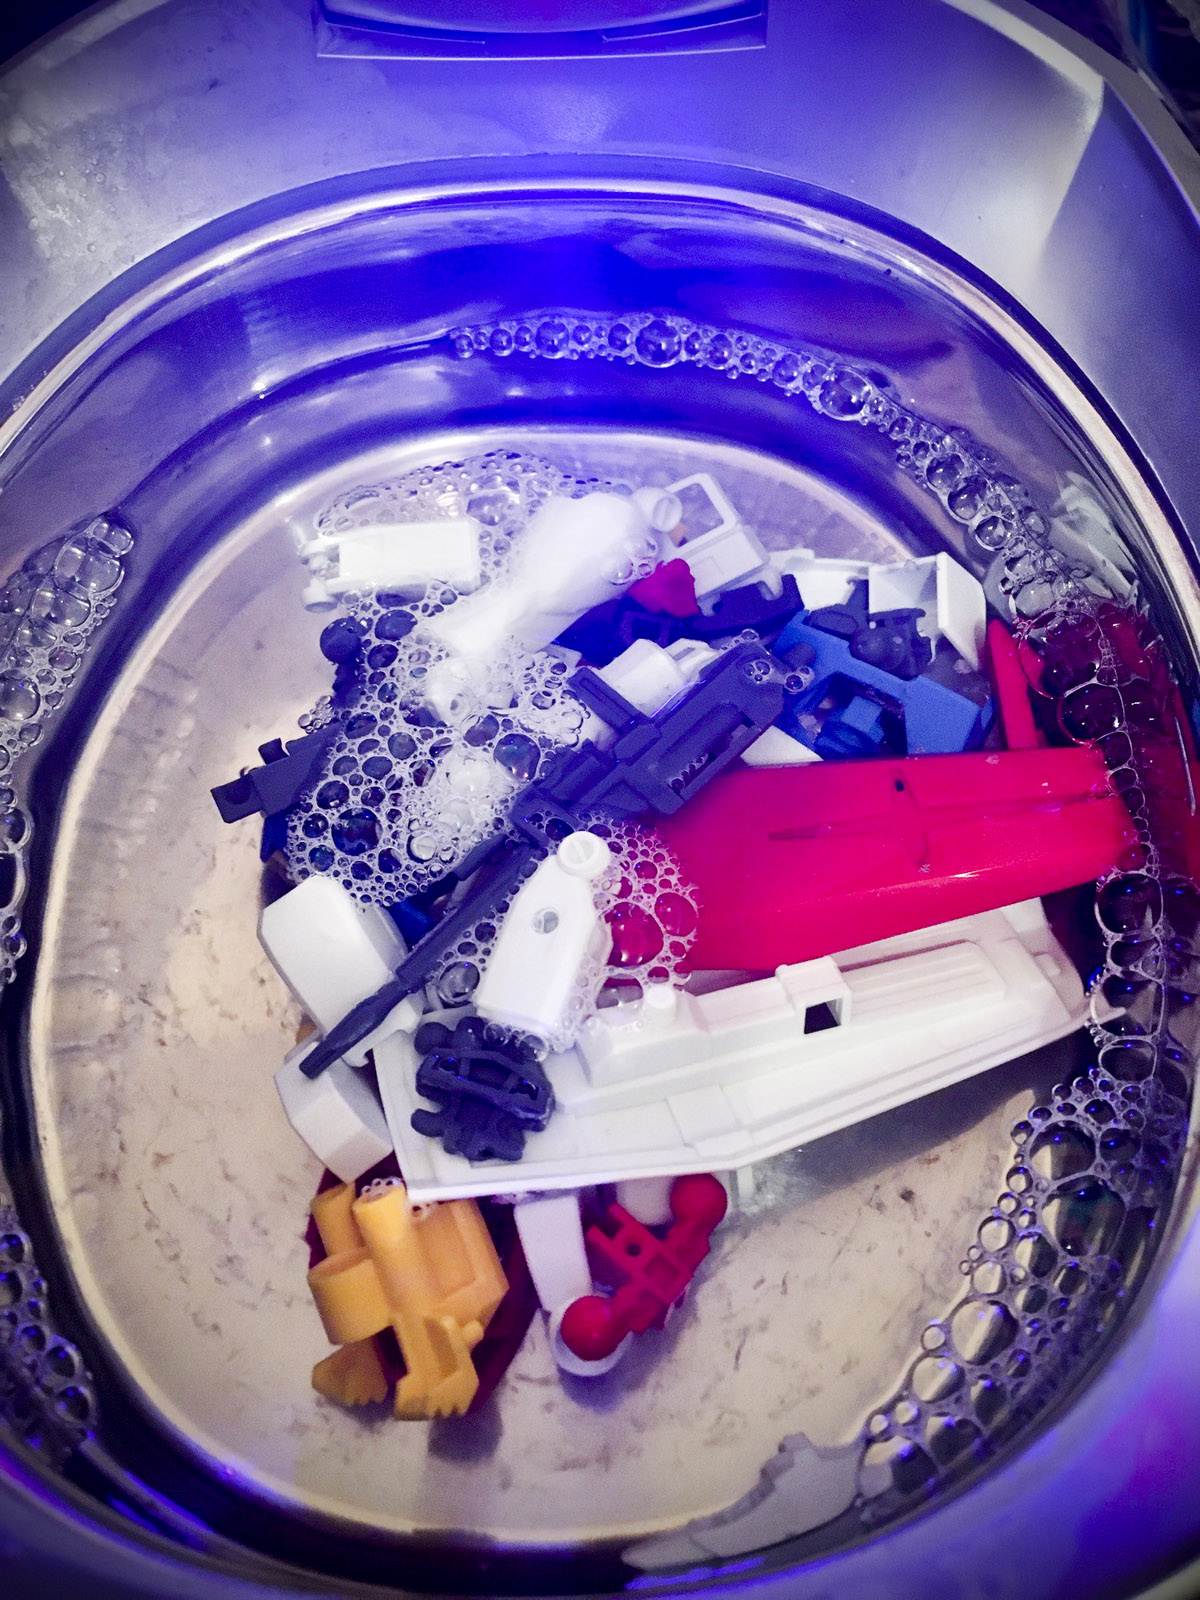
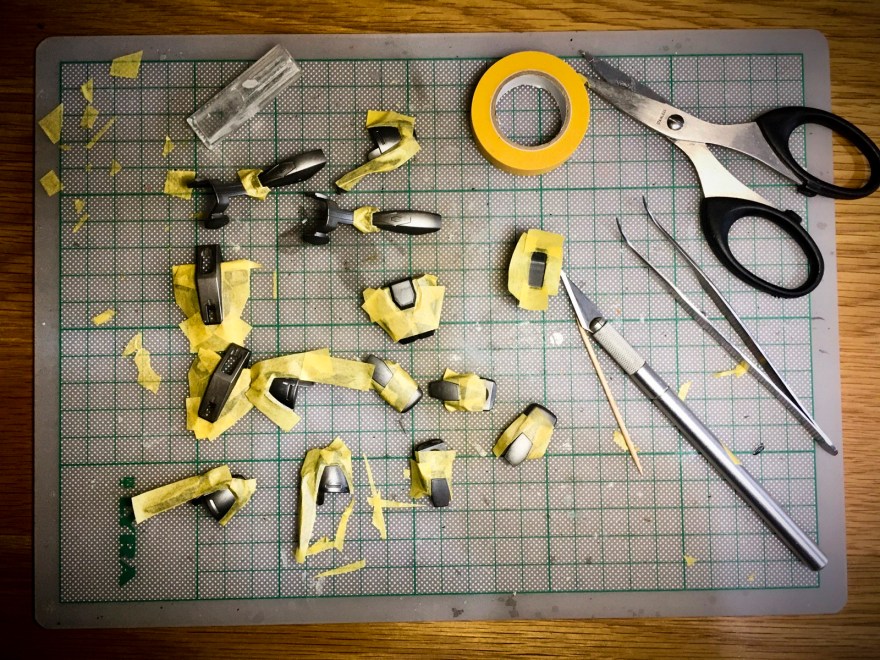
Because this was a competition submission, I thought I will spend a bit more time and love to prep the surface and sand off the seam lines. Well let’s just say I have good intentions and carry it as far as I could just like a Ball Pod going against a Zaku 2. Mind you if I am a New Type, I might has pulled it off, but I lost my momentum and gave up on decals.
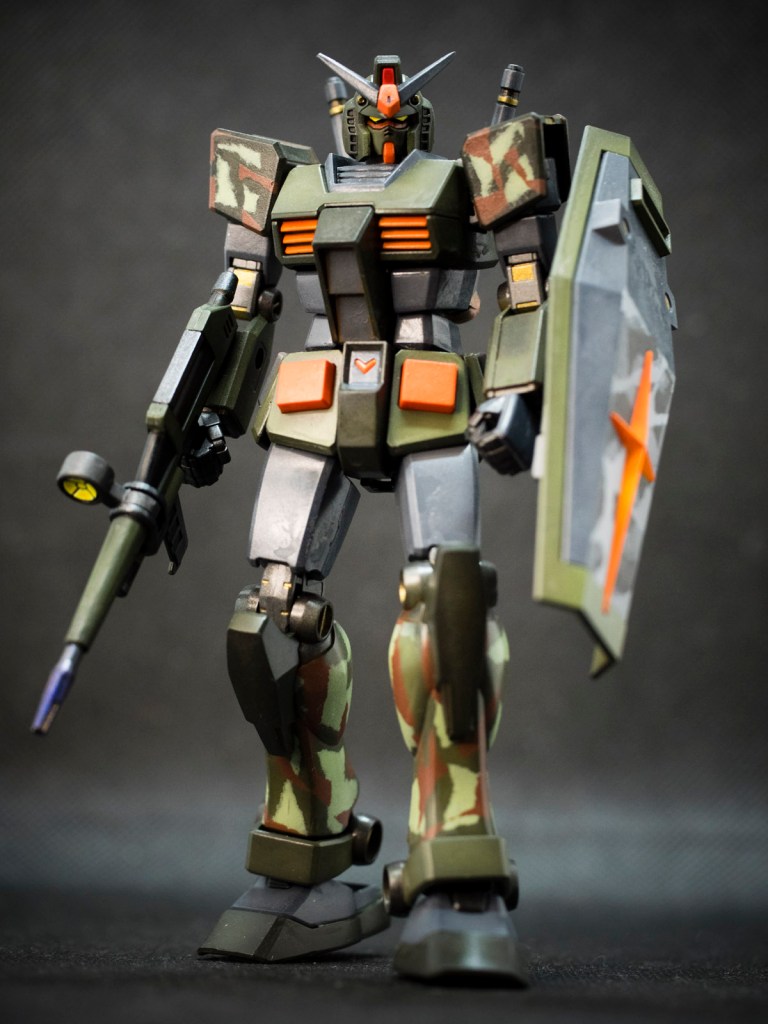
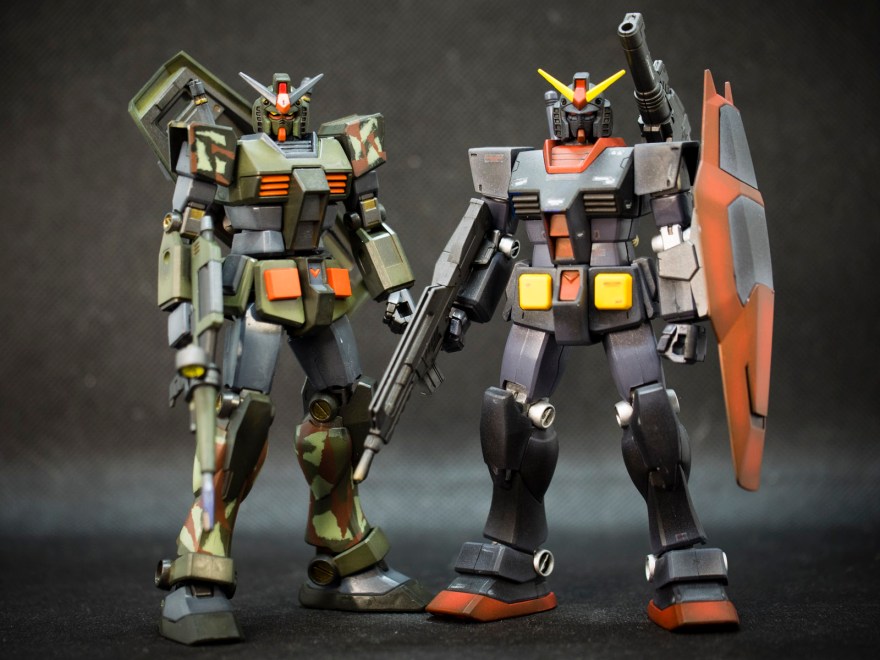
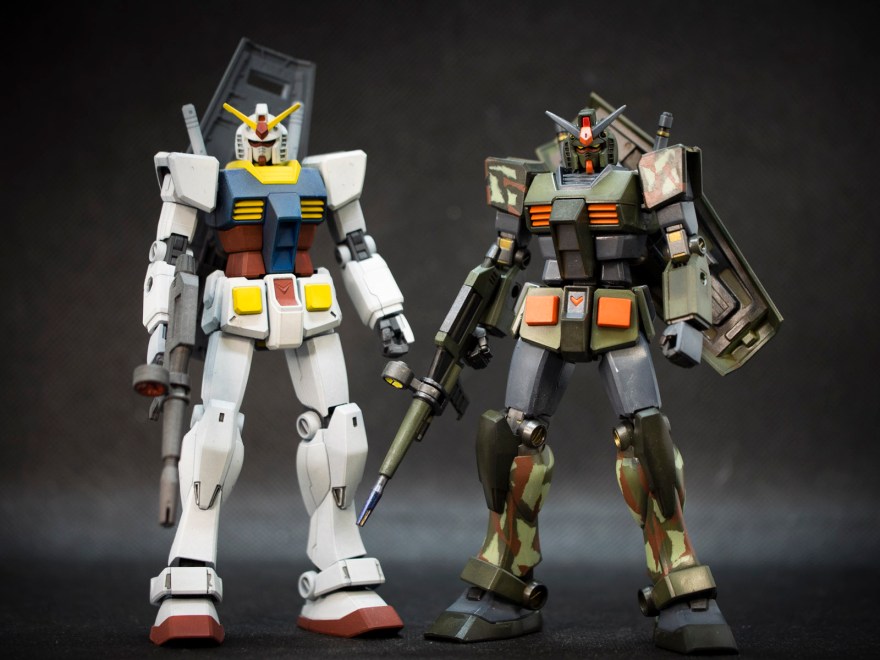
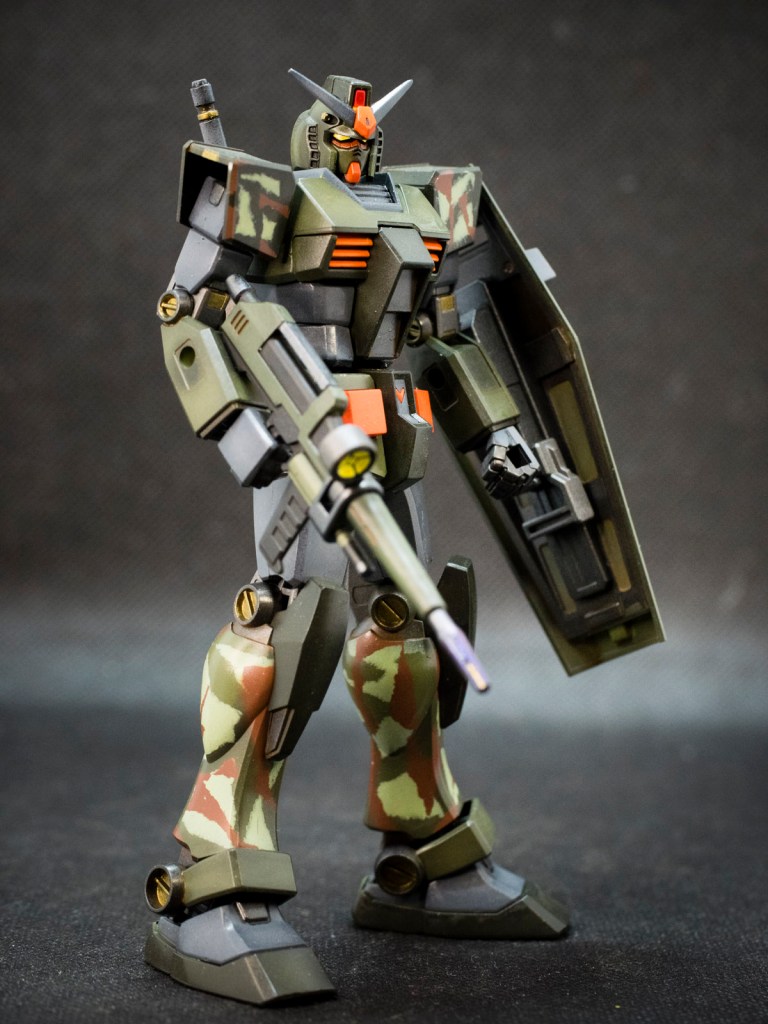
This colour scheme was based on Full Armour Green RX-78-2 Gundam. I planned to submt somethig less common colour scheme as an entry to a painting competition organised by Otaku ME. I used camouflage green to help provide some patterns to the areas where it was missing details.
I have a collection of a few Grand Daddies, and each HG RX-78 variants has slightly different design profiles. My favourite was still the Origin Version, but the head unit assembly design has to be the Revive version. I was actually very disappointed with the Beyod Global version; I was hoping that Bandai will take all the years of expereinces and built a “perfect” RX-78. I used to have high hope on the GBN Base Gundam, because I thought it was meant to be a “clone” of from a popular anime and the Build Fighters GM was actually very good, but this GBN Gundam was just too goofy looking and something just not look correct. Nonethelss, I am surprise that the EG shape is actually very well design and really have a strong impressive pose.
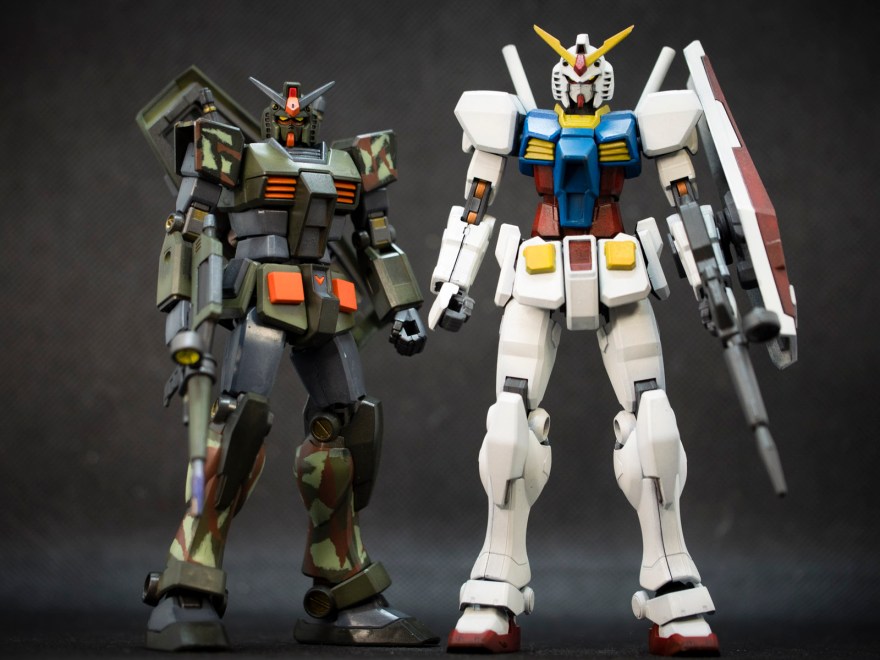
To be fair there are some details such as underneath the shield, the feets, the joints, beam rifle, backpack etc. Hence my aim was to bring out those details but painting them with different colours.
Overall, I am quite surprise how well this kit turns out even though there were areas where I could be more careful with the paint finish and not rush through the prep works. I learnt a lot from this process and I take my hat off to other modellers who has a lot more patience and professionalism in spending the time and days to get everything right.
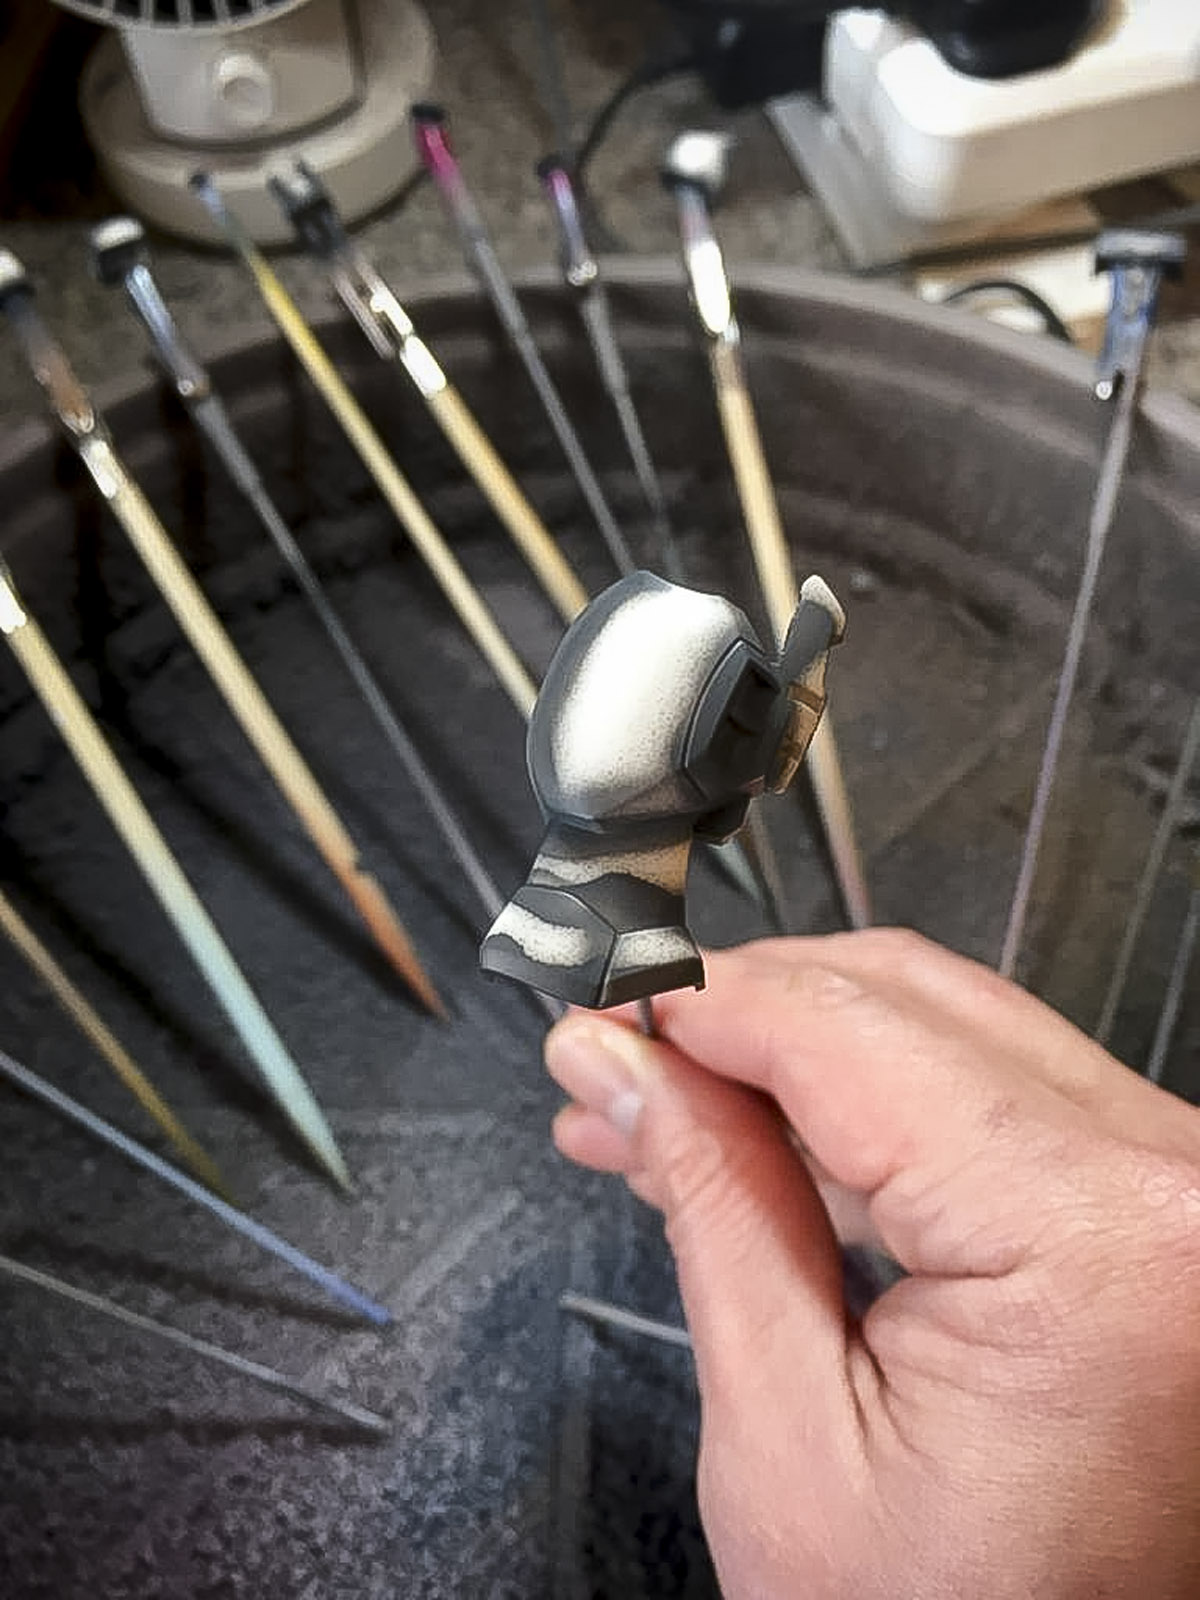
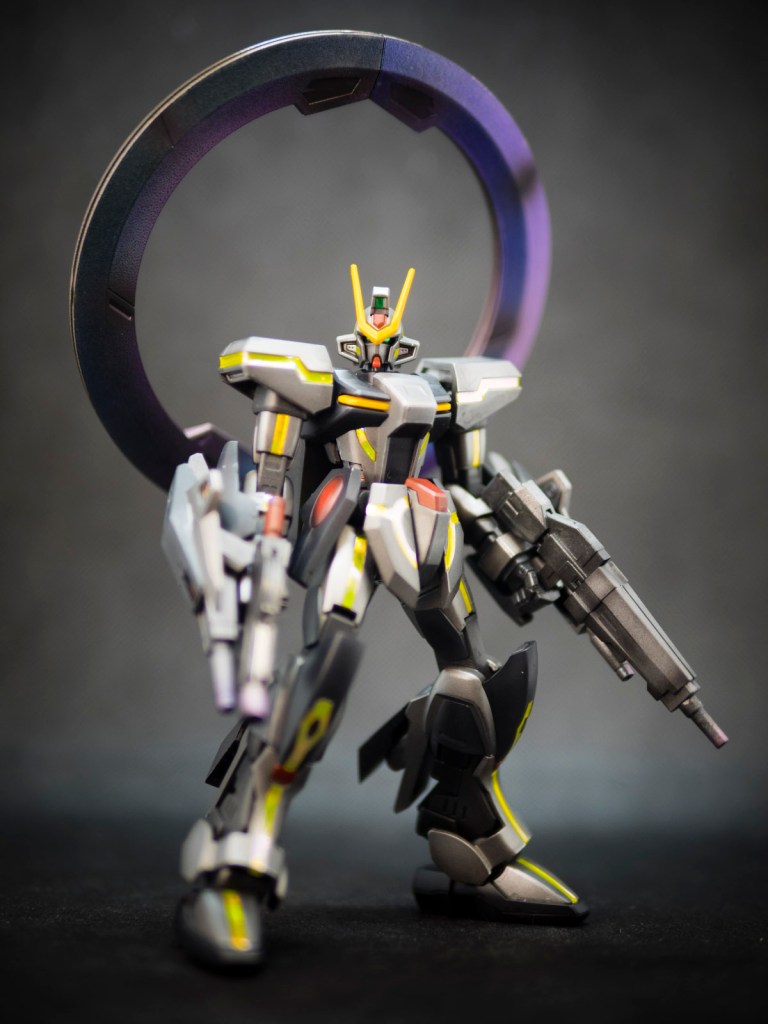
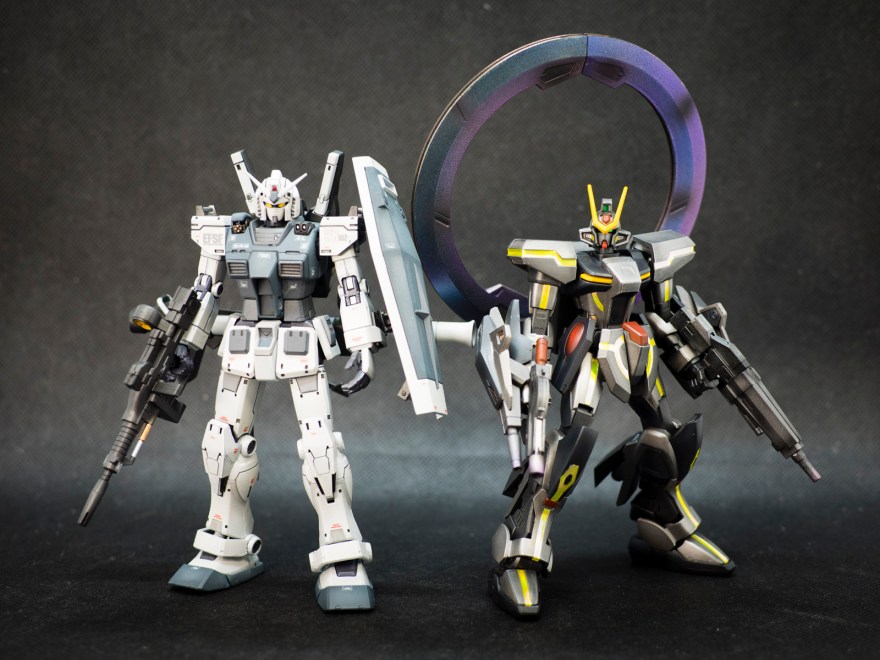
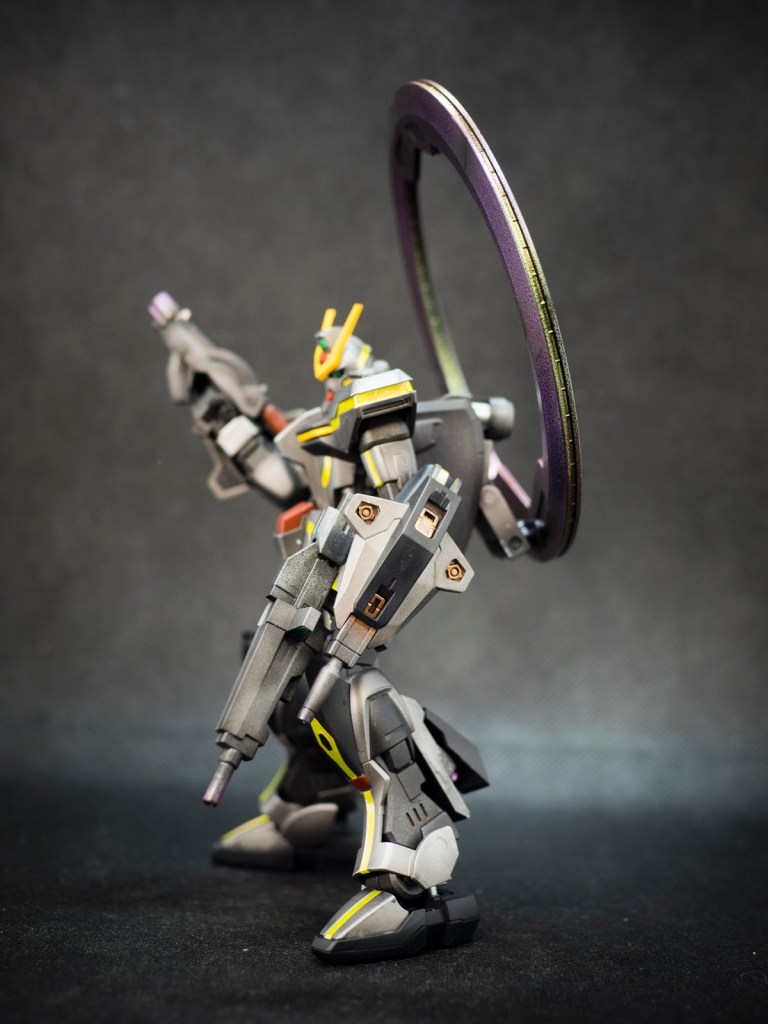
The Stargazer Gundam, I bought it from Armourofgod in UK maninly because it has a different head design compared to other Gundams and it is a realtively cheap kit which includes a plastic stand and some green decorative rings. I have not watched the Gundam Seed anime series and hence I have no idea what is the history behind the big ring and the mobile suit background story.
But from a quick wiki serach and googling, I found out it is more of a exploration mobile suit instead of combat use. Which is like a Star Trek “Boldly goes where no Mobile suits has gone before” type story. Hence, I was quite keen on painting this in metallic steel or grey to pay tribute to Star Trek Starship type colours.
The kit is basically very simple and straight forward, adequate parts separation for painting and I tend to use a bit more artistic license and change up new colour scheme with masking and kit bashing. But I wasn’t really inspired by this kit so I kept the “re-design” relatively “out-of-box” and simple. The paint finish wasn’t as well done as I hope because I keep having mixed feelings on the metallic colour scheme hence I didn’t really prime the surface hoping that I would paint it over later.
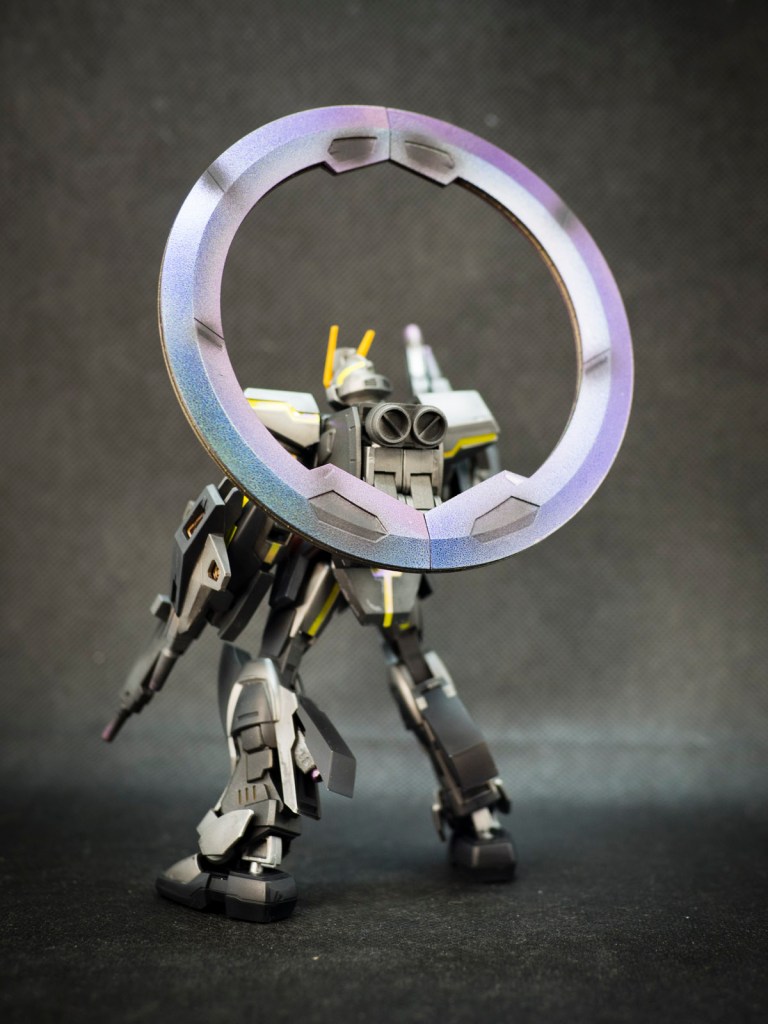
I always wanted to try Vallejo Clour Shift paints which can be air brushed on easily. Hence I thought I would try it on the big ring to makes it stand out. It is recommended to use a black glossy base to bring out the shifting paint.After assembling it, I am slightly surprise that the Stargazer is slightly shorter than a regualr HG Rx-78 Origin.
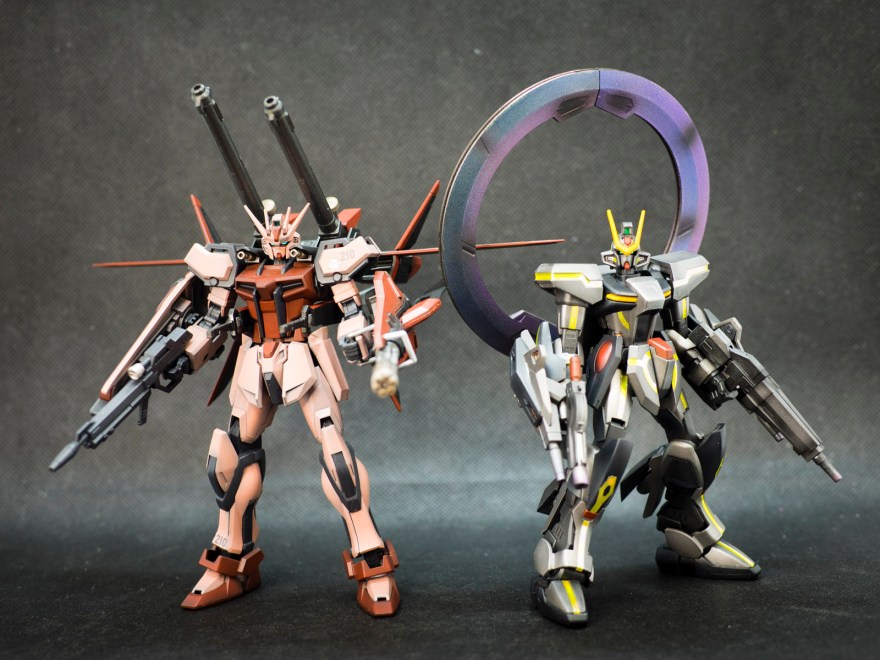
I also have the Strike Rogue from the SEED series, but Stargazer is a very different design and shorter even though it is from the same series. The Stargazer is probably around the similar height to the smaller Gundams such as Victory and F91. The Altron and Sandrock is only used as a reference, but please take a look at my other projects if you are interested in my builds.
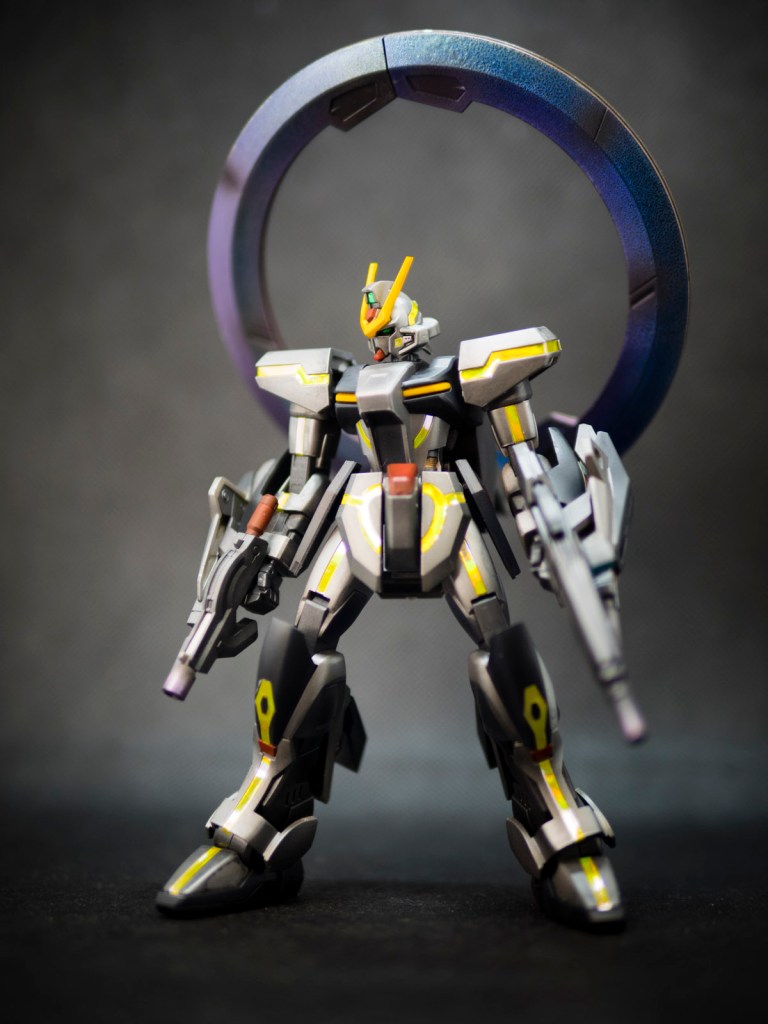
“Set your phaser to stun!” I know it is an exploration Gundam, but I just thought you also need guns just in case! The metallic steel colour came out a lot darker than I had planned, but that is a good mistake because the dark colour helps bring out the yellow reflective stickers than comes with Stargazer. It makes the Stargazer looks like it is also it is ready for a bicycle ride at night to gaze at the stars.
The additional weapons are a beam rifle from AGE and hands cannons from Jupitive. I am quite pleased with the colour shift paint, the Big Ring colour changes at different angles and also in different part of the day. I also mixed the shifting colours by painting a different colour over the first coat when it is still wet. I was hoping it will give it a strange blend of colours.
There are not much of a surface details for this simple kit, which is not a problem because most of the empty spaces are taken up by the reflective yellow stickers. There are 2 sticker colours options Black and Reflective yellow; I would suggest using a light white base finish if you are using the black stickers and if you are using the reflective yellow a dark colour based will suit better.
My metallic dark steel with the reflective yellow scheme makes this Gundam stands out on the shelf and the colour shifting ring changes colour throughout the day and it makes me want to look at it to see what colour has it shifted too. I like what I did, but I don’t like it enough to buy another one.
I have recently set up an online shop to help sell my digital print of my gunplas’photos. Please take a look here or click on the banner below if you are interested.
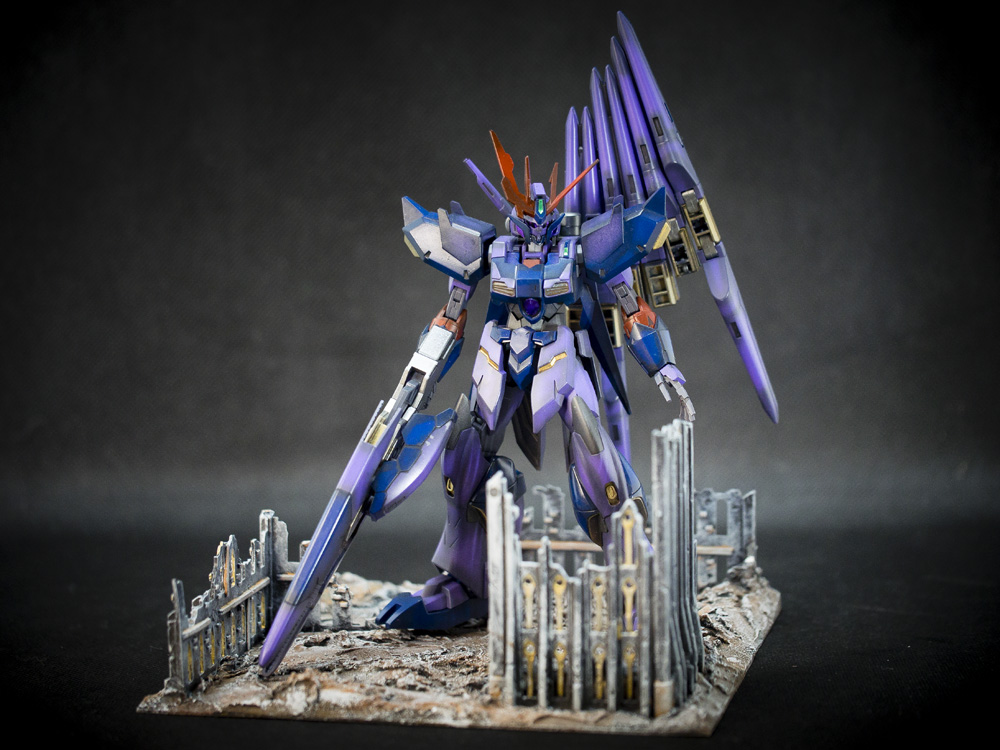
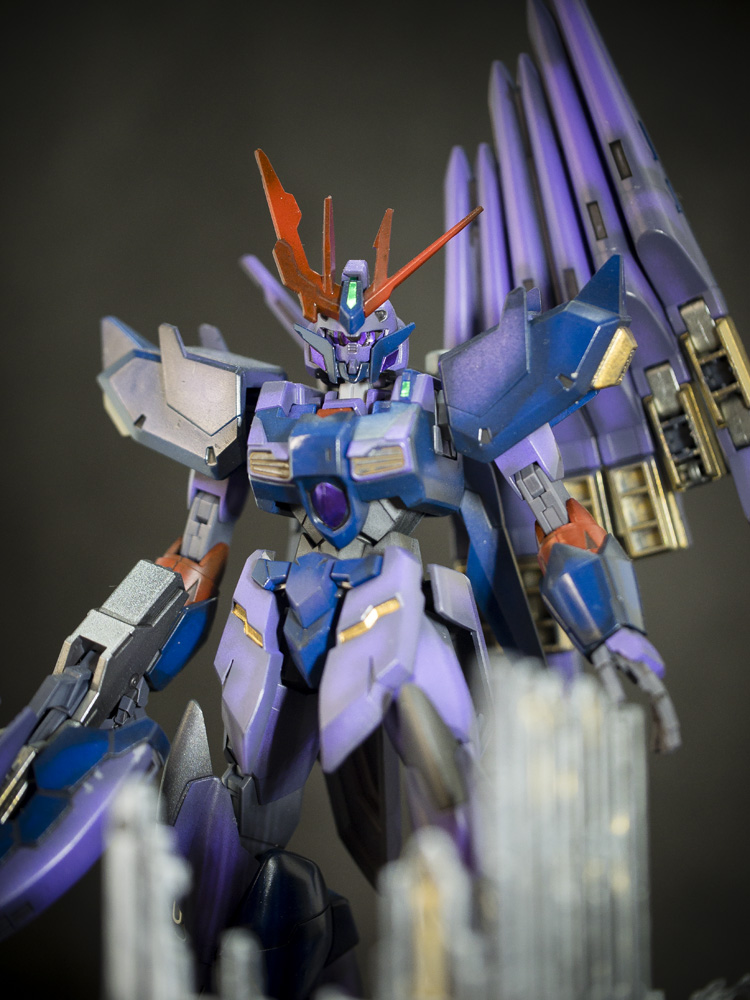
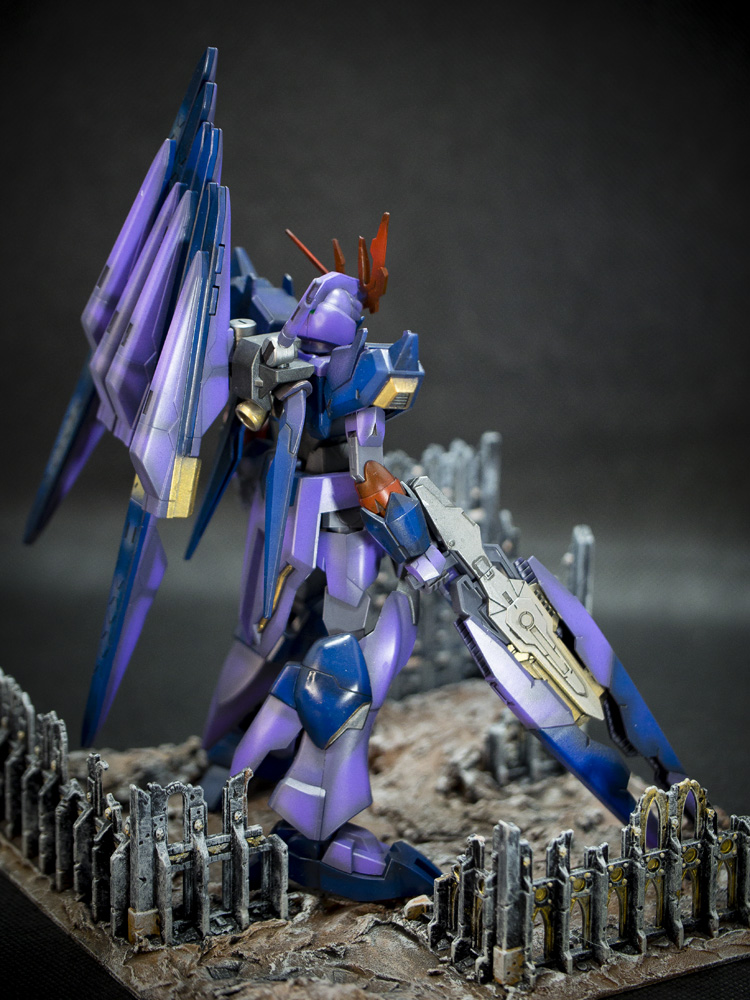
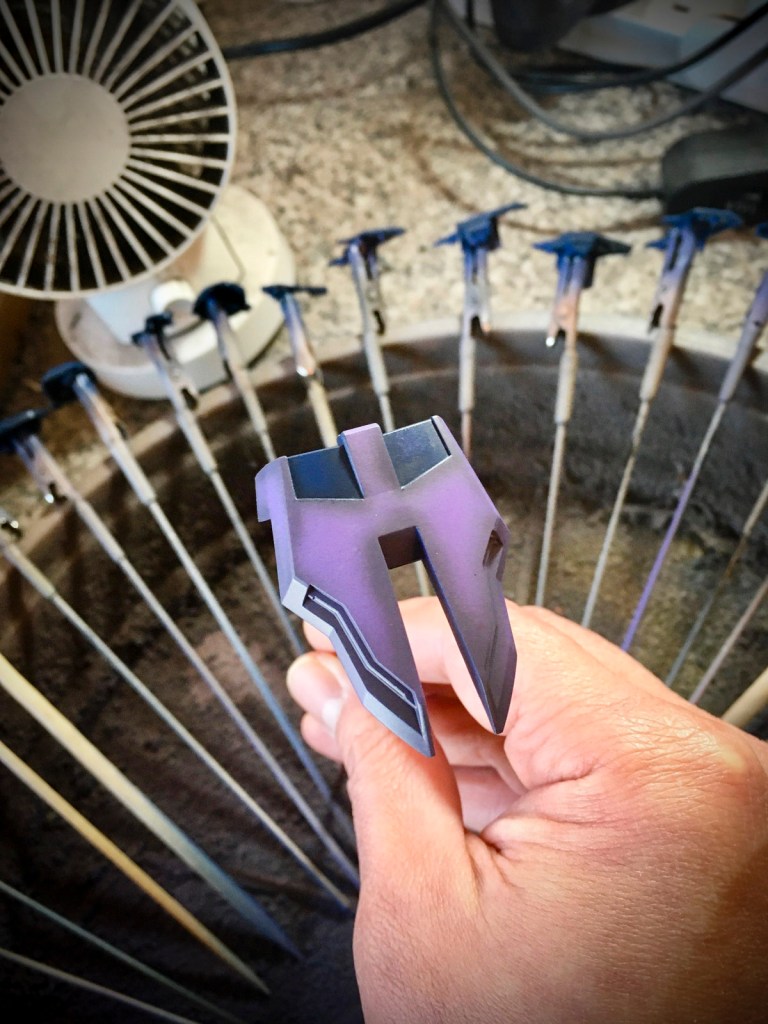
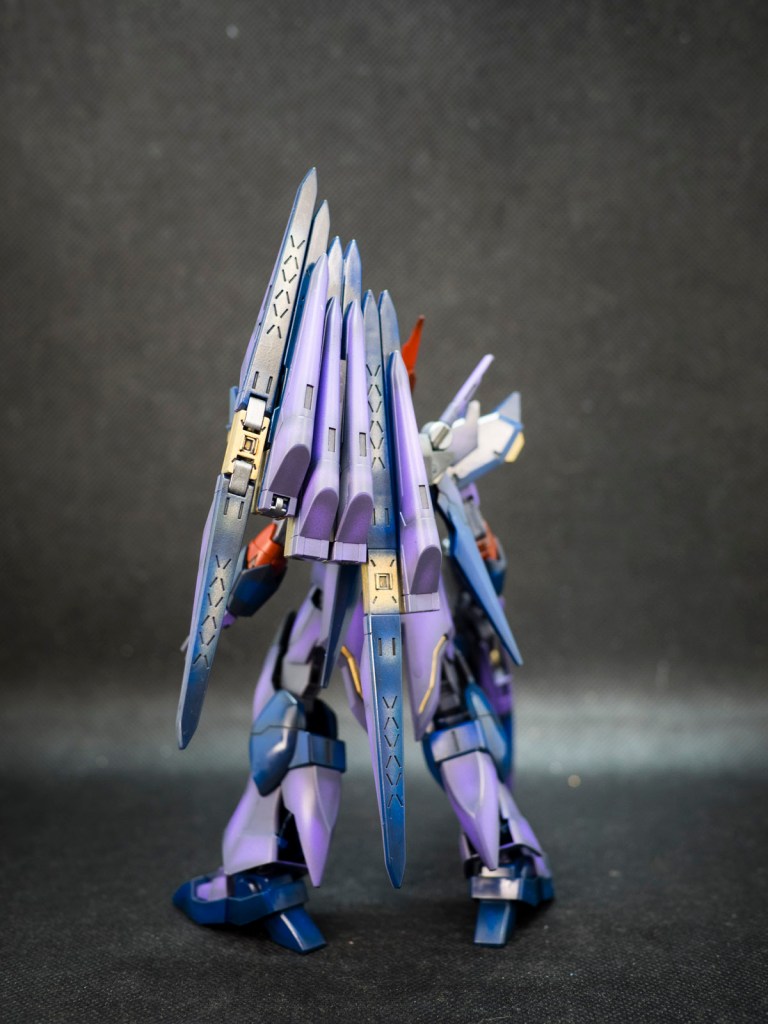
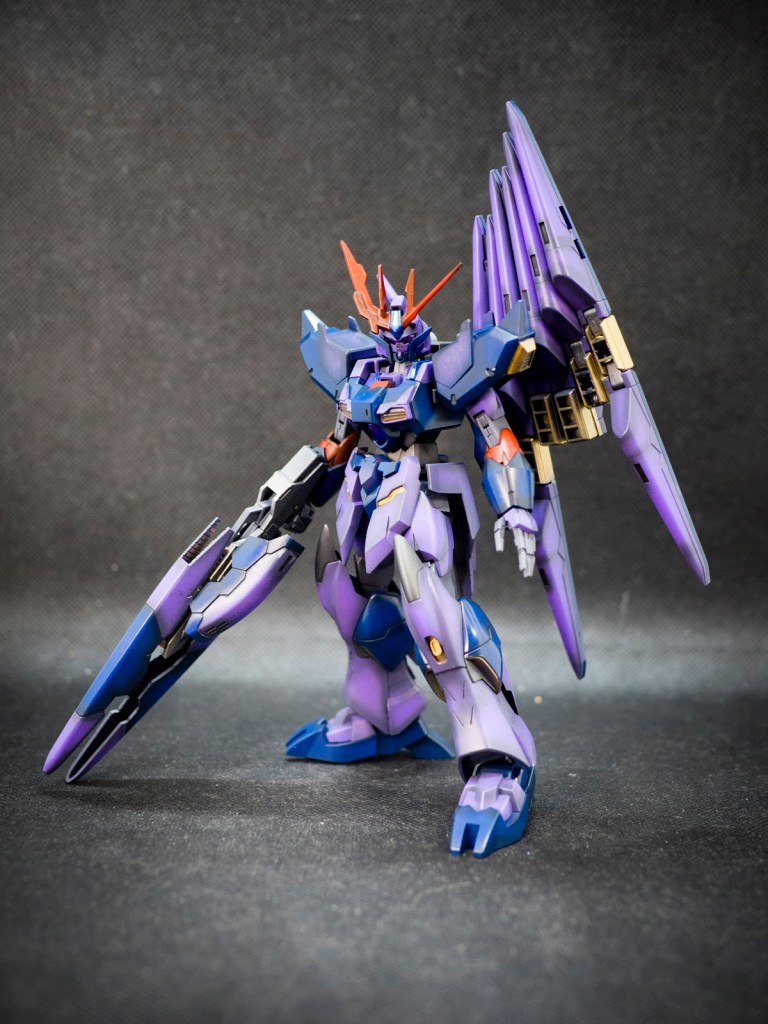
I wasn’t keen on this kit until Bandai released the “Fake Nu Unit and Wepaons”pack. This additional add-on set makes the Alus looks like a re-imagined verison of the RX-93 Nu Gundam. I don’t own a HG or RG version of a RX-93, hence I thought this and my customised Captain Zeon will be a great modern and unique tribute to the classic mobile suit.
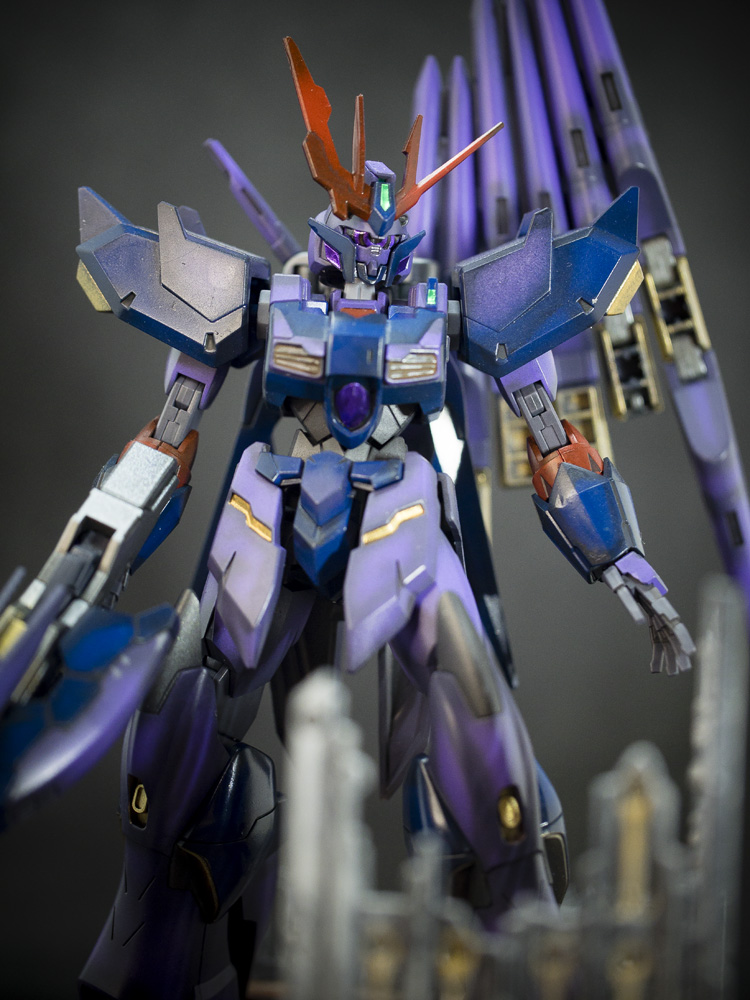
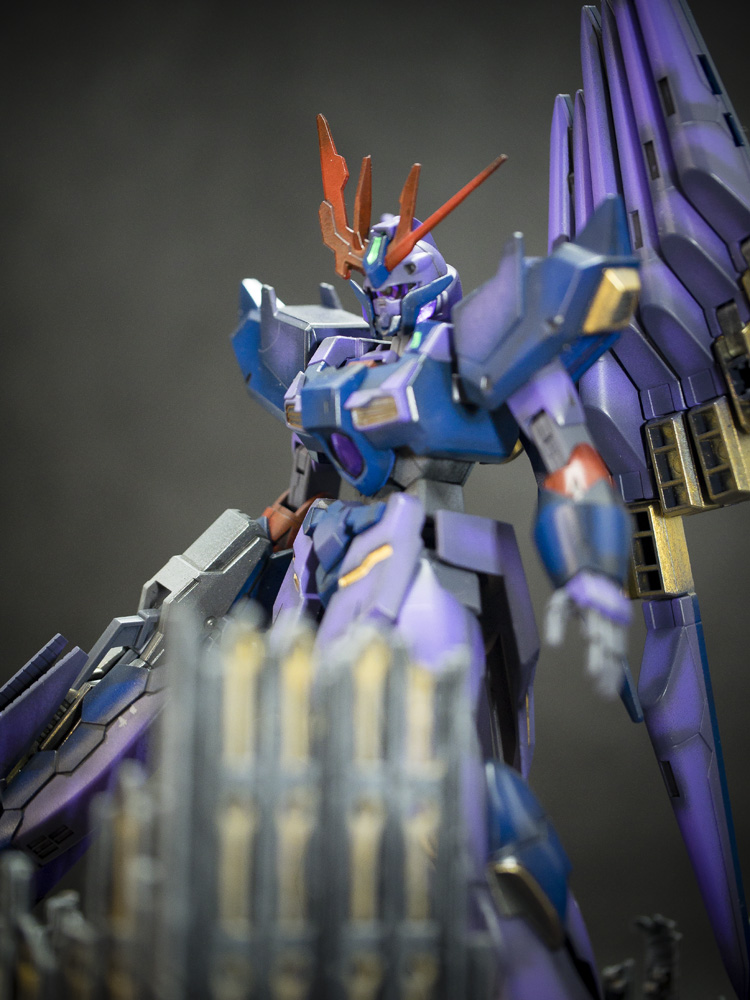
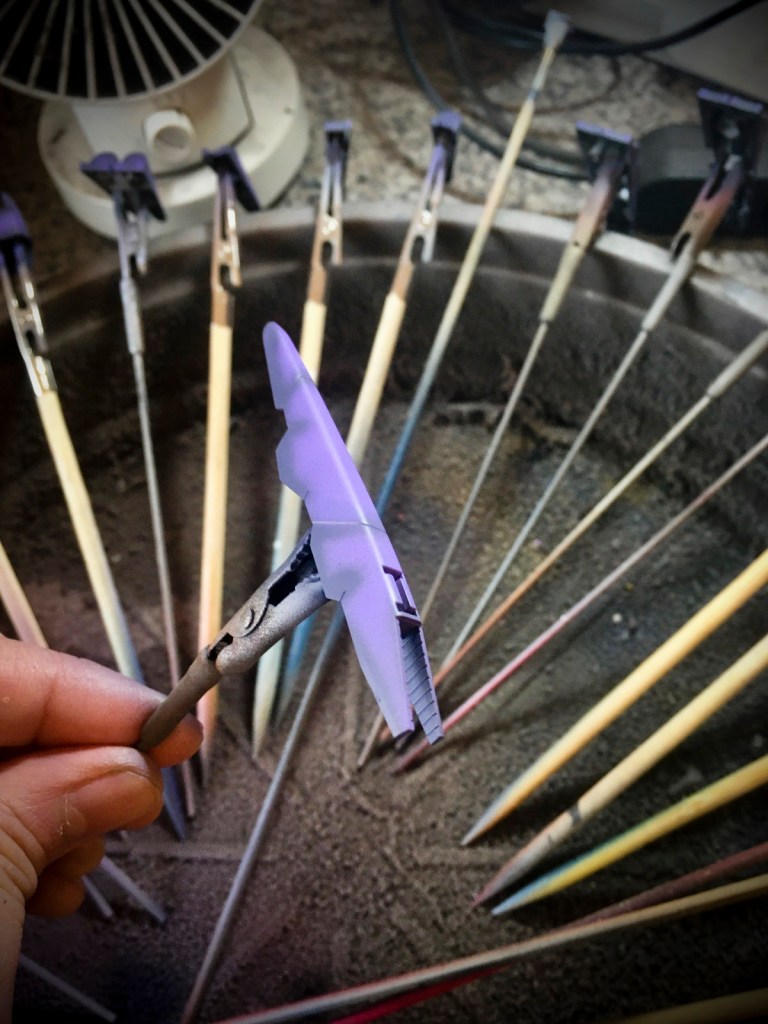
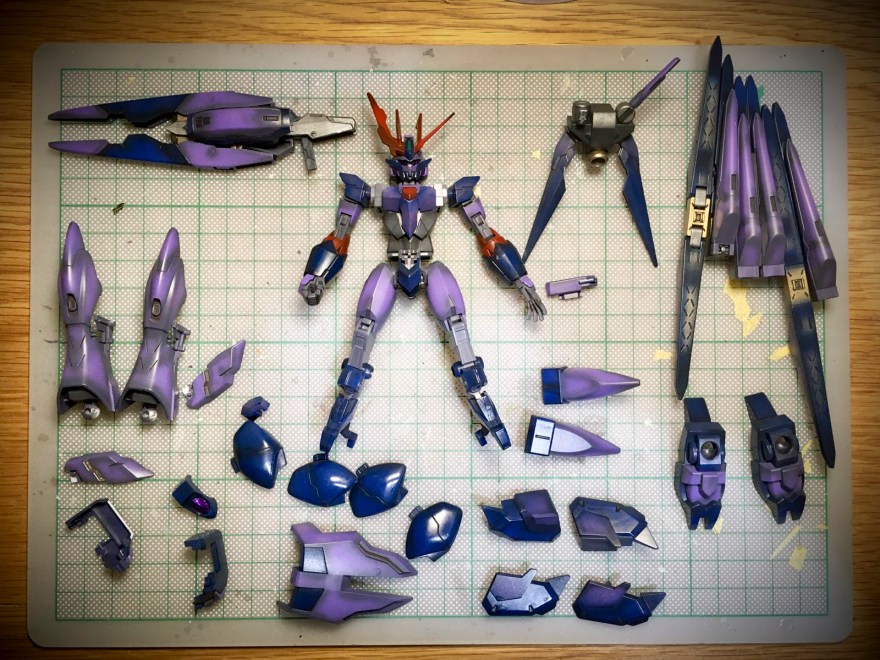
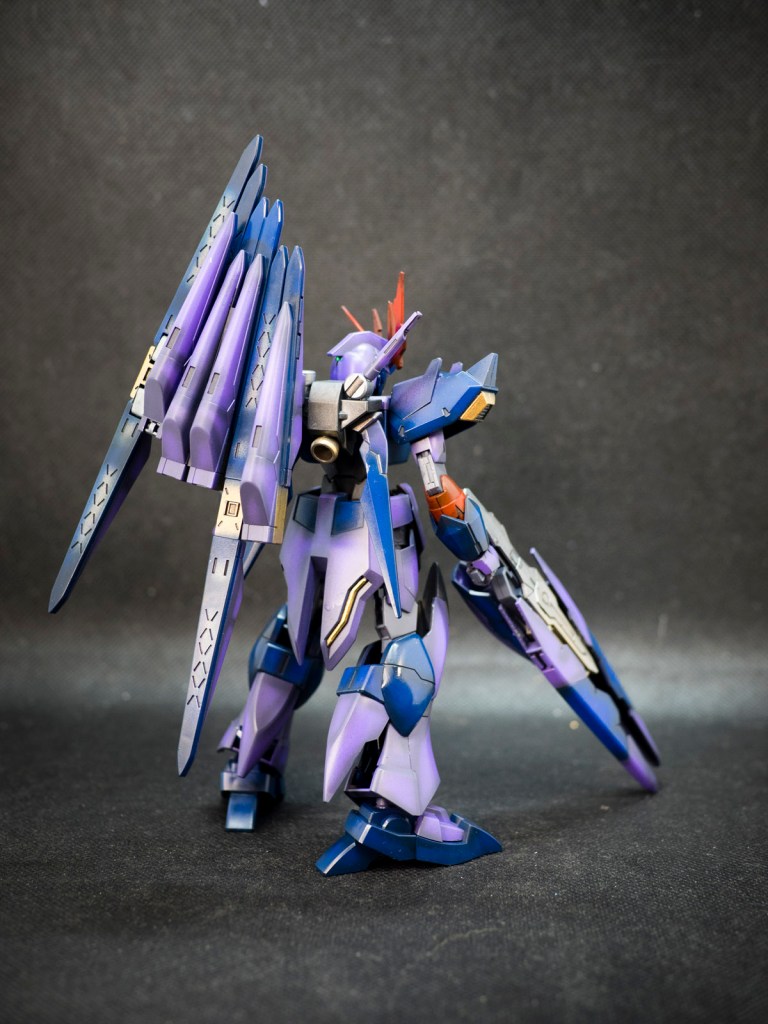
Bandai recently announced that they will be releasing a new RG Zeong, I never liked that huge design, but I just thought it would be great to use that colour scheme on my Fake Nu Alus! The colour scheme was pretty simple with 3 main colours Purple, Blue, and Red. I tried a heavier preshading and 2 tone shade on some parts to give it a dark vide. The parts separation on this kit is not too bad, which helps with the “creative” painting.
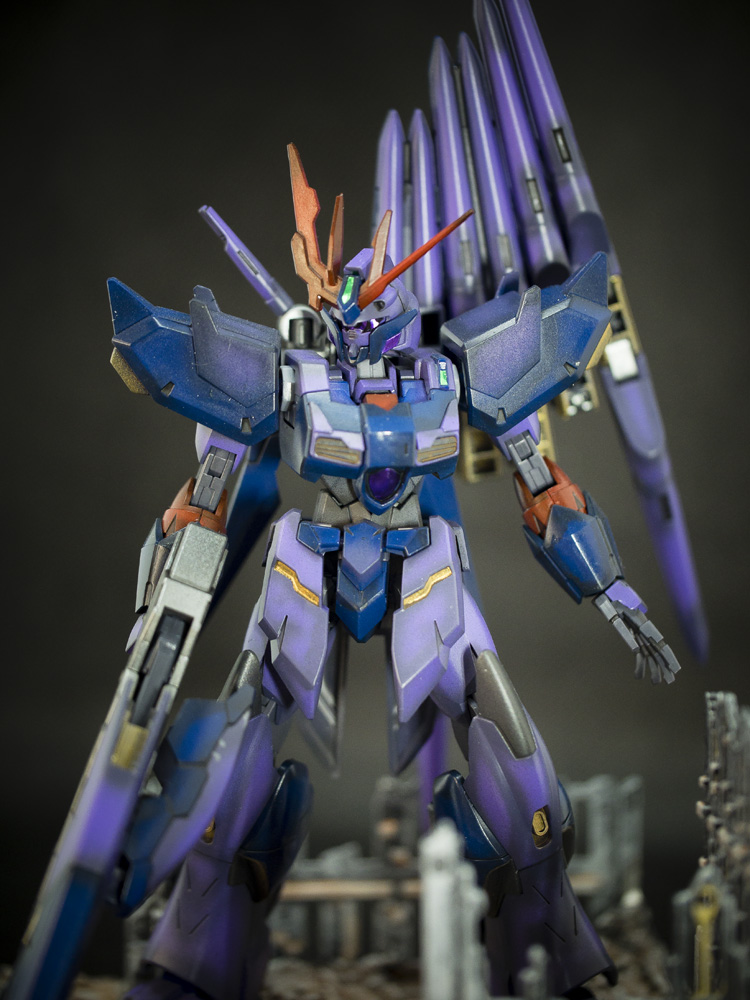
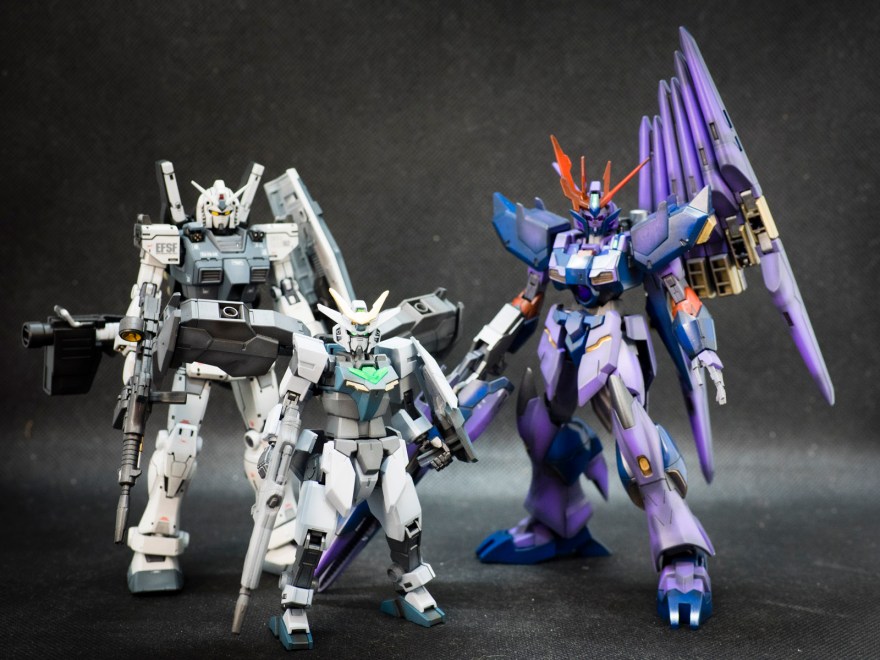
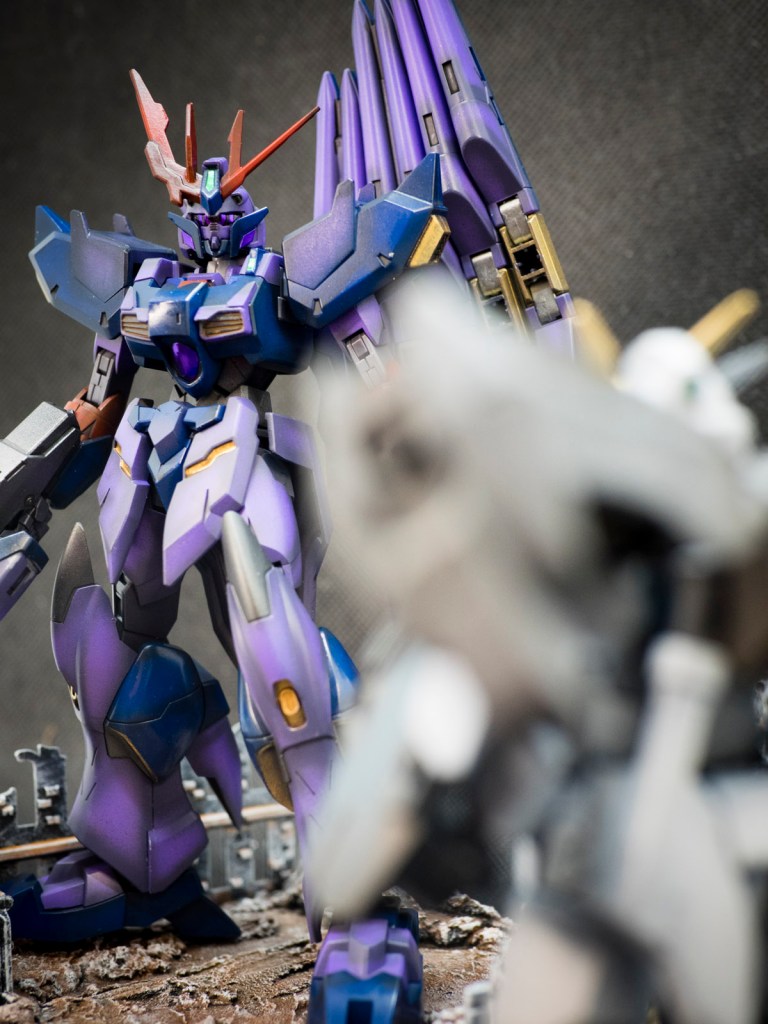
The completed Alus Earthree with the Fake Nu Unit stands almost as tall as the HG Rx-78 Gundam Origin. The Core Gundam is almost up to chest height. I actually bought the Jupitive Gundam to be used with the Fake Nu Unit, but after test fitting, I prefer the curved edges of the Alus, which kind of suited the Fake Nu Unit better.
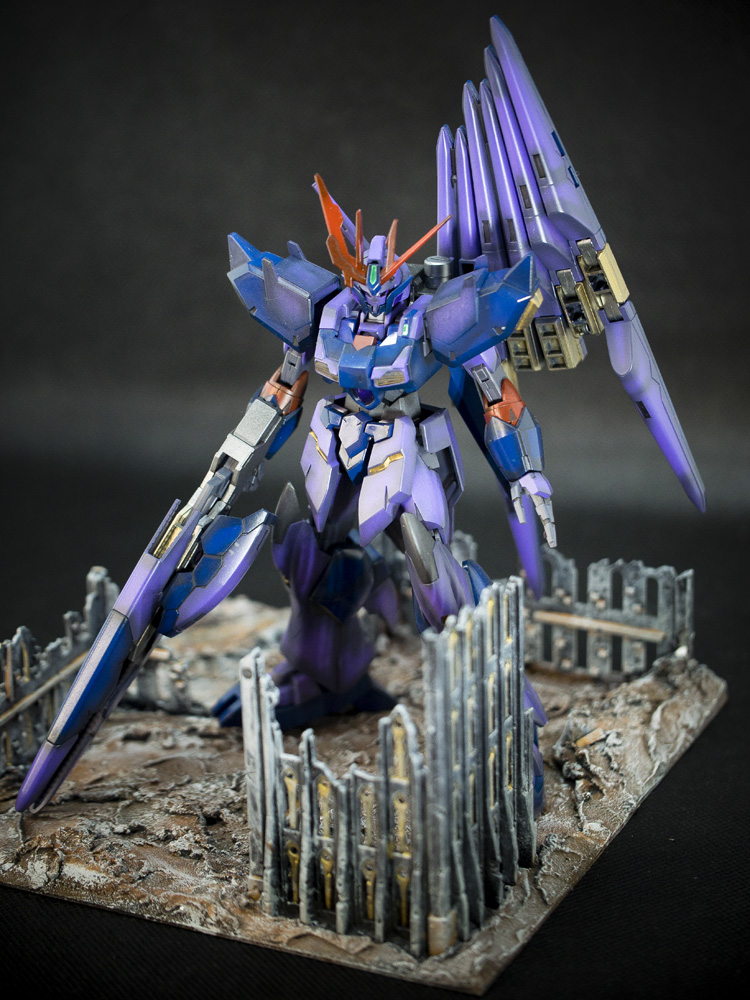
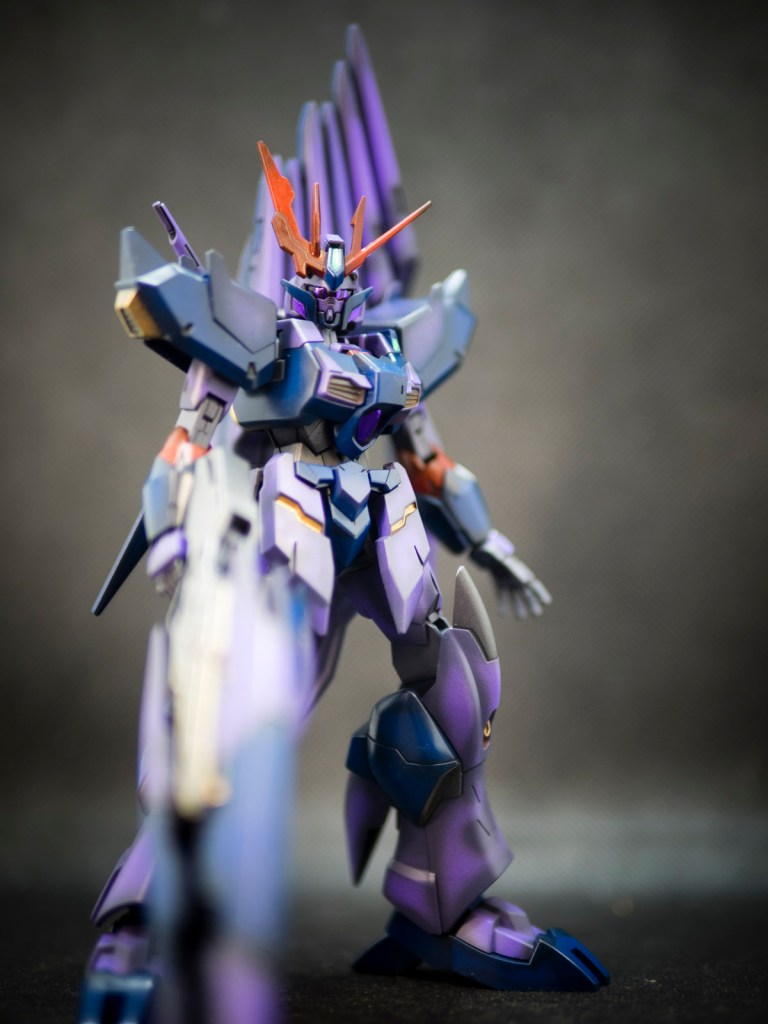
I actually enjoyed this built. The parts separation allows me to be creative with the colours. The sniper beam rifle allows you to configure it in both open or closed mode which is a nice touch by Bandai. I just don’t have much neagtive thing to say about the kit.
But there is just one minor thing, the purple chest piece in the middle is a sticker, this piece is curve hence hand painting will be difficult and sticker will be quite nasty if not stick on correctly. So it would be easier if Bandai does mould this as a separate piece.
If you do like my work, please feel free to visit my other projects to help support this website.
I wasn’t keen on the Wing Gundam anime when it first air in Japan. Hence I wasn’t interested in the original release of the 1/144 model kits. It is only when I recently watched Build Divers, I saw how they were able to customise the Wing Zero and the Altron I started to get some inspiration.
It is not until I realised Bandai have released the “revive”Sandrock. Maganac and Heavyarms and in 2021 Deathscythe, I started to get serious and planned to collect and build the Wing Gundam Suits.
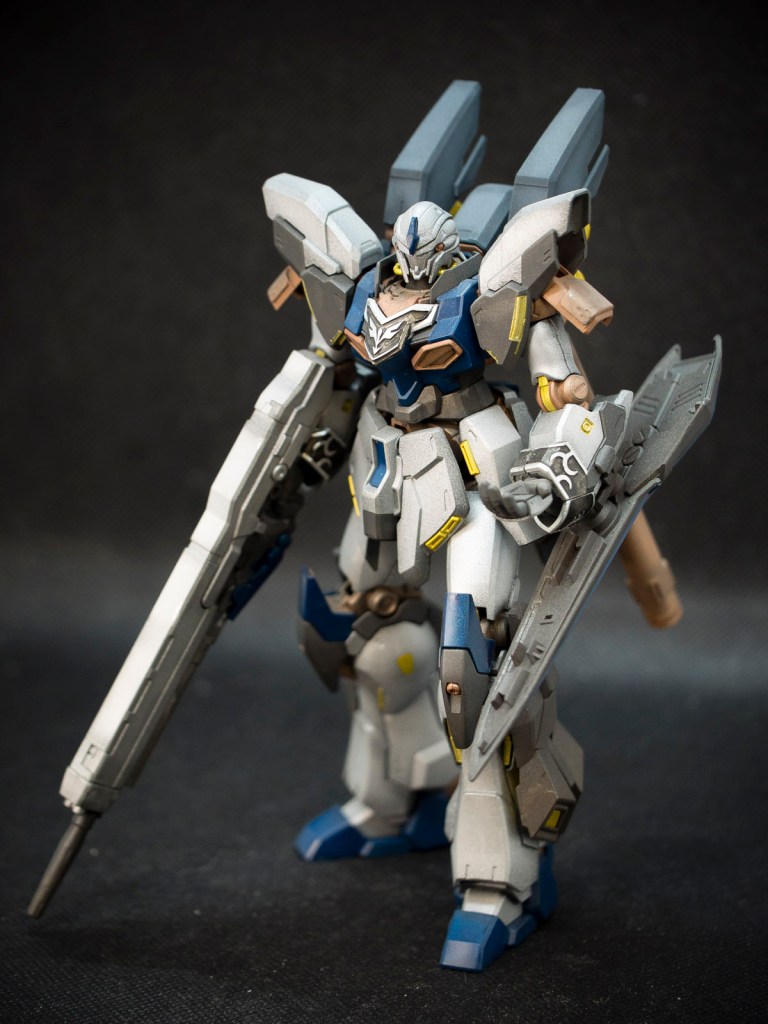
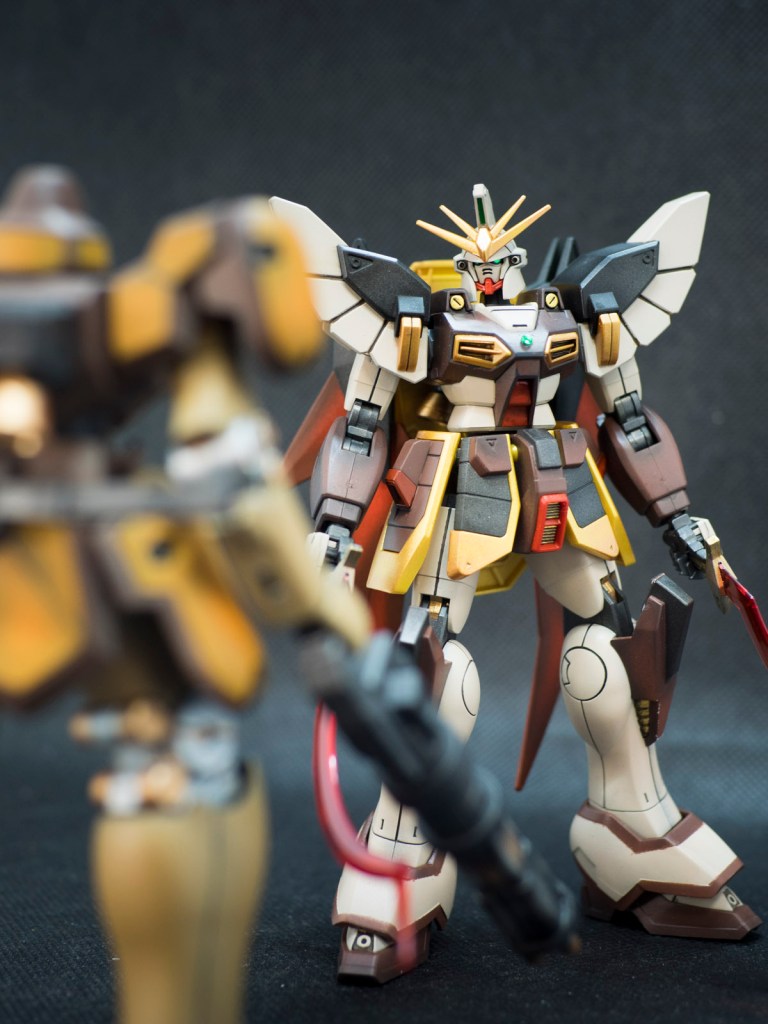
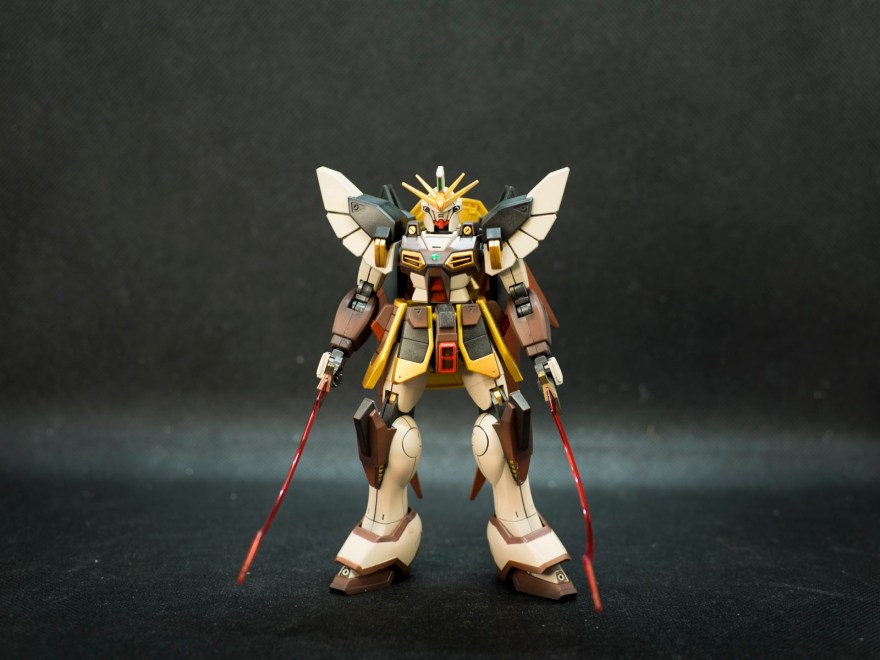
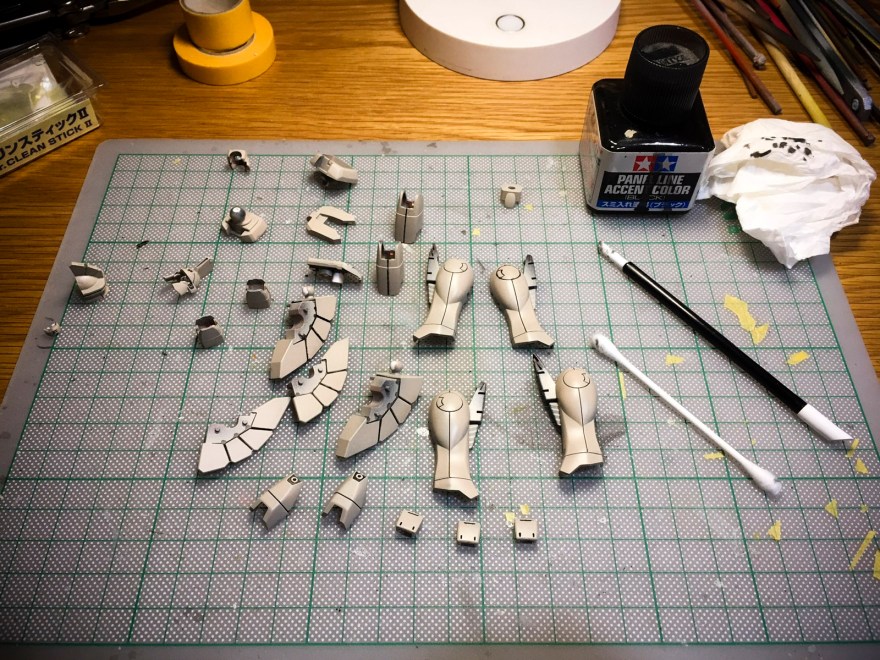
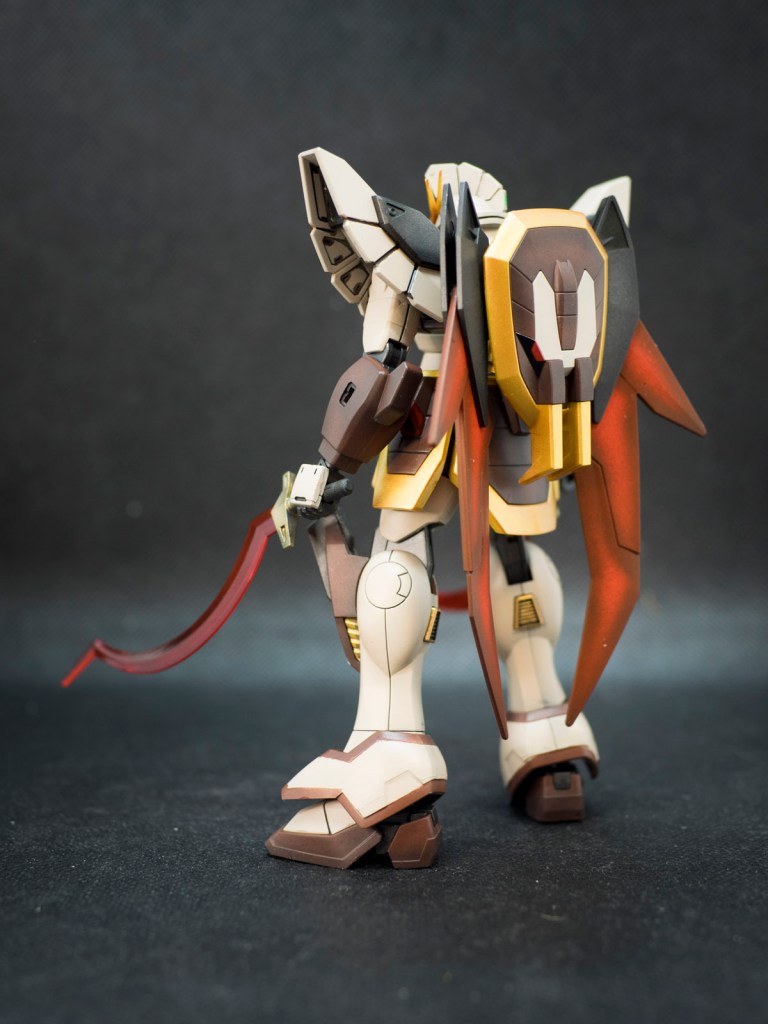
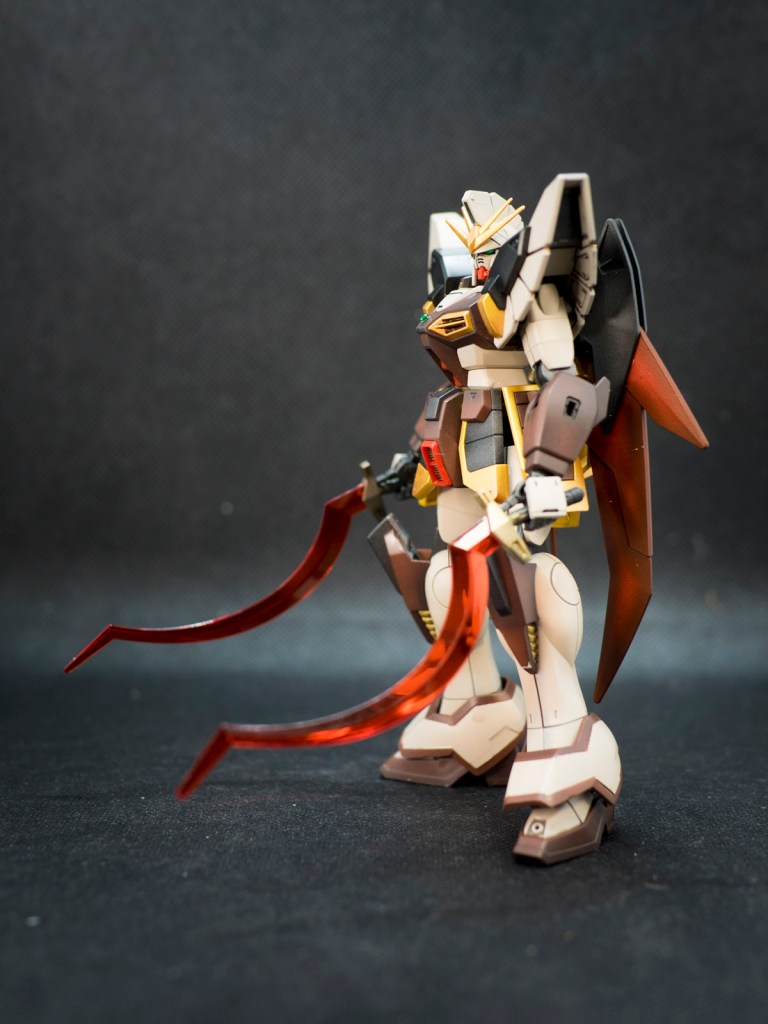
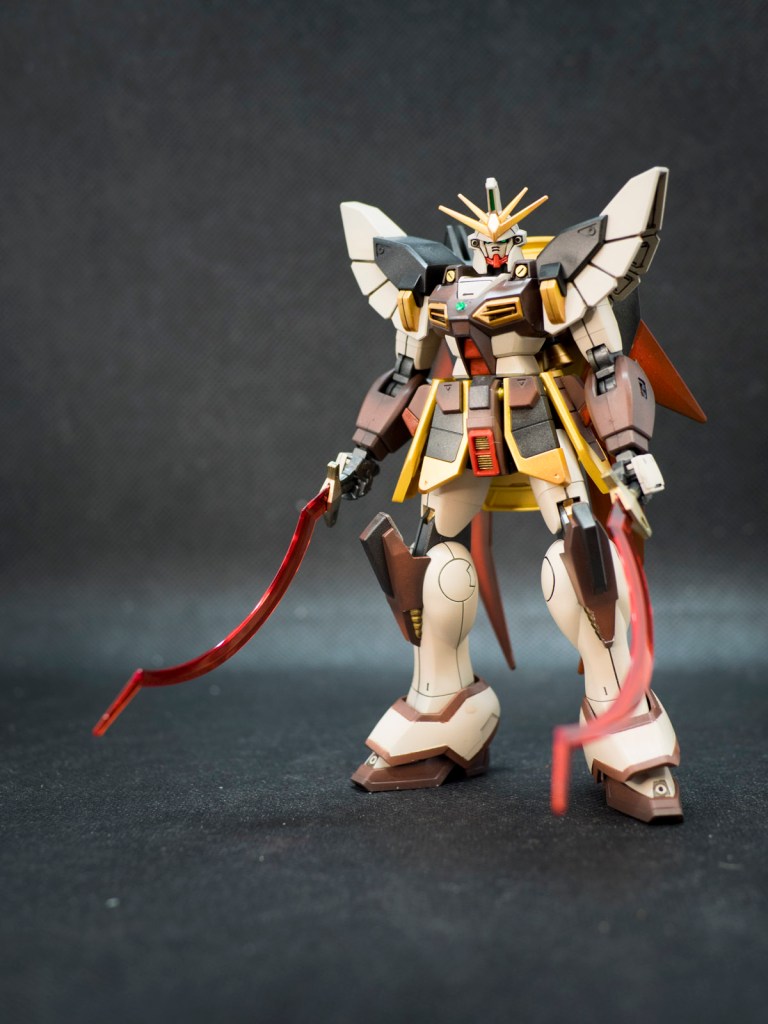
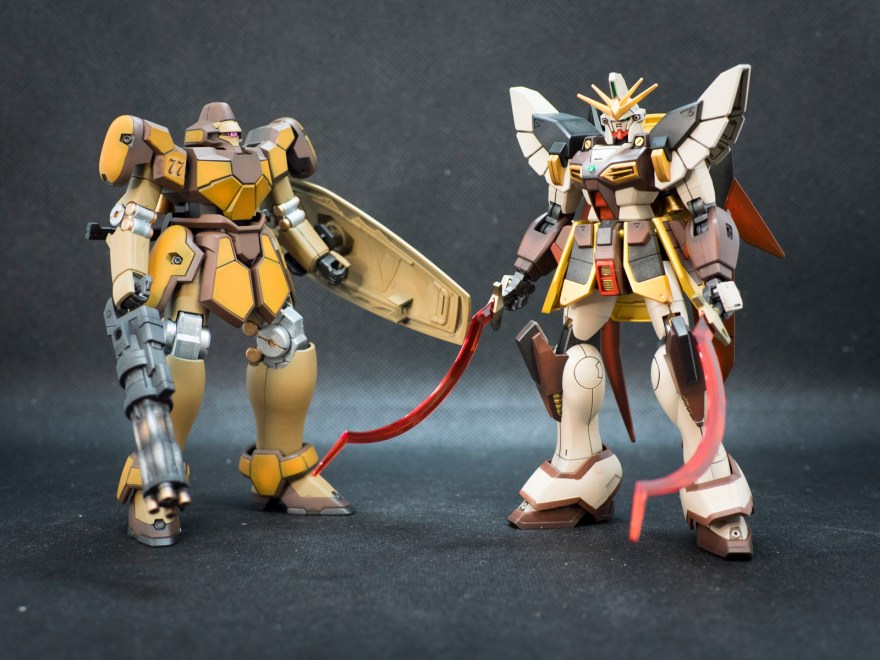
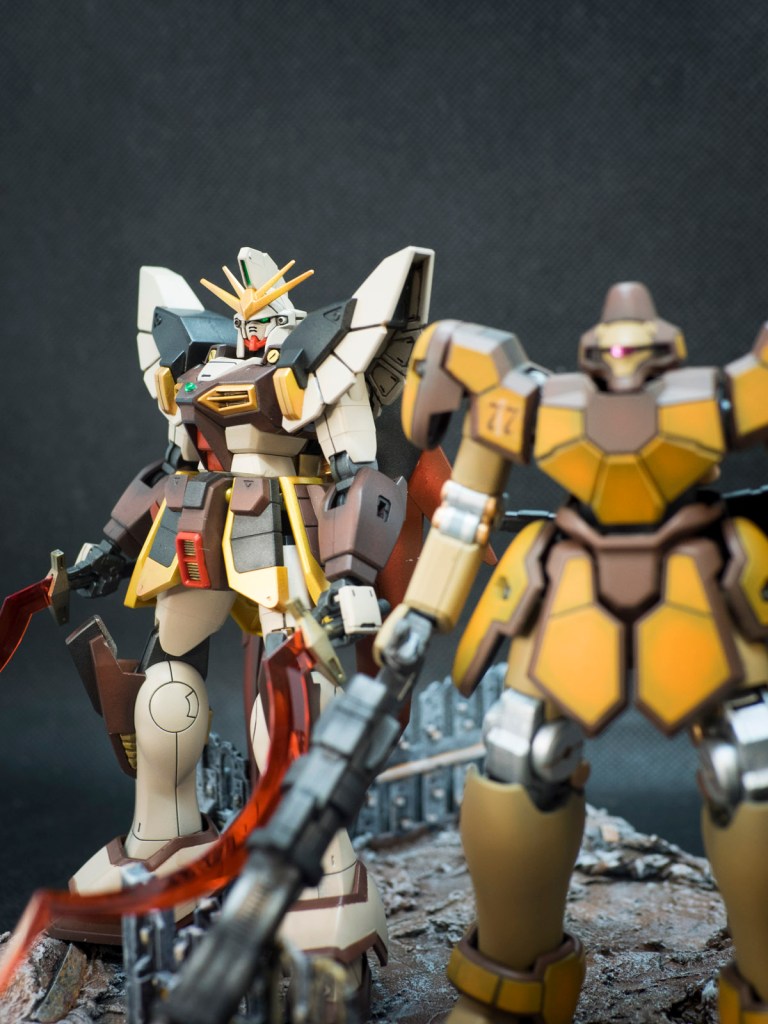
I wasn’t keen on the original white base and blackish scheme, which I thought it wasn’t really “Sandrock”looking and it is too different to the Maganac. I decided to give it a sandy beige base with a dark brown tone to give it a desert scheme. Sandrock is also a leader to the Maganac so the desert theme is much more suitable.
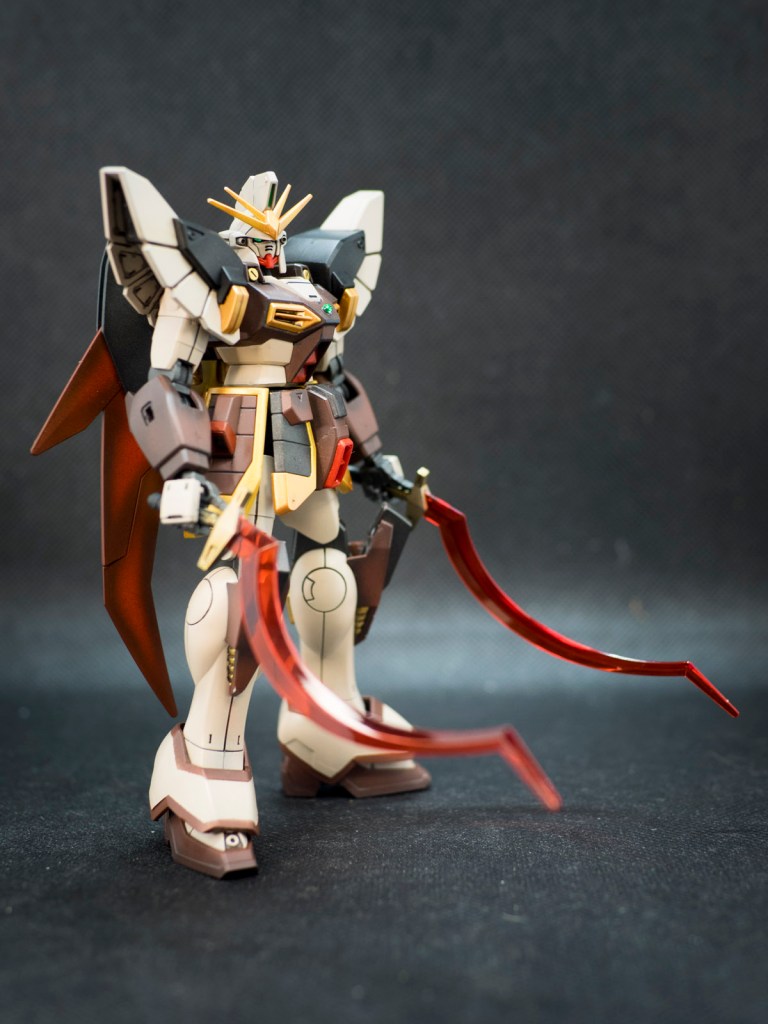
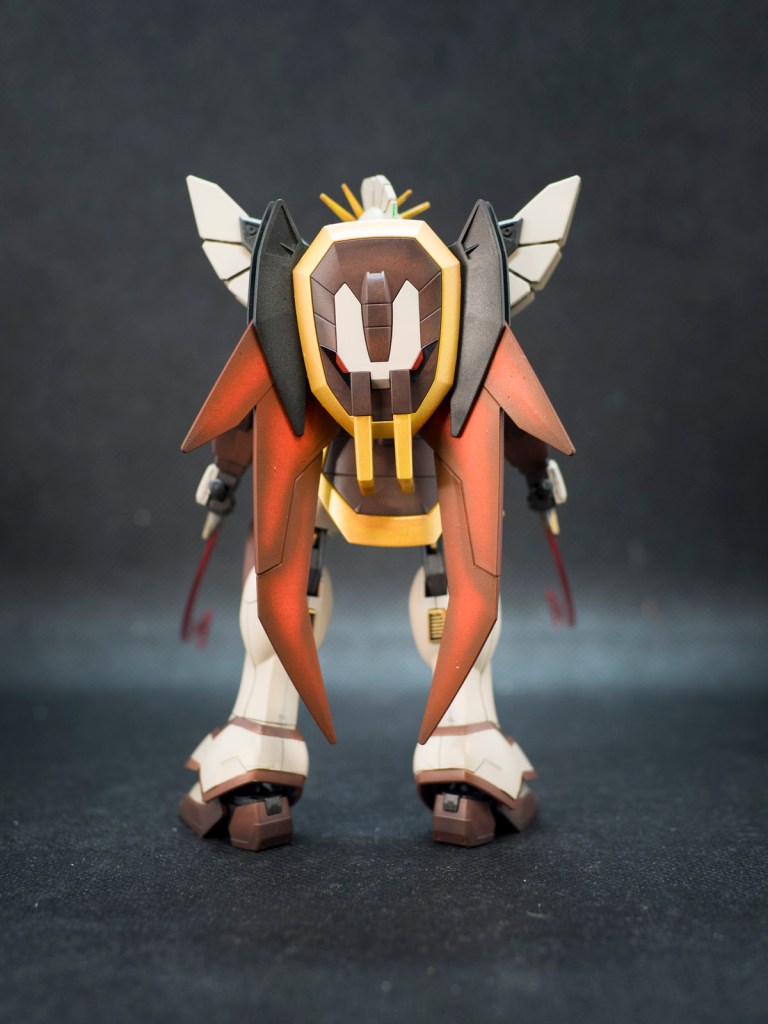
I read that the pilot of the Sandrock comes from a rich family and hence I thought a bit of yellowy god will be just right to show his family wealth. I have also kit bashed the wings of the Jiyan Altron to made 2 huge fangs to the cobra shield.
I actually quite pleased with the design of Sandrock as I think it gives a Roman Centurion vibe, hence I coloured the fangs red since I have always remembered Roman Centurion Officers wear a red cape in the history books.
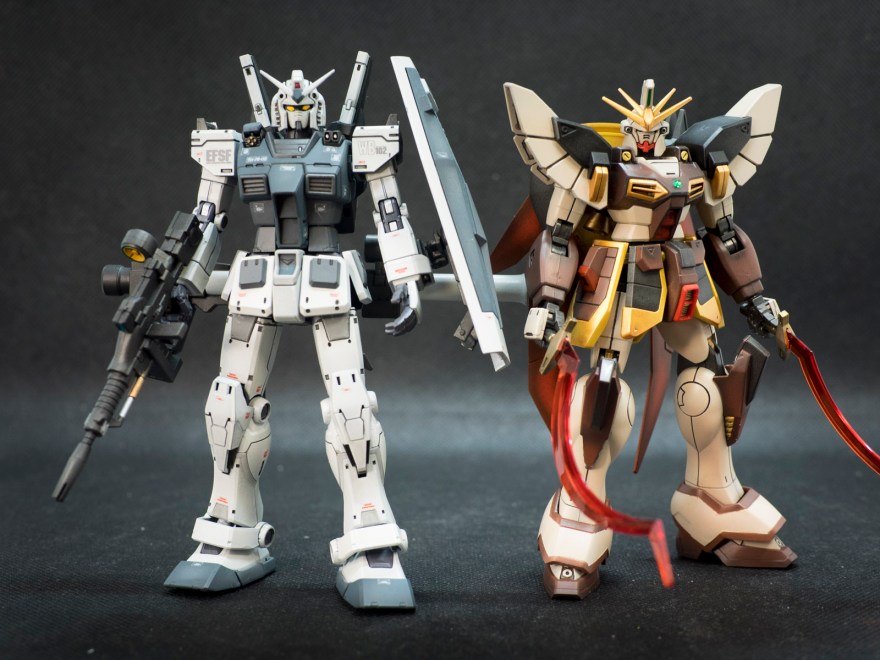
The Wind Gundam kits are usually a bit smaller in scale to the UC design, which you can see side by side with R-78 Origin.
So far I only have 3 Wing Gundams kit; I have preordered Heavyarms so I am hoping it will arrive before Christmas 2020.
You can’t have Sandrock without the Maganac and the Leos! I have customised one of my Leo to look like a “Tallgeese“! If you enjoy my work please feel free to browse my other other previous work to help keep this project going.
![Bandai 1/144 HG MS-04 Bugu [Ramba Ral]](https://itisagunpla.com/wp-content/uploads/2021/03/p3280272.jpg?w=220)
![Bandai 1/144 HG MS-04 Bugu [Ramba Ral]](https://itisagunpla.com/wp-content/uploads/2021/03/p3280268.jpg)
![Bandai 1/144 HG MS-04 Bugu [Ramba Ral]](https://itisagunpla.com/wp-content/uploads/2021/03/p3280269.jpg)
![Bandai 1/144 HG MS-04 Bugu [Ramba Ral]](https://itisagunpla.com/wp-content/uploads/2021/03/p3280270.jpg)
![Bandai 1/144 HG MS-04 Bugu [Ramba Ral]](https://itisagunpla.com/wp-content/uploads/2021/03/p3280271.jpg)
![Bandai 1/144 HG MS-04 Bugu [Ramba Ral]](https://itisagunpla.com/wp-content/uploads/2021/03/p3280273.jpg)
![Bandai 1/144 HG MS-04 Bugu [Ramba Ral]](https://itisagunpla.com/wp-content/uploads/2021/03/p3280274.jpg)

![Bandai 1/144 HG RX-79[G] Ez-8 Gundam Ez8](https://itisagunpla.com/wp-content/uploads/2021/03/ez8-banner.jpg?w=880)